Install and publish Audisode
Everything you need to go from the zip file to a running backend, an admin panel with your first books, and an app on Google Play and the App Store. You can do all of it with this guide alone.
Welcome
Audisode is an audiobook and episodic-series platform. It has two parts: a Flutter app for Android and iOS that your listeners use, and a Laravel backend with an admin panel that you use in a web browser to run the business: books, prices, listeners, notifications and settings.
This guide uses the same words throughout. The backend is the server. The admin panel is the website you sign in to at /login. The app is the mobile app. A listener is a person using the app. Coins are the app's currency, Premium is the subscription that unlocks everything, and a coin pack is a bundle of coins sold as an in-app purchase.
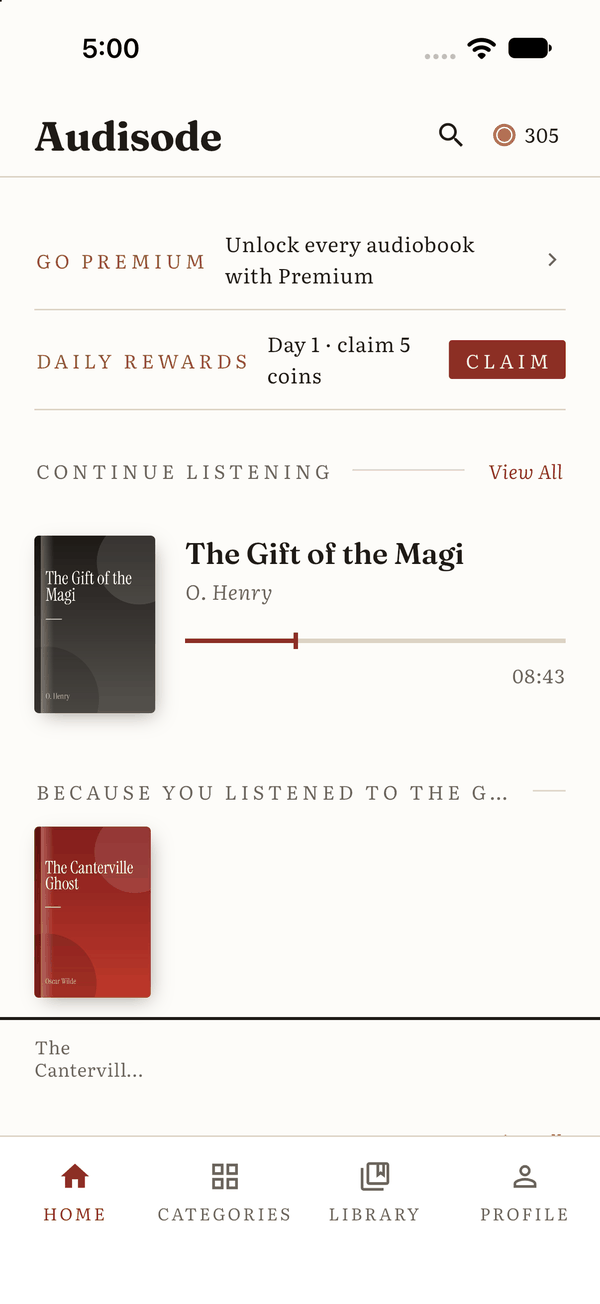
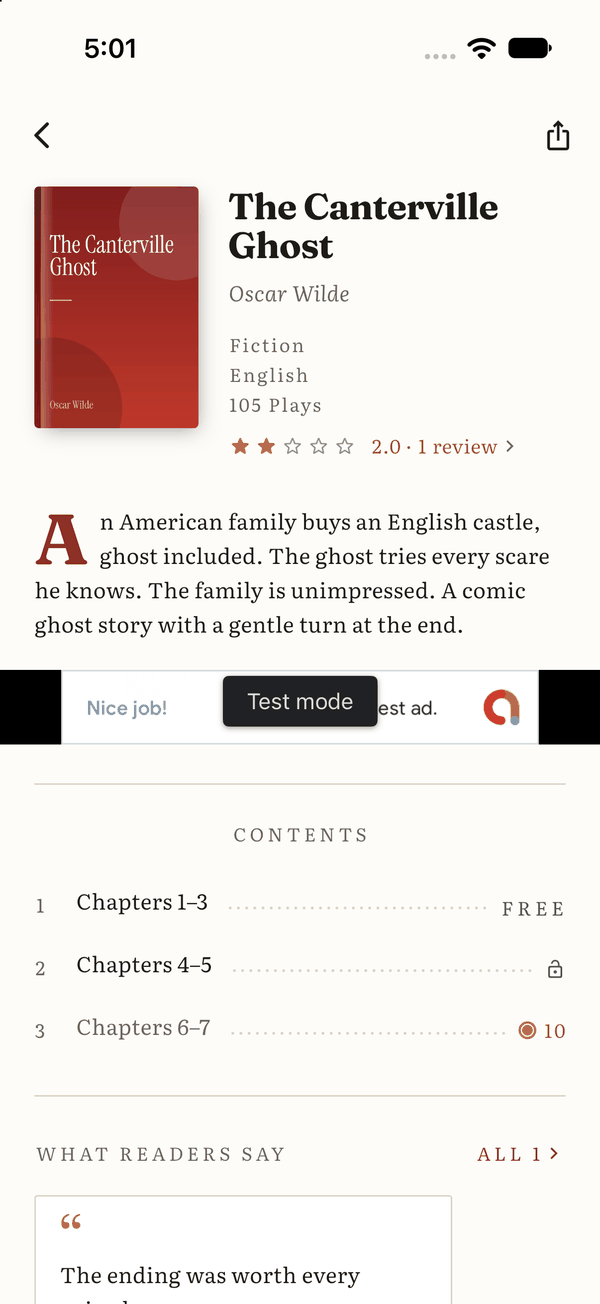
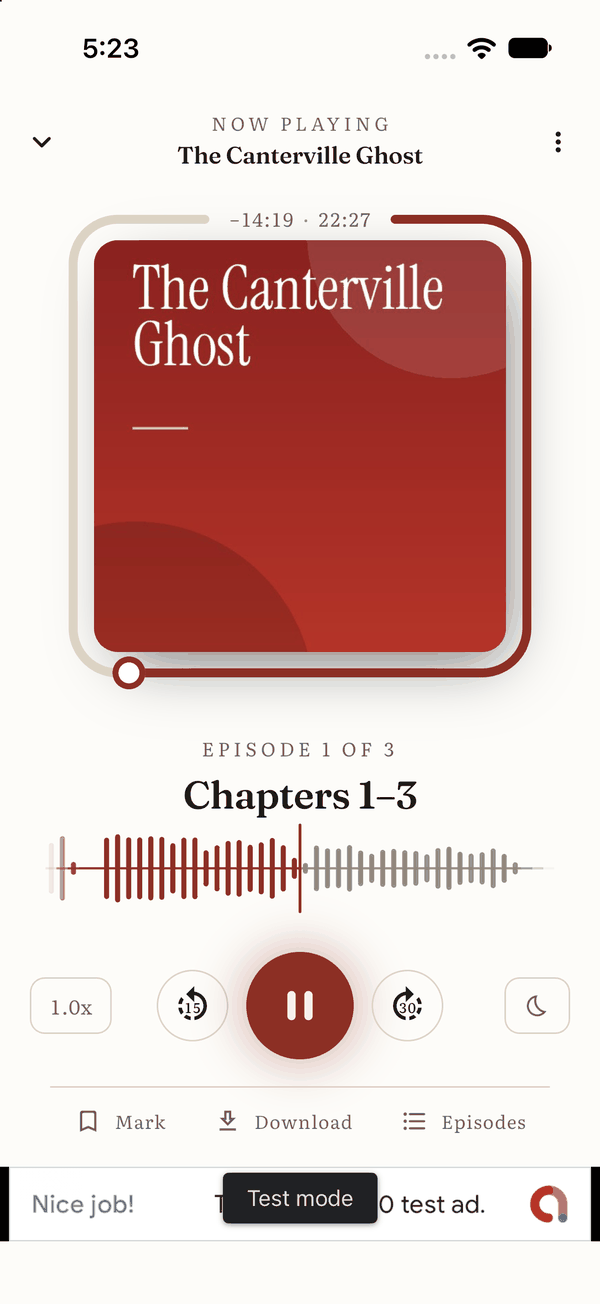
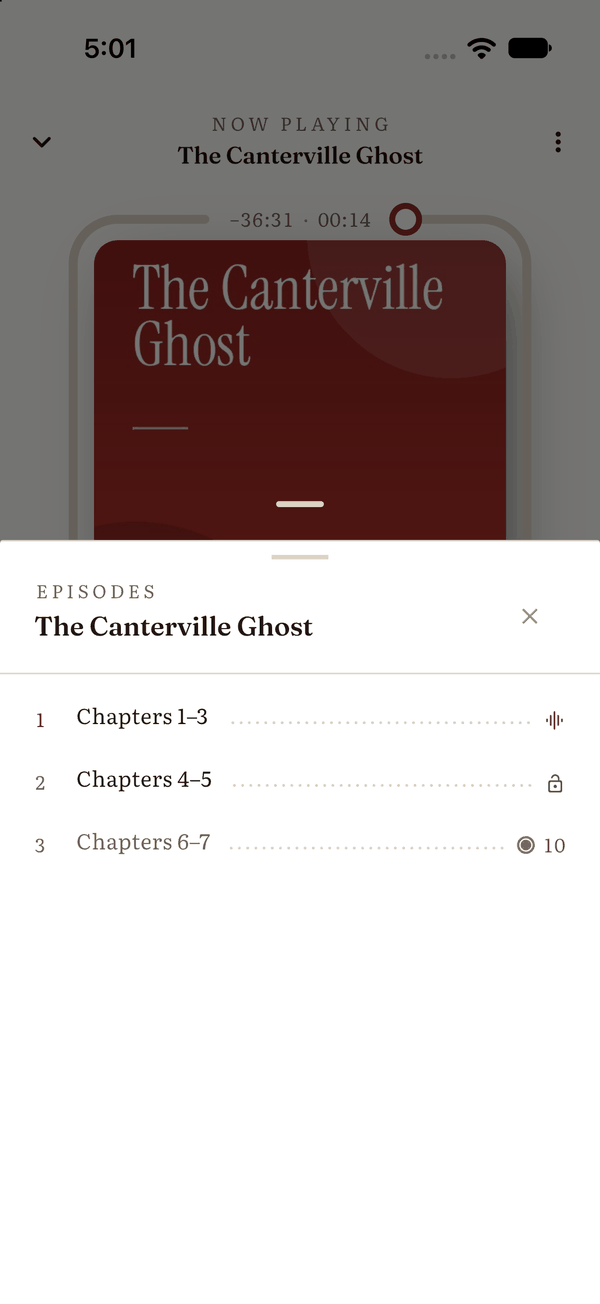
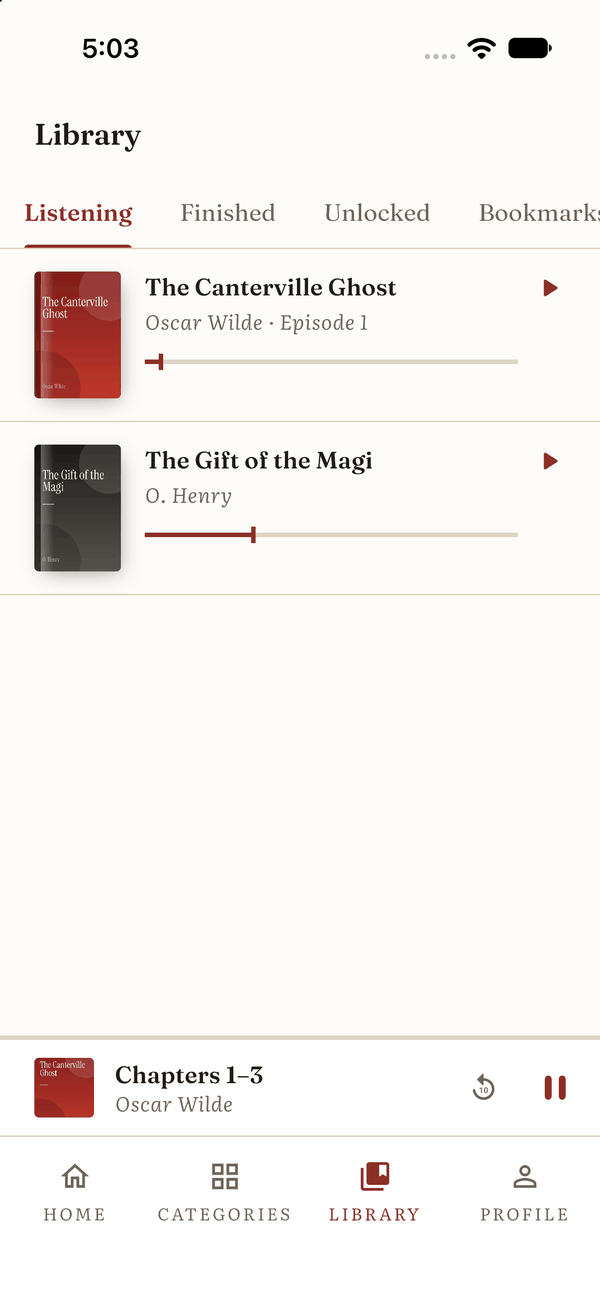
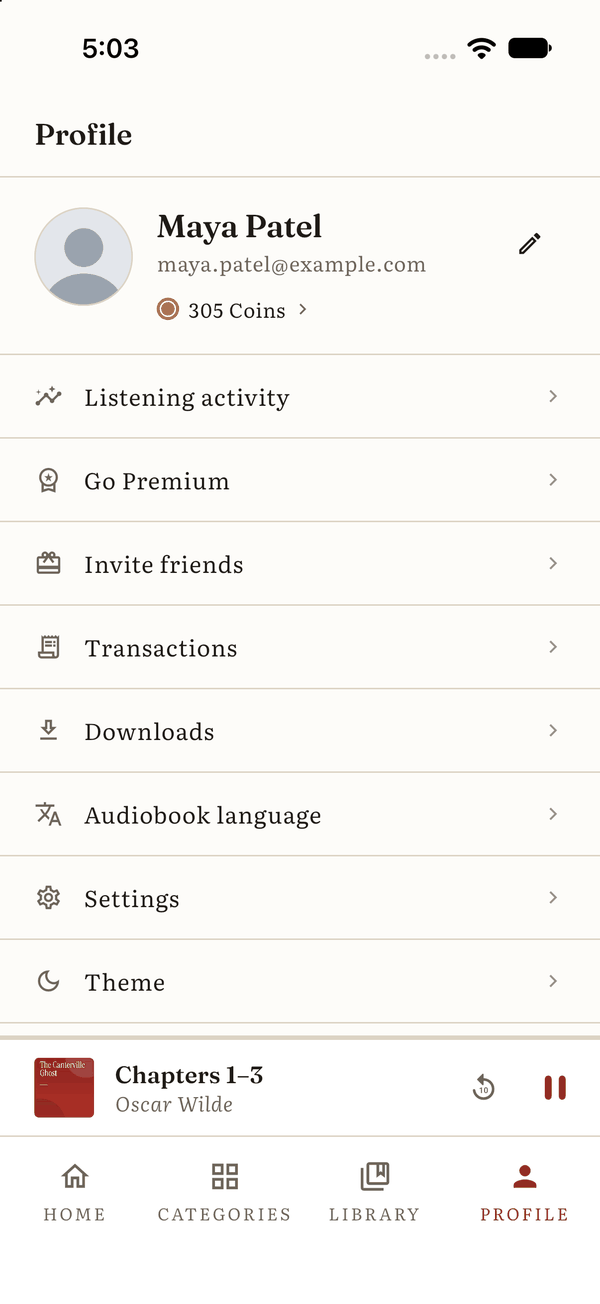
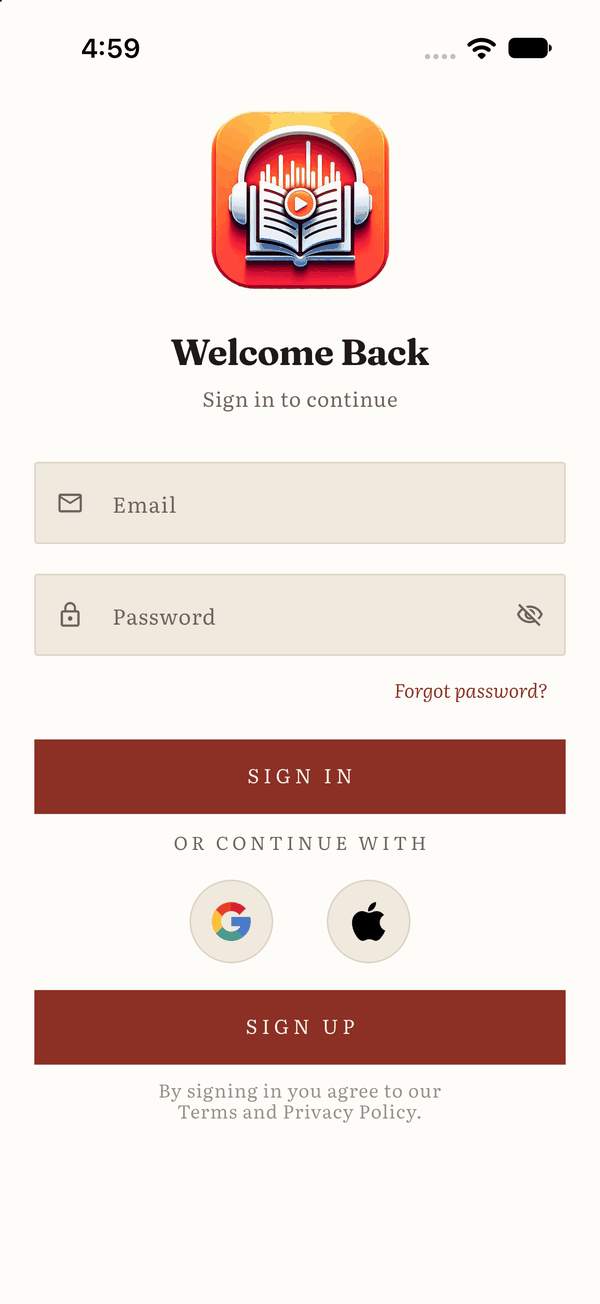
What is included
Every feature below exists in the code you received.
Listening
- Single audiobooks and series of episodes
- Streaming and offline downloads
- Sleep timer, speed control, bookmarks
- Progress that follows the listener across devices
- Reviews and ratings
- Follow authors, recommendations
- Activity page with listening time
- Shareable book links that open the app
Monetisation
- Coins: welcome gift, daily check-in streak, rewarded ads, invites, coin packs
- Premium subscriptions (unlock everything, no ads)
- In-app purchases through RevenueCat
- AdMob banner, full-screen and rewarded ads with a consent form
- Server-side wallet: the app cannot grant itself coins
Engagement
- Push notifications: new episodes, streak reminders, announcements
- Invite friends with rewards for both
- Google, Apple and email sign-in
- Four app languages, including right-to-left Arabic
- Light and dark themes
Admin
- Dashboard with analytics and a "needs attention" list
- Books, episodes, authors, categories, languages
- Bulk upload of whole seasons
- Home-screen builder and collections
- AI narration (optional)
- Listeners, reviews, notifications
- Branding, team (more than one admin)
- Web installer, read-only demo admin
- Audio on your server or S3-compatible storage
Quick start
The whole job in six steps. Each links to the section that explains it.
Install the backend. Upload it, create a database, run the installer. Section 4.
Add content. Languages, authors, books and episodes in the admin panel. Section 7.
Set up Firebase. Google and Apple sign-in, and push notifications. Section 9.
Make the app yours. Name, package ID, icons, colours, backend address. Section 15.
Set up RevenueCat. Coin packs and Premium. Section 10.
Build and publish. Android bundle, iOS archive, store listings. Section 16.
About this guide
This is Audisode version 1.0.0. The guide was built on 4 October 2026 from the code in this package. What changed in each release is in the changelog. Quote the version number when you ask for support: it is also shown in the admin panel's user menu and when you run php artisan app:install.
The two developer READMEs stay in the package: audisode_backend/README.md and audisode/README.md. This guide points to them where deeper detail lives, but you should not need them to install, configure and publish.
1How it fits together
Your listeners use the app. The app talks to your backend for everything that matters: the catalogue, coins, unlocks, and the links to the audio. You use the admin panel, which is part of the backend, to manage it all. Around them sit a few outside services, shown in the diagram.
Dashed outlines and lines mark the optional parts.
- App and backend. Everything the app shows and does goes over HTTPS as JSON to the backend's
/api. - App and Firebase. Google and Apple sign-in happen in Firebase. The app then sends Firebase's proof of identity (an ID token) to your backend.
- App and RevenueCat. The RevenueCat SDK in the app shows the store prices and runs the purchase.
- App and AdMob. The AdMob SDK in the app loads banner, full-screen and rewarded ads.
- Backend and Firebase. The backend checks every sign-in token with Firebase, and sends push notifications through Firebase Cloud Messaging.
- Backend and RevenueCat. The backend asks RevenueCat's REST API what a listener owns. RevenueCat also calls the backend's webhook when something changes.
- AdMob and backend. When a listener finishes a rewarded ad, AdMob calls
/api/admob/ssvwith a signed message. Only then are coins granted. - Backend and cloud storage (optional). Audio can sit in a private S3 or Cloudflare R2 bucket instead of your server.
- Backend and AI voices (optional). The AI narration page sends text to OpenAI or ElevenLabs and stores the audio they return.
2Requirements
Check these before you start. The accounts take the longest: some need approval from Apple or Google, which can take days.
2.1Server
| Item | What you need |
|---|---|
| PHP | 8.2 or newer with the openssl, pdo_mysql, mbstring, gd, fileinfo, curl and zip extensions, plus the extensions every Laravel host already has. The installer checks all of this for you. |
| Database | MySQL 8 or MariaDB 10.6 or newer, with an empty database and a user that has all privileges on it. |
| HTTPS | Required. The app only talks to https:// addresses in release builds, and stores and sign-in providers expect it. |
| Cron | One entry that runs every minute (shown in section 4). It sends notifications, makes AI narration and does daily clean-up. |
| Outgoing HTTPS | The server must be allowed to call out to the licence server (appentium.com), Firebase, RevenueCat and, if you use them, Google's ad verification keys, OpenAI or ElevenLabs, and your cloud storage. |
| Disk and bandwidth | Audio is large. An hour at a typical 64 to 128 kbps MP3 is about 30 to 60 MB. Pick a plan with room for your library, or put audio in cloud storage. |
| Upload limits | PHP limits how much one upload may hold (upload_max_filesize, post_max_size, max_file_uploads). The Bulk upload page shows yours. Section 7.4 explains how to raise them. |
| SSH and Composer | Helpful, not required. With SSH you run two commands. Without it, use the web installer and a package that already contains vendor/. Composer 2 is needed only if the package has no vendor/ folder. |
2.2Accounts
| Account | Used for | Cost note | Step |
|---|---|---|---|
| Licence from appentium.com | The licence key and username that activate your copy for one domain | Included with your purchase | 4 |
| Hosting and a domain | Backend and admin panel | Paid | 4 |
| Firebase | Google and Apple sign-in, push notifications | Free plan available | 9, 12 |
| RevenueCat | Coin packs and Premium for both stores | Free tier available; see RevenueCat's pricing page | 10 |
| Google Play Console | Publishing on Android; Android in-app products | One-time registration fee | 10, 16 |
| Apple Developer Program | Publishing on iOS; iOS in-app products; Sign in with Apple and its key; push | Yearly fee | 9, 10, 16 |
| AdMob Optional | Real ads. Without it the app shows Google's test ads, which earn nothing | Free account | 11 |
| OpenAI or ElevenLabs Optional | AI narration | Billed by the provider per character | 7.5 |
| S3 or Cloudflare R2 Optional | Audio in the cloud | Storage and bandwidth billed by the provider | 14 |
2.3Your computer
| Tool | Notes |
|---|---|
| Flutter SDK | Stable channel. The app was built and tested with Flutter 3.44. Follow Flutter's install guide and finish with flutter doctor. |
| Android Studio | For the Android SDK, an emulator and Java 17 (the project builds with Java 17). |
| Xcode and CocoaPods | On a Mac only, for iOS. The app supports iOS 15 and newer. |
| Firebase CLI | The FlutterFire tool in section 9 needs it installed and signed in (firebase login). |
| Composer 2 | Only if your package has no audisode_backend/vendor folder. |
3What is in the package
Unzip the package. This is what you will find:
audisode-v1.0.0/
  START_HERE.html          opens this guide
  CHANGELOG.md             what changed in each version
  THIRD_PARTY_NOTICES.md   licences of the open-source parts
  docs/                    this guide (index.html), its images, a PDF copy
  audisode_backend/        the server: Laravel 12 API and admin panel
audisode/ the mobile app: Flutter, Android and iOS| Folder | What it is |
|---|---|
| audisode_backend/ | The backend. It also holds README.md for developers (API, deeper server detail) and .env.example, the template for your settings file. If a vendor/ folder is inside, the PHP packages are already installed. |
| audisode/ | The app. Its README.md is the developer reference for app setup. |
| docs/ | This guide. Open index.html in any browser; it needs no internet. |
3.1What is not included, and why
Nothing that belongs to a previous owner is in the package. You create your own:
- Your .env file, with your database password and keys. You make it from .env.example.
- Your Android keystore and android/key.properties. See section 16.1.
- Firebase files: google-services.json, GoogleService-Info.plist and lib/firebase_options.dart. The app will not build until you create them (section 9).
- Ad IDs: the app ships with Google's test IDs.
- Apple team: you choose yours in Xcode.
4Install the backend~20 minServer
Pick the path that matches your hosting. All three end in the same place: an admin panel you can sign in to.
4.1A. Server with SSHRecommended
Create a database and a user. In your hosting panel, or with these commands in the MySQL client (change the names and the password):
sqlCREATE DATABASE audisode CHARACTER SET utf8mb4 COLLATE utf8mb4_unicode_ci; CREATE USER 'audisode_user'@'localhost' IDENTIFIED BY 'choose-a-strong-password'; GRANT ALL PRIVILEGES ON audisode.* TO 'audisode_user'@'localhost';Upload the audisode_backend folder to your server. If your host allows it, put it outside the public web folder.
Point the domain's document root at the public/ folder inside it. This matters: everything else in the folder (your
.envfile, logs, source code) must not be reachable from the web.Install the PHP packages. Skip this step if the folder already contains vendor/.
bashcd /path/to/audisode_backend composer install --no-dev --optimize-autoloaderCreate your settings file.
bashcp .env.example .envOpen .env and set at least these lines. Leave
APP_ENV=production,APP_DEBUG=falseandAPP_KEY(the installer fills it in).dotenvAPP_NAME="Your Brand" APP_URL=https://your-domain.com DB_DATABASE=audisode DB_USERNAME=audisode_user DB_PASSWORD=choose-a-strong-password MAIL_MAILER=smtp MAIL_HOST=mail.your-domain.com MAIL_PORT=587 MAIL_USERNAME=hello@your-domain.com MAIL_PASSWORD=your-mail-password MAIL_FROM_ADDRESS="hello@your-domain.com"APP_NAMEis your brand name. It appears in the admin panel, the sign-in pages, emails and the public website. Every key is explained in section 5.Run the installer.
bashphp artisan app:install --demoIt prints Installing Audisode v1.0.0, asks for your licence key and username (the email you bought with) and activates the licence for your domain. Then it creates the tables and default settings, adds an English language and a few categories (because of
--demo), and asks for the admin email and password you will sign in with (at least 8 characters).It ends with a configuration checklist. Lines marked TODO are normal at this point: they are the later sections of this guide. The command is safe to run again.
These options skip the questions, which helps in scripts:
Option What it does --license-key=and--license-username=The licence from your purchase. --admin-email=and--admin-password=The admin account. --demoAdds an English language and a few categories, so you can add books straight away. --sample-booksAlso adds seven English sample audiobooks with authors and covers, so the app has something in it from the first minute. Delete them before you launch. Includes what --demoadds.Add the scheduler to cron. Run
crontab -eand add this line, with your path. It runs push notifications, AI narration jobs and the daily clean-up:cron* * * * * cd /path/to/audisode_backend && php artisan schedule:run >> /dev/null 2>&1Check that your settings file is not public. This must print
404or403, never200:bashcurl -s -o /dev/null -w "%{http_code}\n" https://your-domain.com/.envSign in at
https://your-domain.com/loginwith the admin email and password you chose. Continue with the first sign-in below.
4.2B. cPanel shared hosting, no SSH
You do not need a terminal. The backend has a web installer that asks the same questions in your browser. It needs a package that already contains the PHP packages.
Check for audisode_backend/vendor. If the folder exists, carry on. If it does not, run
composer install --no-dev --optimize-autoloaderinside audisode_backend on your own computer first, then upload the folder together with the new vendor/.Create a database and a user in cPanel under MySQL Databases. Add the user to the database with all privileges. cPanel puts your account name in front of both names (for example
account_audisode): use the full names later.Choose PHP 8.2 or newer in MultiPHP Manager, and in Select PHP Version make sure the extensions
pdo_mysql,openssl,mbstring,gd,fileinfo,curlandzipare ticked.Upload and unzip the audisode_backend folder with File Manager. Turn on Show Hidden Files and check that .env.example and .htaccess are there: hidden files are easy to lose.
Point the domain at audisode_backend/public. In cPanel open Domains (or Subdomains) and set the document root of your domain or subdomain to that folder.
Open your site in a browser. A copy that is not installed yet sends every page to
/install. If a screen says it cannot write.env, make the project folder writable (permissions775) for the installation and put it back afterwards.Click through the installer. It has five screens.
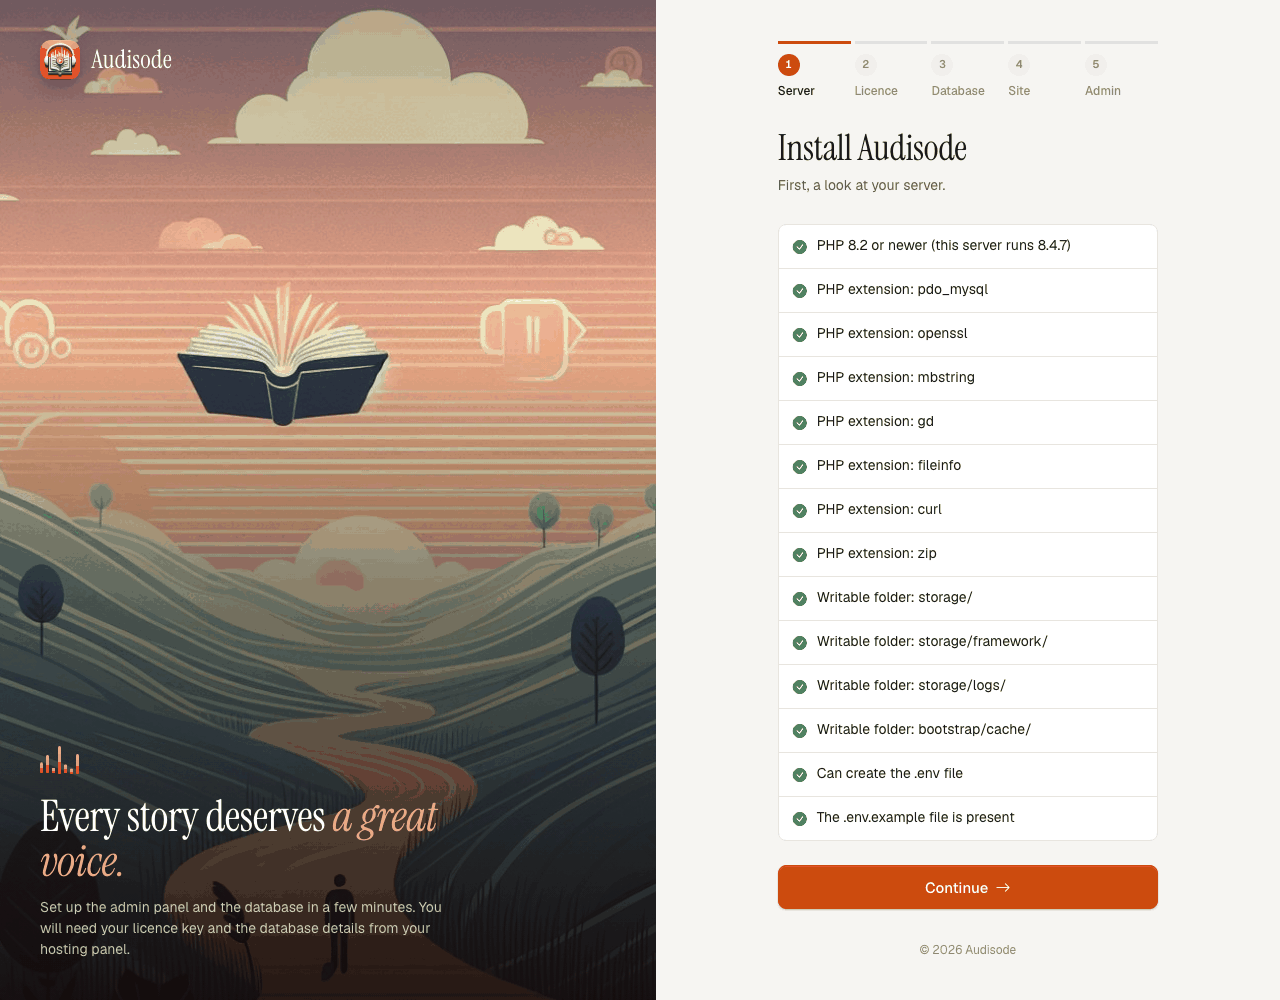
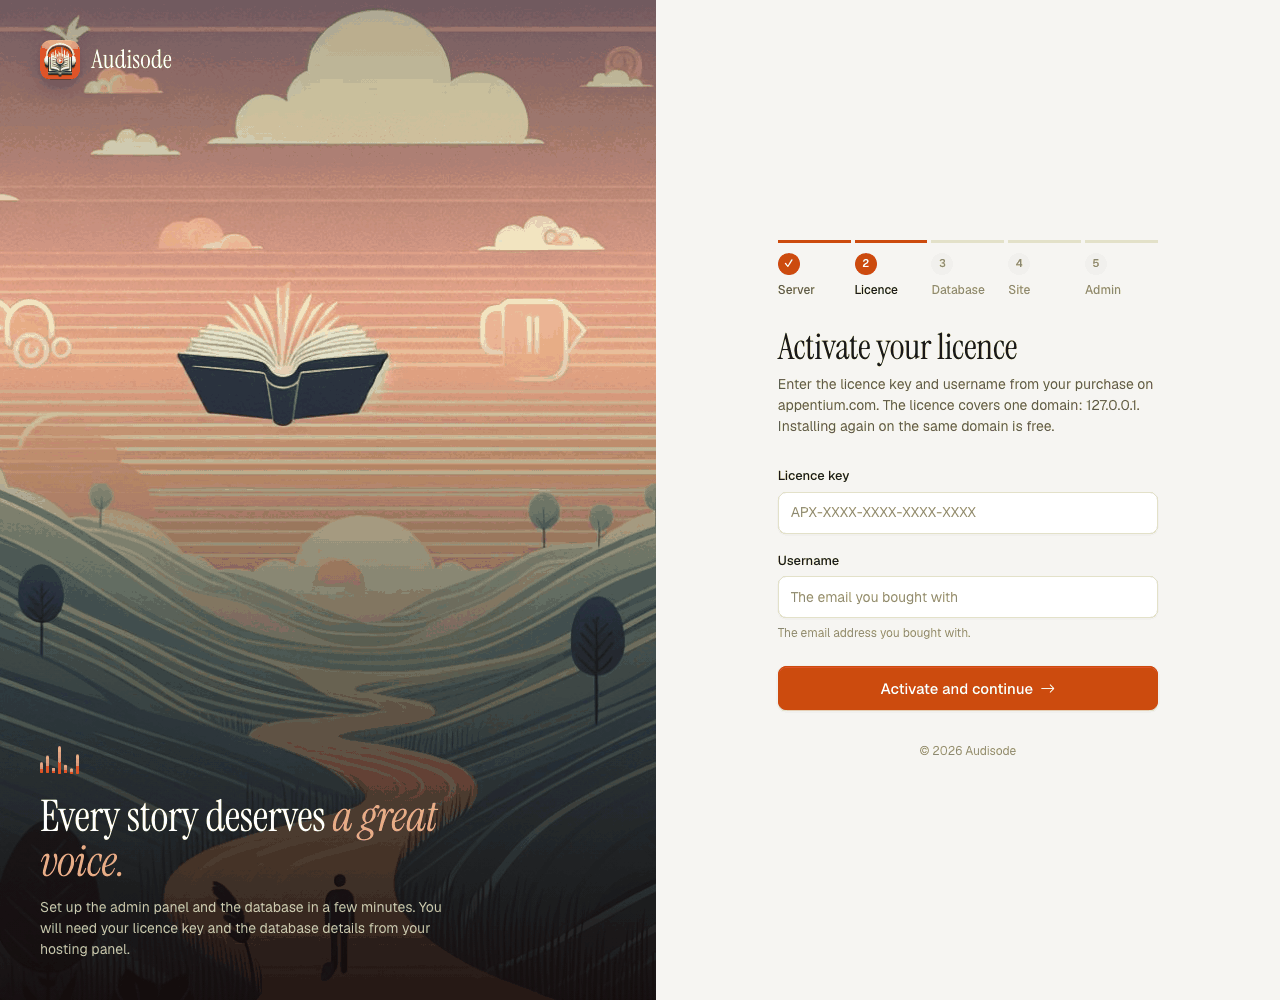
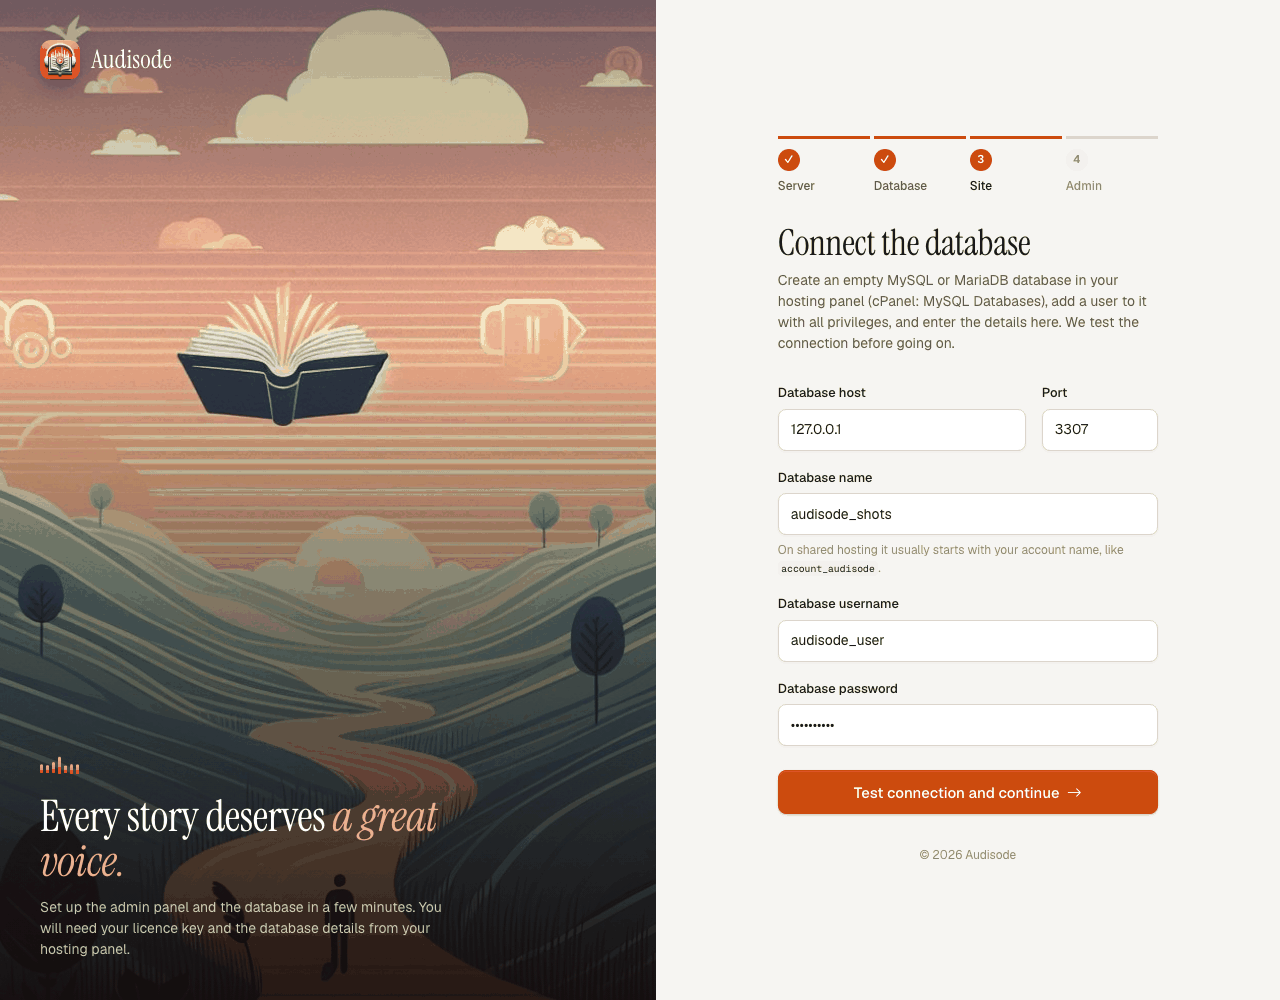
localhost. The installer tests the connection before going on and explains what went wrong if it cannot connect.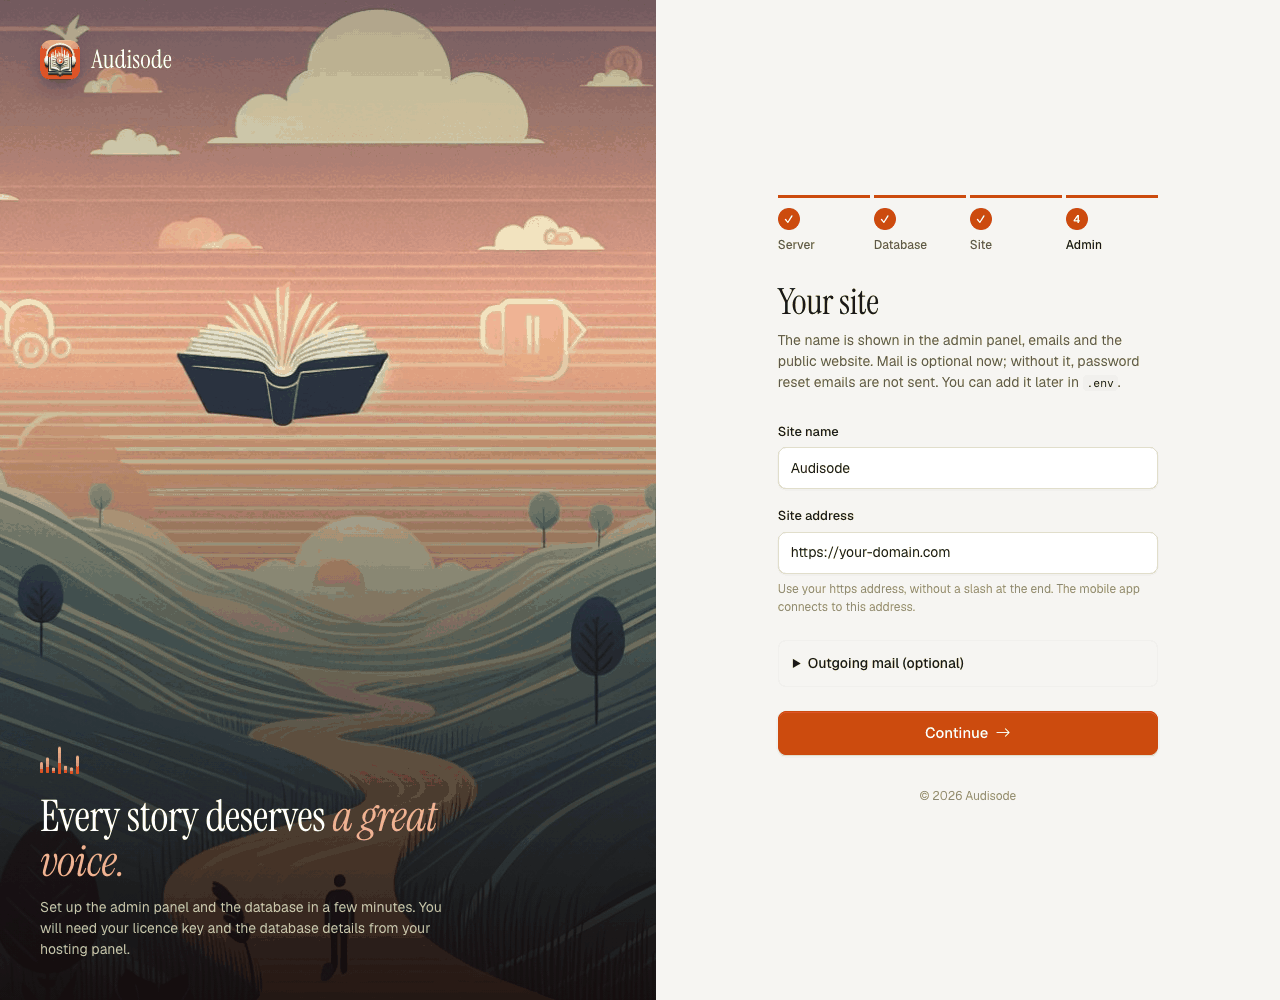
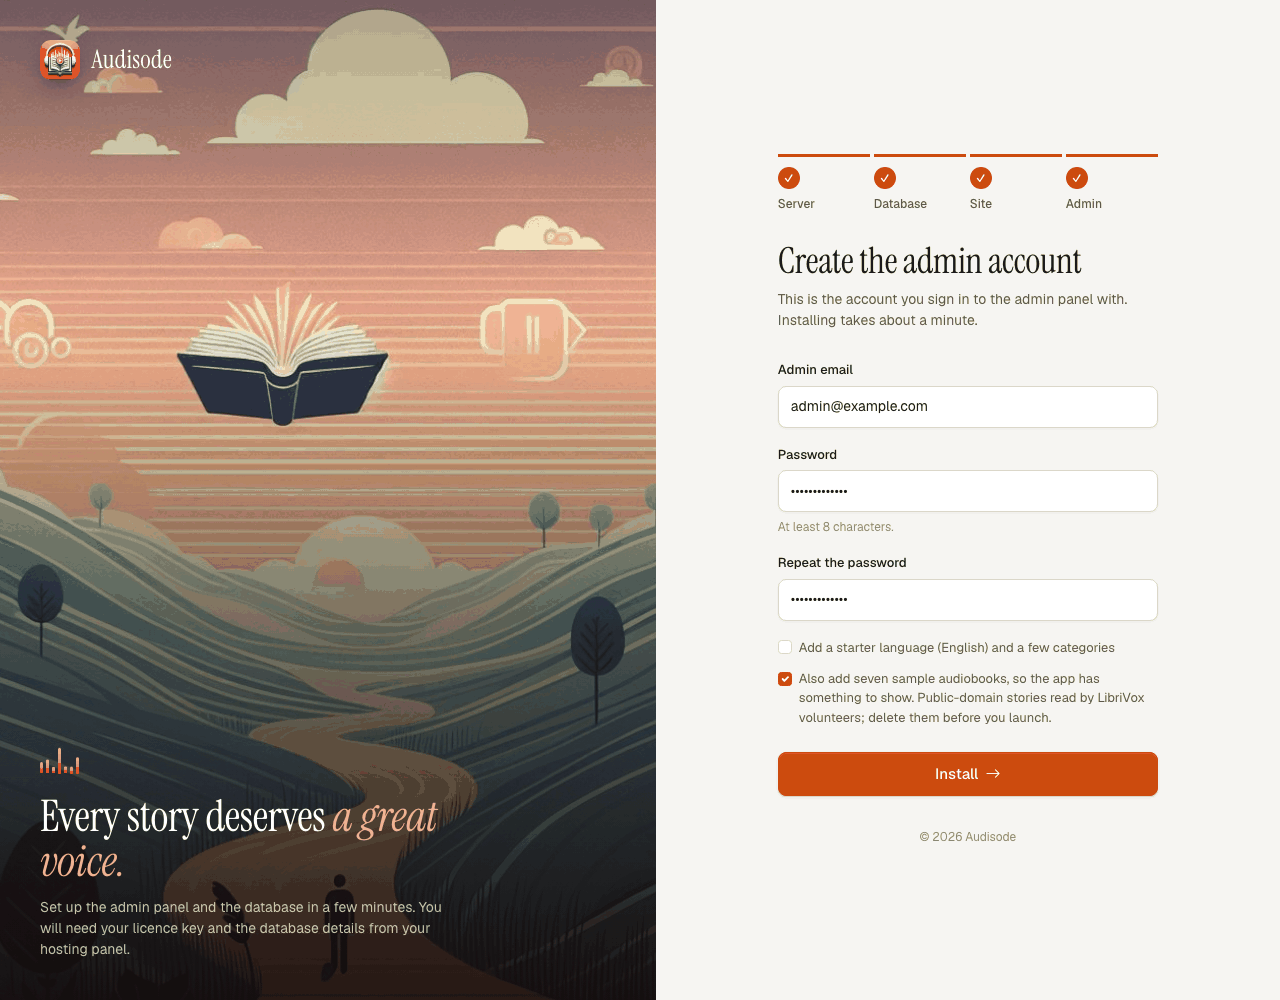
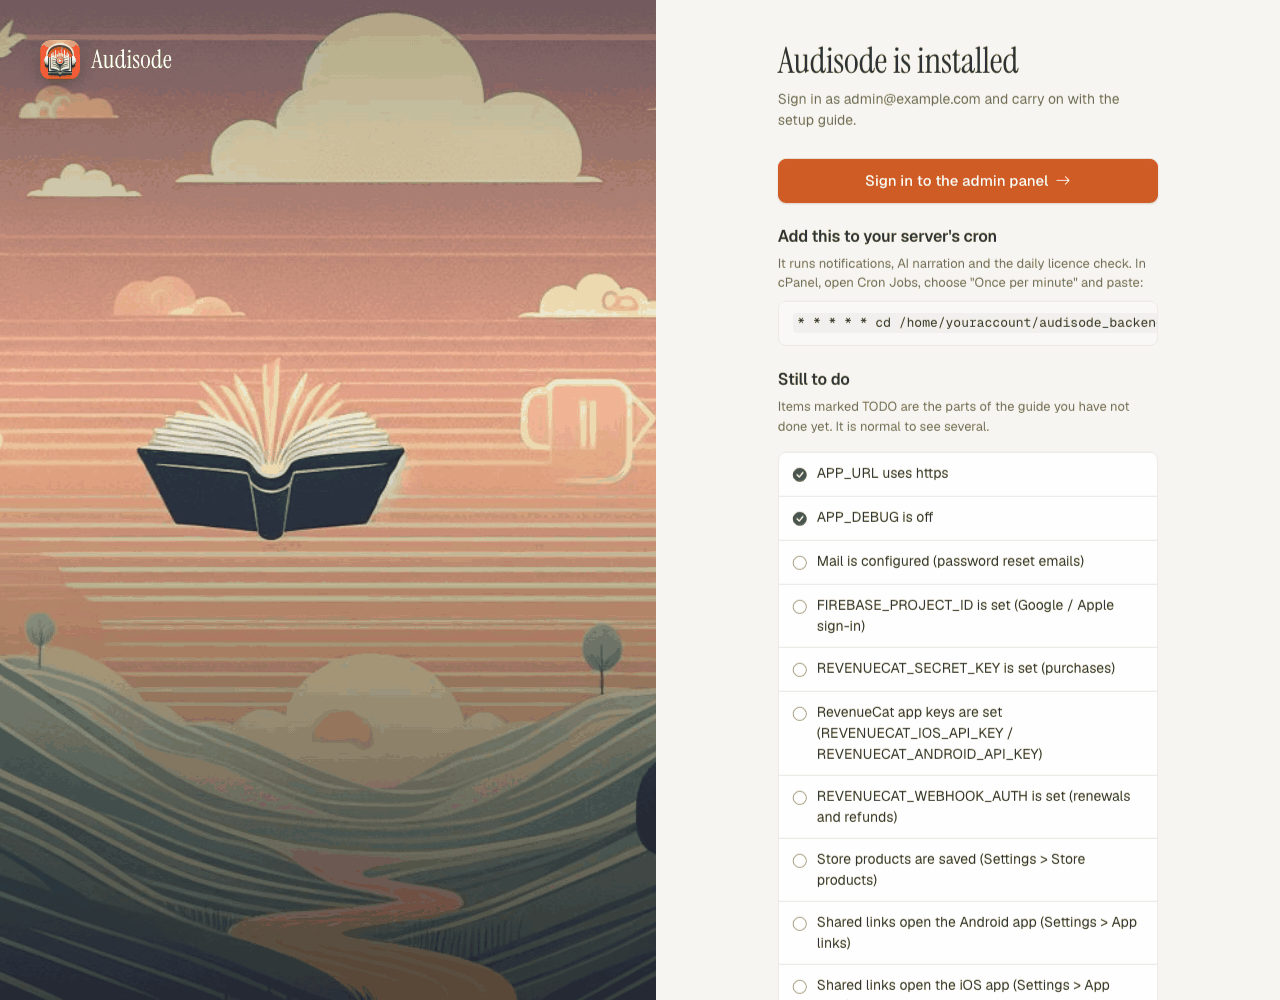
app:install. Items still open are normal.Add the cron job. In cPanel open Cron Jobs, choose Once Per Minute and paste the command shown on the finish page. It looks like this:
cron* * * * * cd /home/youraccount/audisode_backend && php artisan schedule:run >> /dev/null 2>&1If
phpon your host is an older version than 8.2, use the full path of PHP 8.2 instead (on cPanel it is often/opt/cpanel/ea-php82/root/usr/bin/php).Check that your settings file is not public. Open
https://your-domain.com/.envin a browser. You must see an error page (404 or 403), never a list of settings.
When the installer has finished, every /install page is a 404. It only runs while there is no storage/app/installed file and no APP_KEY, so a site that is already set up is never offered the installer. To install from scratch again, delete .env and storage/app/installed.
4.3C. Your own computer
The quickest way to see the admin panel working. You need PHP 8.2 or newer and Composer 2 on your computer. The licence step still asks for your key, so you need internet. Local addresses (localhost, *.test and private IP addresses) do not use up an installation of your licence.
Install the packages (skip it if vendor/ exists) and create the settings file:
bashcd audisode_backend composer install cp .env.example .envEdit .env for development. A SQLite file is the easiest database: create an empty file and point to it with an absolute path.
bashtouch database/database.sqlitedotenvAPP_ENV=local APP_DEBUG=true APP_URL=http://127.0.0.1:8000 DB_CONNECTION=sqlite DB_DATABASE=/full/path/to/audisode_backend/database/database.sqlite SESSION_DRIVER=file CACHE_STORE=file MAIL_MAILER=logOr use a local MySQL database exactly as in path A.
APP_DEBUG=trueshows error details; never use it on a live server.MAIL_MAILER=logwrites emails to storage/logs/laravel.log instead of sending them.Install and start:
bashphp artisan app:install --sample-books php artisan serveOpen
http://127.0.0.1:8000/login.
4.4Your first sign-in
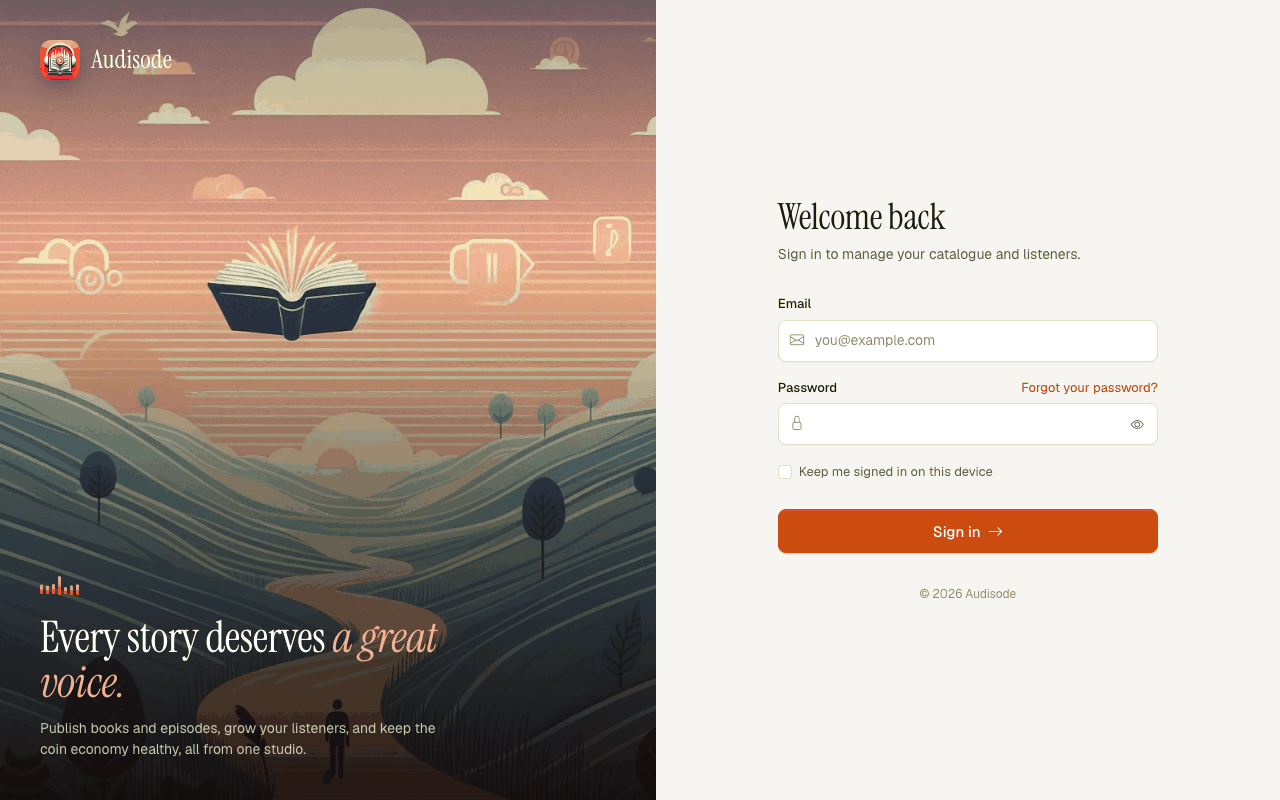
Go to https://your-domain.com/login and sign in with the admin email and password you chose. After five wrong tries the sign-in pauses for a short while.
The dashboard is your home page: listeners, active listeners, Premium subscribers, estimated revenue, a chart of new listeners or coin flow, your top books and the coin economy. Switch between 7, 30 and 90 days at the top; every number is compared with the period before.
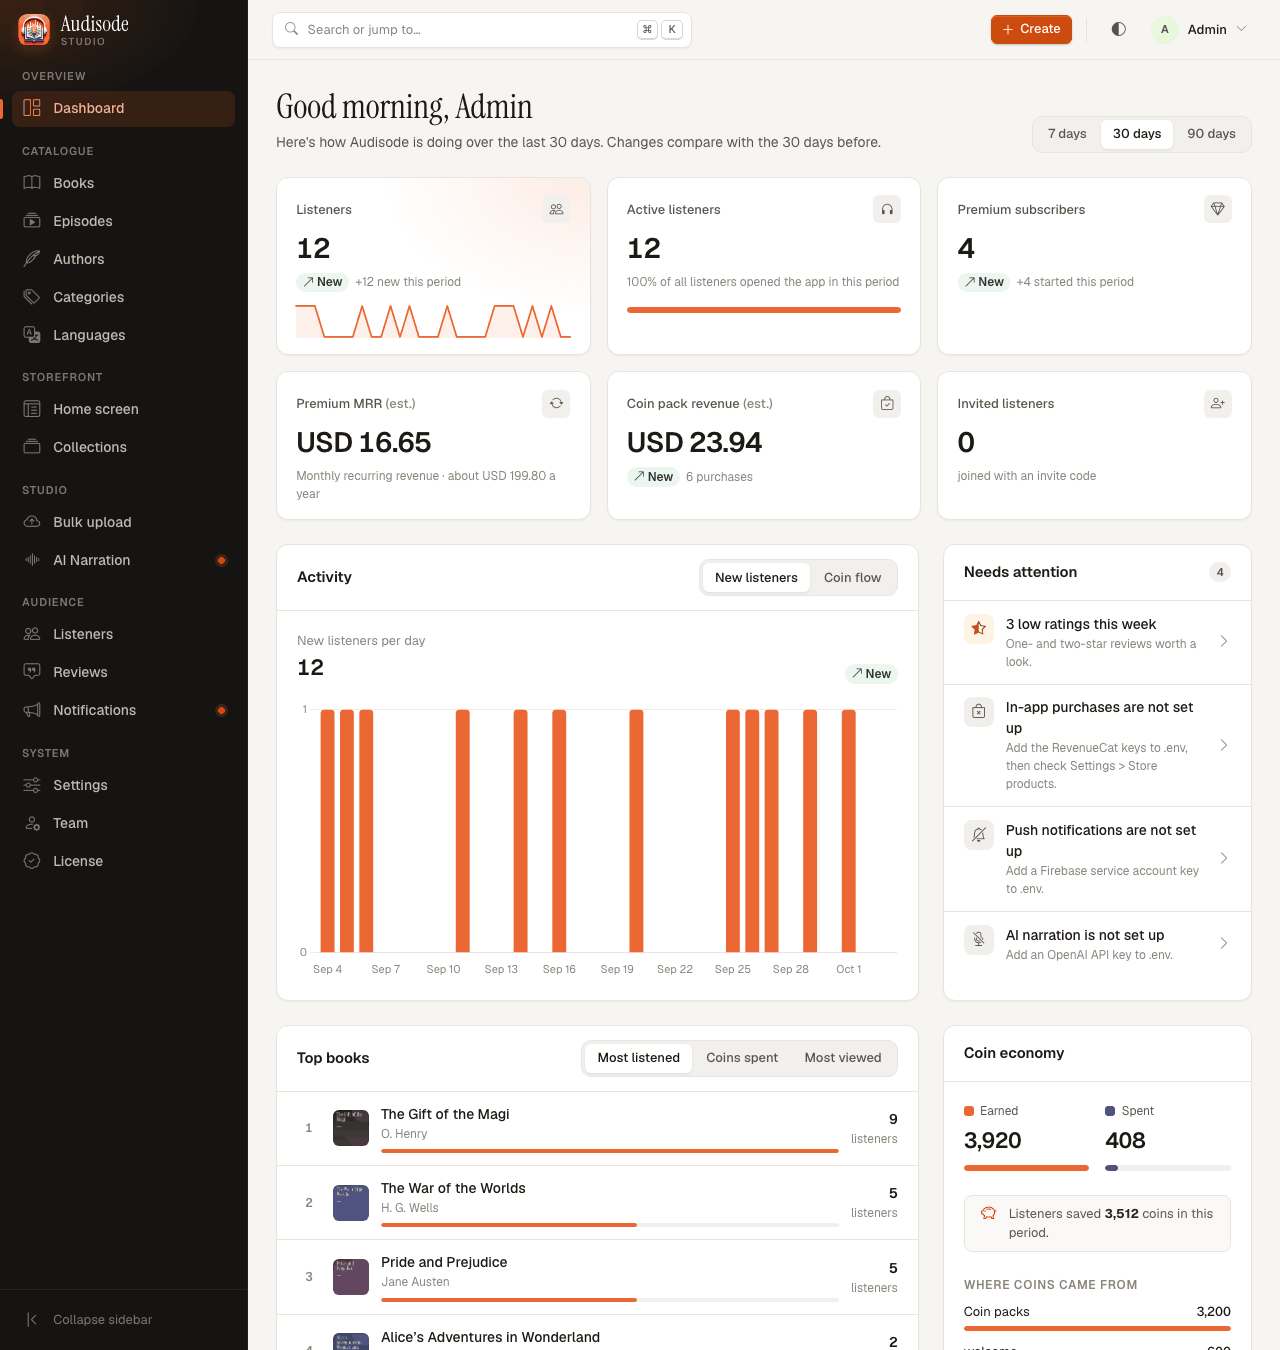
What "Needs attention" means
This list shows problems and unfinished setup. Each item links to the page that fixes it:
- The licence needs attention, or a new version is available.
- Narrations failed, or are in progress.
- Single-audio books without audio, and series without episodes: listeners cannot play these yet.
- Notifications failed this week: check the Firebase credentials.
- Low ratings this week (one and two stars) worth a look.
- In-app purchases are not set up, or the RevenueCat webhook is not secured: see section 10.
- Push notifications are not set up: see section 12.
- AI narration is not set up: optional, see section 7.5.
4.5Background jobs and the queue
Push notifications and AI narration run in the background. On hosting without a process manager you do nothing extra: the cron entry above runs the scheduler every minute, and the scheduler starts a short-lived queue worker each time. That is enough on shared hosting.
If you run the worker yourself with Supervisor or systemd, tell the scheduler not to start its own, and keep the retry time longer than your longest job:
QUEUE_RUN_VIA_SCHEDULER=false
DB_QUEUE_RETRY_AFTER=960
DB_QUEUE_RETRY_AFTER must stay above 900 seconds, because a long AI narration can take up to 15 minutes. A sample Supervisor configuration:
[program:audisode-worker]
command=php /path/to/audisode_backend/artisan queue:work --sleep=3 --tries=3 --max-time=3600
process_name=%(program_name)s_%(process_num)02d
numprocs=1
user=www-data
autostart=true
autorestart=true
stopwaitsecs=3600
redirect_stderr=true
stdout_logfile=/path/to/audisode_backend/storage/logs/worker.log
After you deploy an update, run php artisan queue:restart so the worker picks up the new code. The scheduler still needs its cron line: it sends the daily reminders and does the clean-up.
4.6File permissions
The web server user must be able to write to storage/ and bootstrap/cache/. If you see a blank page or a 500 error after uploading, this is the usual cause. On a server with SSH (replace www-data with your web server's user):
cd /path/to/audisode_backend
chown -R www-data:www-data storage bootstrap/cache
find storage bootstrap/cache -type d -exec chmod 775 {} \;
find storage bootstrap/cache -type f -exec chmod 664 {} \;
On cPanel, select those two folders in File Manager and set the permissions to 775.
5The .env reference
The .env file in audisode_backend holds your settings and secrets. This section lists every line of .env.example, in the same order, so you can see what each one does.
Where a value contains spaces or a #, put it in double quotes. Anything marked Leave works as it is.
5.1App
The basics. Most of these you set once.
| Key | Required? | Example | What it does and where to get it |
|---|---|---|---|
APP_NAME | Required | "Your Brand" | Your brand name. It shows in the admin panel, sign-in pages, emails and the public website. Settings > Branding can override it on web pages. |
APP_ENV | Required | production | production on a live server, local on your own computer. |
APP_KEY | Automatic | (empty) | Encrypts sessions. The installer fills it in. Never share it. If it ever leaks, run php artisan key:generate --force (this signs admins out). |
APP_DEBUG | Required | false | Must be false on a live server: true shows error details that include secrets. |
APP_URL | Required | https://your-domain.com | Your address with https:// and no trailing slash. The licence is activated for this domain, and emails and shared links use it. |
APP_LOCALE | Leave | en | Language of messages the server writes. Leave as en. |
APP_FALLBACK_LOCALE | Leave | en | Used when a translation is missing. Leave. |
APP_FAKER_LOCALE | Leave | en_US | Only for test-data generators. Leave. |
APP_MAINTENANCE_DRIVER | Leave | file | Where php artisan down keeps maintenance mode. Leave. |
APP_MAINTENANCE_STORE | Leave | database | Commented out in the template. Only matters if the driver is cache. |
PHP_CLI_SERVER_WORKERS | Leave | 4 | Workers for php artisan serve on your own computer. Not used on a live server. |
BCRYPT_ROUNDS | Leave | 12 | How hard passwords are to crack. Leave. |
LOG_CHANNEL | Leave | stack | Where logs go. With the defaults they are in storage/logs/laravel.log. |
LOG_STACK | Leave | single | One log file. Leave. |
LOG_DEPRECATIONS_CHANNEL | Leave | null | Leave. |
LOG_LEVEL | Optional | debug | How much is logged. warning keeps the file smaller on a busy live server. |
5.2Database
The empty database you created in the install step.
| Key | Required? | Example | What it does and where to get it |
|---|---|---|---|
DB_CONNECTION | Required | mysql | mysql for MySQL and MariaDB. sqlite is for your own computer. |
DB_HOST | Required | 127.0.0.1 | The database server. On shared hosting it is usually localhost. |
DB_PORT | Required | 3306 | Leave unless your host says otherwise. |
DB_DATABASE | Required | audisode | The database name. On cPanel it starts with your account name. With SQLite, the full path of the file. |
DB_USERNAME | Required | audisode_user | The database user. Change it from the template's root. |
DB_PASSWORD | Required | (a strong password) | The database user's password. |
5.3Sessions, cache and queue
These work as they are. The backend runs on the database drivers, so you need no Redis or Memcached.
| Key | Required? | Example | What it does and where to get it |
|---|---|---|---|
SESSION_DRIVER | Leave | database | Where admin sign-ins are kept. |
SESSION_LIFETIME | Leave | 120 | Minutes of inactivity before the admin panel signs you out. |
SESSION_ENCRYPT | Leave | false | Leave. |
SESSION_PATH | Leave | / | Leave. |
SESSION_DOMAIN | Leave | null | Leave empty. A wrong value here causes "419 Page Expired" (see troubleshooting). |
BROADCAST_CONNECTION | Leave | log | Not used by Audisode. Leave. |
FILESYSTEM_DISK | Leave | local | Leave. Audio has its own setting, MEDIA_DISK. |
QUEUE_CONNECTION | Leave | database | Background jobs wait in the database. Leave. |
CACHE_STORE | Leave | database | Leave. |
CACHE_PREFIX | Leave | (commented out) | Only if several sites share one cache. |
MEMCACHED_HOST | Leave | 127.0.0.1 | Only used if you switch the cache to Memcached. |
REDIS_CLIENT | Leave | phpredis | Only used if you switch cache, sessions or queue to Redis. |
REDIS_HOST | Leave | 127.0.0.1 | As above. |
REDIS_PASSWORD | Leave | null | As above. |
REDIS_PORT | Leave | 6379 | As above. |
5.4Mail
Password-reset emails for admins and for app users, and admin invitations. Until you set this up, emails are only written to the log.
| Key | Required? | Example | What it does and where to get it |
|---|---|---|---|
MAIL_MAILER | Required | smtp | log (the template's value) writes emails to storage/logs/laravel.log instead of sending them. Use smtp, or mailgun, ses, postmark. |
MAIL_SCHEME | Optional | null | Leave empty for the usual. Set smtps if your provider needs SSL on port 465. |
MAIL_HOST | Required | mail.your-domain.com | Your mail server. Your hosting panel or email provider shows it. |
MAIL_PORT | Required | 587 | Usually 587 (TLS) or 465 (SSL). |
MAIL_USERNAME | Required | hello@your-domain.com | The mail account. |
MAIL_PASSWORD | Required | (its password) | The mail account's password. |
MAIL_FROM_ADDRESS | Required | "hello@your-domain.com" | The sender address. Use one on your own domain, or mail may land in spam. |
MAIL_FROM_NAME | Optional | "${APP_NAME}" | The sender name. By default it is your APP_NAME. |
AWS_ACCESS_KEY_ID | Leave | Laravel's own Amazon settings. Audisode uses them only if you send mail through Amazon SES. Audio in the cloud uses the MEDIA_S3_* keys below. | |
AWS_SECRET_ACCESS_KEY | Leave | As above. | |
AWS_DEFAULT_REGION | Leave | us-east-1 | As above. |
AWS_BUCKET | Leave | As above. | |
AWS_USE_PATH_STYLE_ENDPOINT | Leave | false | As above. |
5.5Admin and demo admin
Only used by php artisan db:seed, the alternative to app:install. The installer and app:install ask you for the admin email and password instead.
| Key | Required? | Example | What it does and where to get it |
|---|---|---|---|
ADMIN_EMAIL | Optional | admin@example.com | Email of the admin that db:seed creates. |
ADMIN_PASSWORD | Optional | (empty) | Leave empty and db:seed generates a random password and prints it once. |
SEED_DEMO_ADMIN | Optional | false | true also creates the read-only demo admin when seeding. See hosting a demo. |
DEMO_ADMIN_EMAIL | Optional | demo@example.com | Sign-in email of the demo admin. Use an address that is not a real mailbox. |
DEMO_ADMIN_PASSWORD | Optional | (a password) | Sign-in password of the demo admin. Empty means a random one is printed once. |
5.6Firebase sign-in
So the backend can check who is signing in, and end a listener's Sign in with Apple when they delete their account. See section 9.
| Key | Required? | Example | What it does and where to get it |
|---|---|---|---|
FIREBASE_PROJECT_ID | Required | your-firebase-project-id | Firebase console > Project settings > General > Project ID. Without it nobody can sign in with Google or Apple. |
5.7RevenueCat
Coin packs and Premium. See section 10.
| Key | Required? | Example | What it does and where to get it |
|---|---|---|---|
REVENUECAT_SECRET_KEY | Required | sk_… | RevenueCat > Project settings > API keys, the secret key. It stays on the server. |
REVENUECAT_IOS_API_KEY | Required | appl_… | The public SDK key of your iOS app. The app reads it from the backend, so changing it needs no app rebuild. |
REVENUECAT_ANDROID_API_KEY | Required | goog_… | The public SDK key of your Android app. |
REVENUECAT_WEBHOOK_AUTH | Required | a-long-random-secret | Any long random string. You paste the same value into RevenueCat's webhook settings. Without it, renewals and refunds do not reach the backend. |
REVENUECAT_ENTITLEMENT | Optional | premium | The name of the entitlement your Premium plans unlock. Keep premium unless you named it differently. |
5.8App identity
Fallbacks for shared book links. Settings > App links takes precedence.
| Key | Required? | Example | What it does and where to get it |
|---|---|---|---|
GOOGLE_PLAY_PACKAGE_NAME | Optional | com.yourcompany.yourapp | Your Android package name. Only used if Settings > App links has none. |
APPLE_BUNDLE_ID | Optional | com.yourcompany.yourapp | Your iOS bundle ID. Only used if Settings > App links has none. |
5.9Revenue currency
| Key | Required? | Example | What it does and where to get it |
|---|---|---|---|
REVENUE_CURRENCY | Optional | USD | The currency of the dashboard's revenue estimates. Once you save Settings > Store products, its Price currency is used instead. |
5.10Rewarded ads
See section 11.
| Key | Required? | Example | What it does and where to get it |
|---|---|---|---|
ADMOB_SSV_ENABLED | Required | true | true (the default): coins for a rewarded ad are granted only by AdMob's signed callback. Set false while testing with Google's test ads, which never call your server. |
5.11Audio and cloud storage
See section 14. With the defaults, audio stays on your server.
| Key | Required? | Example | What it does and where to get it |
|---|---|---|---|
MEDIA_URL_TTL_MINUTES | Optional | 1440 | How long the signed audio links given to the app stay valid. With cloud storage the maximum is 10080 (7 days). |
MEDIA_DISK | Optional | media | media keeps audio on your server. media_cloud uses the bucket below. |
MEDIA_S3_KEY | Cloud only | Access key of the bucket. | |
MEDIA_S3_SECRET | Cloud only | Secret key of the bucket. | |
MEDIA_S3_REGION | Cloud only | auto | auto for Cloudflare R2, for example us-east-1 for AWS. |
MEDIA_S3_BUCKET | Cloud only | audisode-audio | Name of the private bucket. |
MEDIA_S3_ENDPOINT | Cloud only | https://ACCOUNT.r2.cloudflarestorage.com | The provider's endpoint. Empty for AWS S3. |
MEDIA_S3_PATH_STYLE | Cloud only | false | true for providers that need path-style addresses (some self-hosted stores). |
5.12Push notifications
See section 12.
| Key | Required? | Example | What it does and where to get it |
|---|---|---|---|
FIREBASE_SERVICE_ACCOUNT_JSON | Push | /home/you/keys/firebase-service-account.json | Full path of a service account key file with the Firebase Cloud Messaging API Admin role. Keep it outside the web root. |
FCM_PROJECT_ID | Optional | (empty) | Defaults to FIREBASE_PROJECT_ID. Only set it if push uses a different project. |
5.13AI narration
Optional. See section 7.5. Providers bill per character.
| Key | Required? | Example | What it does and where to get it |
|---|---|---|---|
TTS_PROVIDER | AI | openai | openai or elevenlabs. |
OPENAI_API_KEY | AI | sk-… | Your OpenAI API key, if you use OpenAI. |
OPENAI_TTS_MODEL | AI | gpt-4o-mini-tts | The OpenAI speech model. |
ELEVENLABS_API_KEY | AI | (your key) | Your ElevenLabs API key, if you use ElevenLabs. |
ELEVENLABS_MODEL | AI | eleven_multilingual_v2 | The ElevenLabs model. |
ELEVENLABS_VOICES | AI | "Rachel:21m00Tcm4TlvDq8ikWAM,Adam:pNInz6obpgDQGcFmaJgB" | The voices offered on the AI Narration page, as Name:voice_id pairs separated by commas. |
TTS_MAX_CHARACTERS | AI | 50000 | The longest text one narration may have. |
5.14Background jobs
See the queue.
| Key | Required? | Example | What it does and where to get it |
|---|---|---|---|
QUEUE_RUN_VIA_SCHEDULER | Optional | true | true: the cron entry also runs the queue. Set false only if Supervisor or systemd runs queue:work. |
DB_QUEUE_RETRY_AFTER | Optional | 960 | Seconds before a stuck job is retried. Keep it above 900. |
5.15Keys that are not in the template
You can add these lines yourself.
| Key | Required? | Example | What it does and where to get it |
|---|---|---|---|
SANCTUM_EXPIRATION | Optional | 525600 | How long a listener stays signed in on a phone, in minutes. The default is a year. Empty means never expires. After it passes, the app asks the listener to sign in again. |
LICENSE_CHECK | Do not use | For the automated tests. Leave it out of .env. |
6The admin panelAdmin panel
The admin panel is where you run the business. This section walks through each page in the order of the left-hand menu. Sign in at https://your-domain.com/login.
- Press Ctrl or ⌘ + K anywhere to search books, episodes, authors and listeners, or to jump to a page. Press / to focus the search box on the page you are on.
- The Create button at the top has shortcuts for a new book, episode, bulk upload, AI narration and notification.
- The half-moon button at the top switches between light, dark and system themes.
- The menu at the top right holds your Account, the app settings, a link to your public website, and the product version.
- A small orange dot next to AI Narration or Notifications means that feature is not set up yet.
6.1Dashboard
The home page, shown in section 4. Use it to see how the business is doing and what needs doing.
- Switch between 7, 30 and 90 days. Every number is compared with the period before.
- Cards for listeners, active listeners, Premium subscribers, estimated Premium income per month, estimated coin pack income and invited listeners.
- An activity chart (new listeners, or coin flow), your top books by listeners, coins spent and views, and the coin economy: coins earned and spent, and where they came from.
- The Needs attention list of problems and unfinished setup, each linking to the page that fixes it.
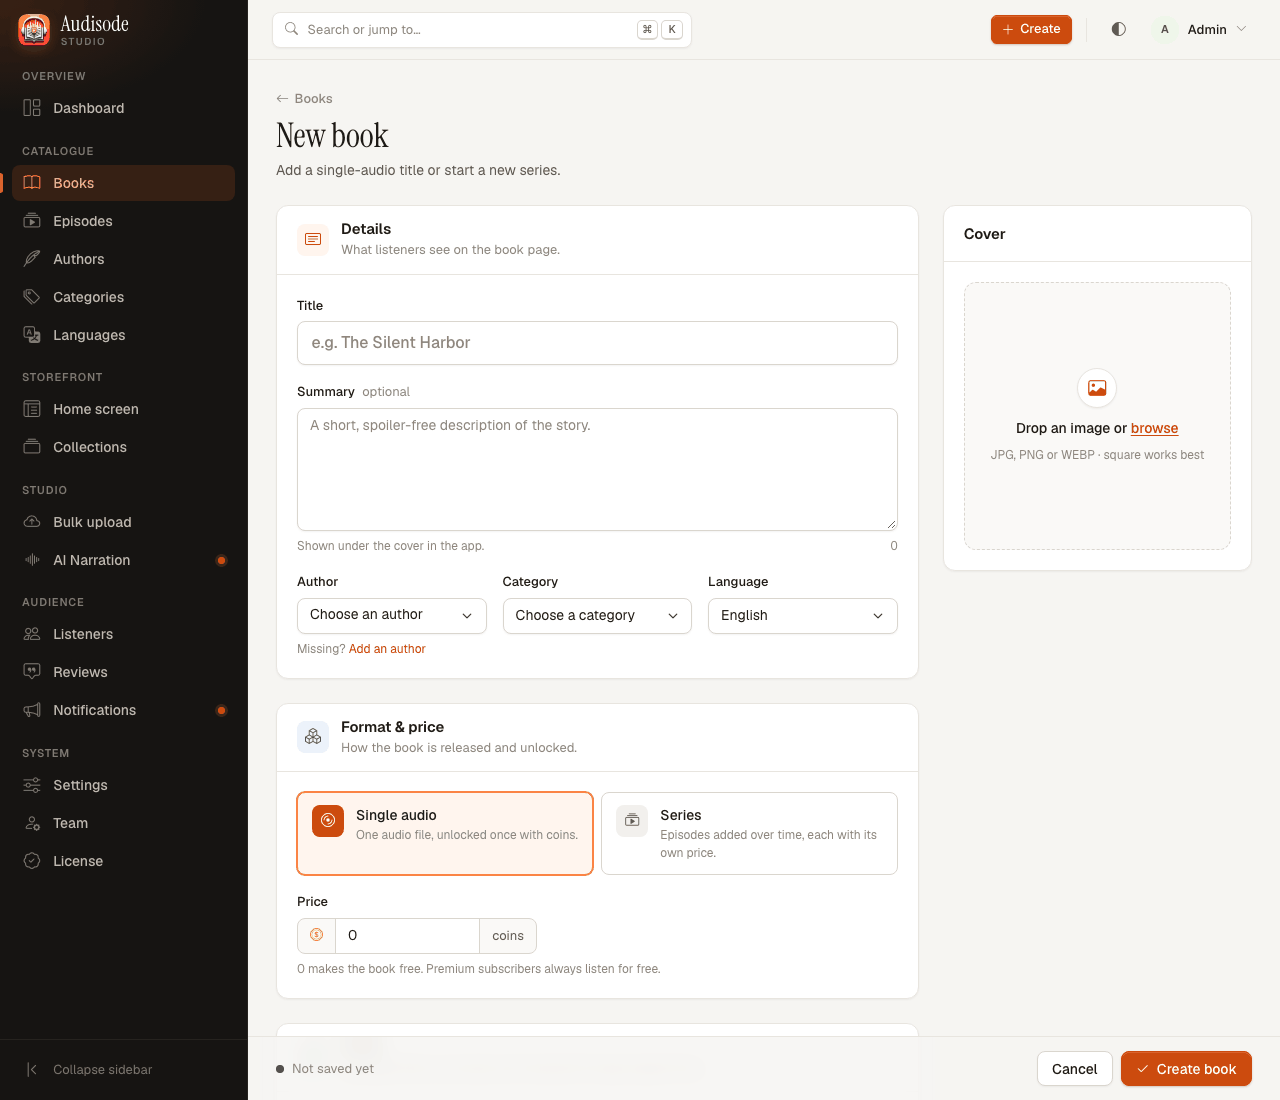
6.2Books
Your catalogue. A book is either a single audio (one file) or a series (episodes).
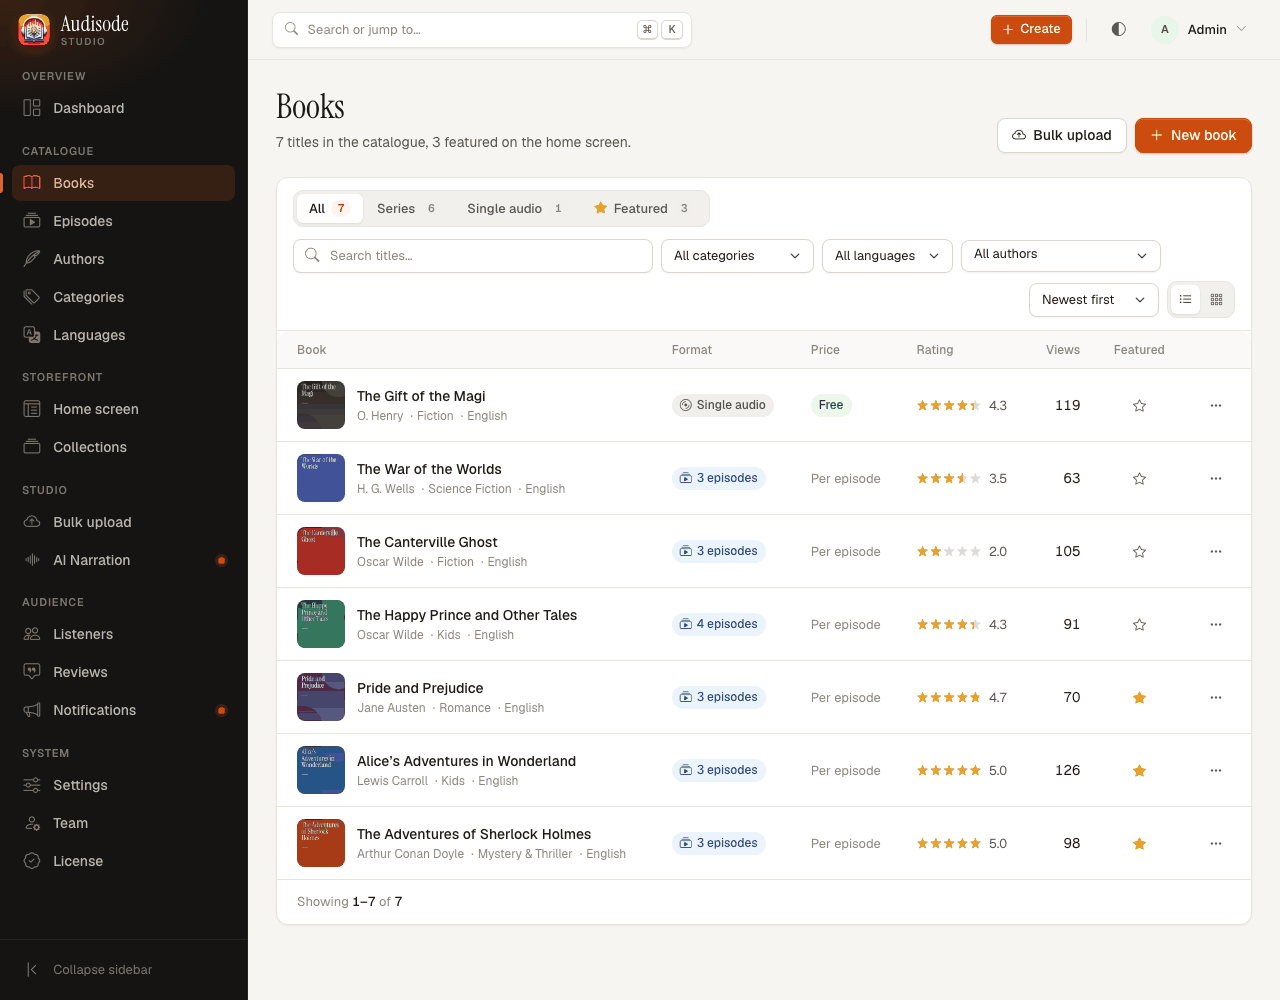
- Search, and filter by format, category, language, author or featured. Sort by newest, oldest, title, highest rated or most viewed. Switch between a table and a cover grid.
- New book asks for the title, summary, author, category, language, a cover image and, for a single audio, the price in coins and the audio.
- For a series the price is set on each episode instead, and you add the episodes on the Episodes page or with Bulk upload.
- A price of
0makes a book free. Premium subscribers always listen for free. - Star a book to feature it on the home screen.
- The filter links from Needs attention show books without audio and series without episodes.
6.3Episodes
Open a series to see its episodes in order.
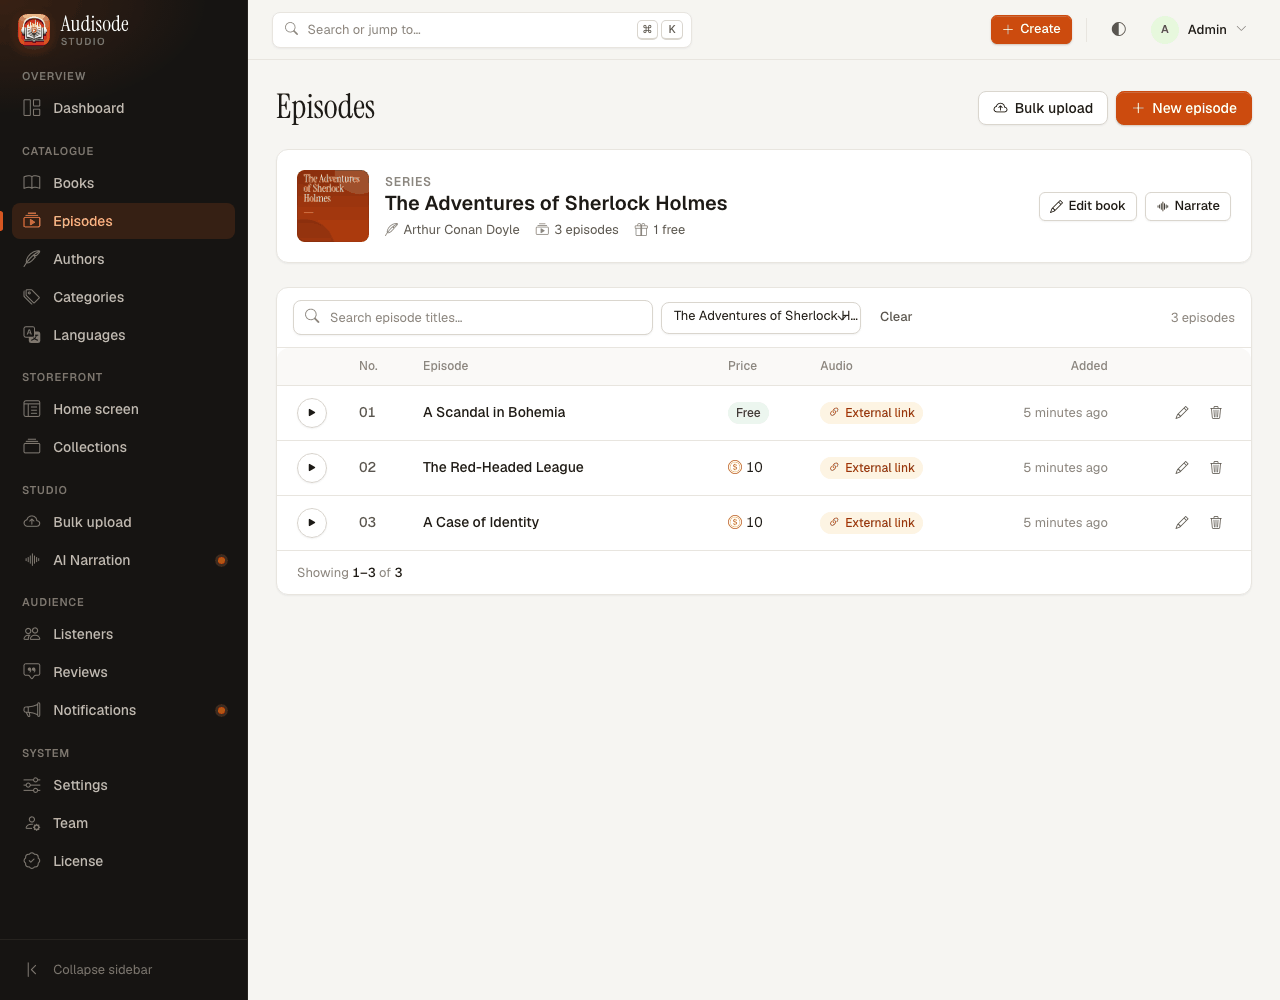
- Add episodes one at a time: title, number, price, and the audio (upload or link).
- Preview each episode's audio on the page.
- Set a price per episode. Making the first few free is the usual way to hook listeners.
- Episode numbers must be unique within a series.
6.4Bulk upload
Add a whole season in one go. Section 7.4 explains it step by step.
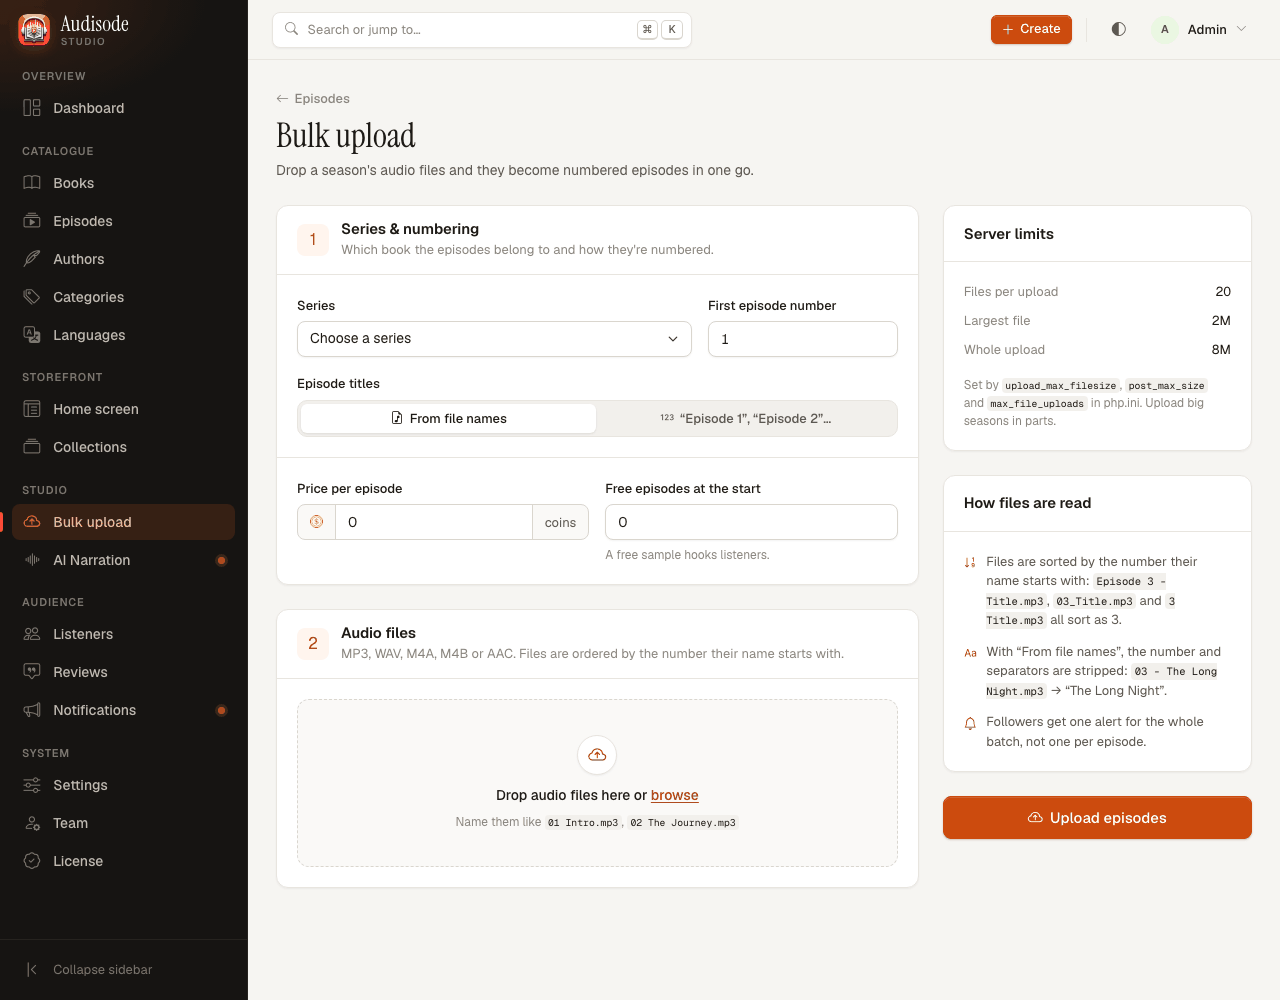
- Choose the series, the first episode number, the price per episode and how many are free.
- Drop the audio files in. A preview table shows the order, titles and sizes before you send anything.
- The page checks the files against your server's upload limits and warns you before uploading.
6.5Home screen
Decides what listeners see when they open the app.
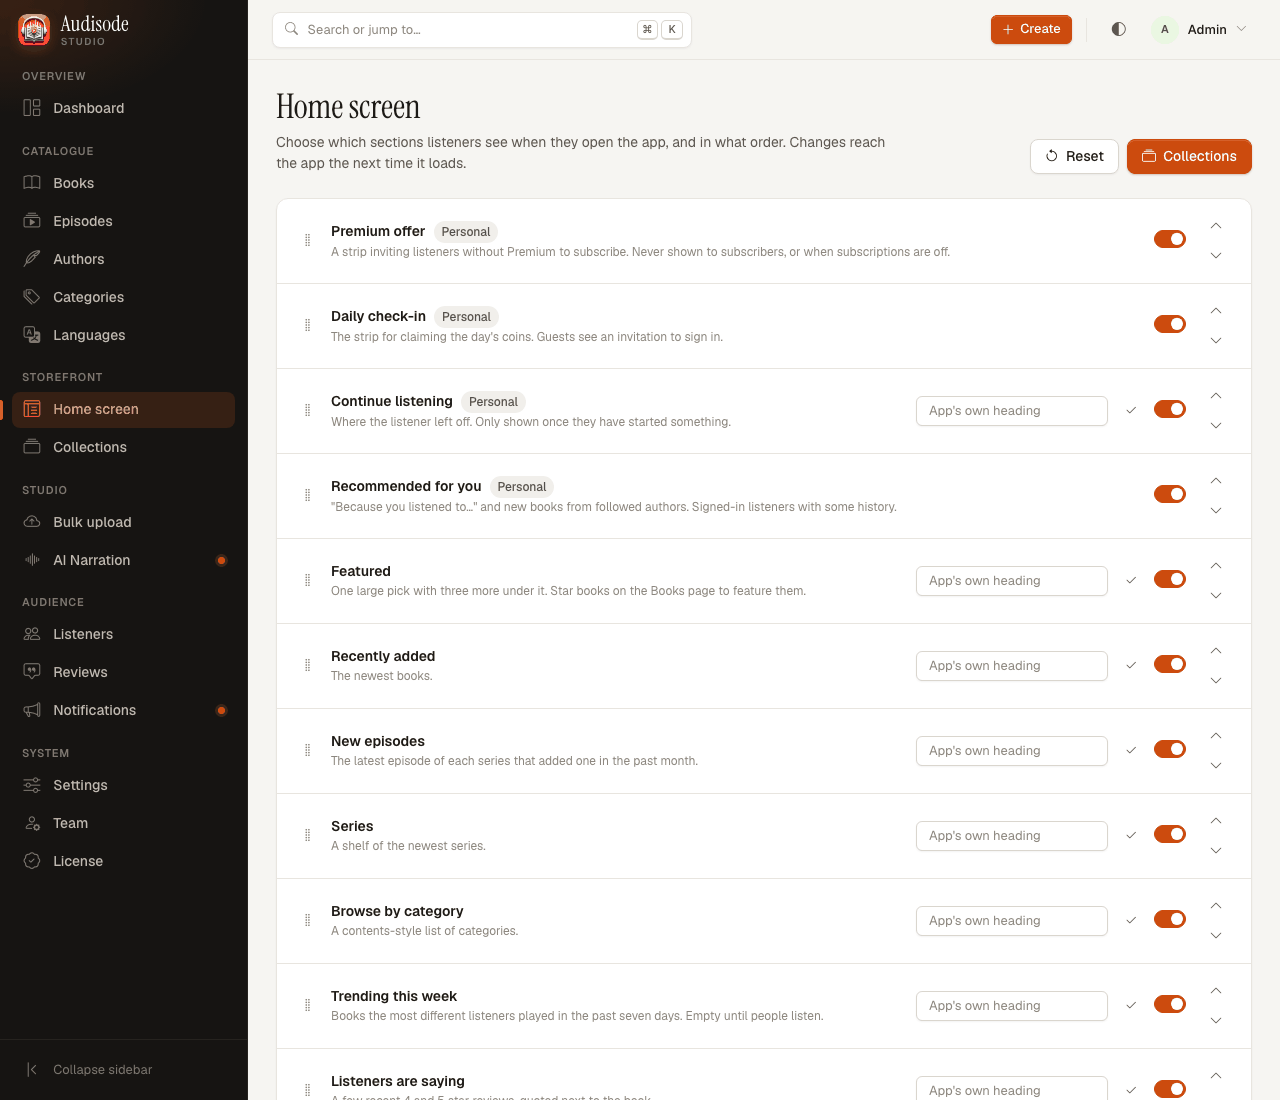
- Sections you can show, hide and reorder: Premium offer, Daily check-in, Continue listening, Recommended for you, Featured, Recently added, New episodes, Series, Browse by category, Trending this week, Listeners are saying, Free to listen, Your week, Top rated, Top 10, Author spotlight and Authors.
- Sections tagged Personal are filled in by the app from each listener's own activity. You only decide whether they appear and where.
- Most sections let you type a heading of your own.
- Collections you create appear here too. Reset restores the original order.
6.6Collections
Hand-picked shelves, such as "Staff picks" or "Summer thrillers".
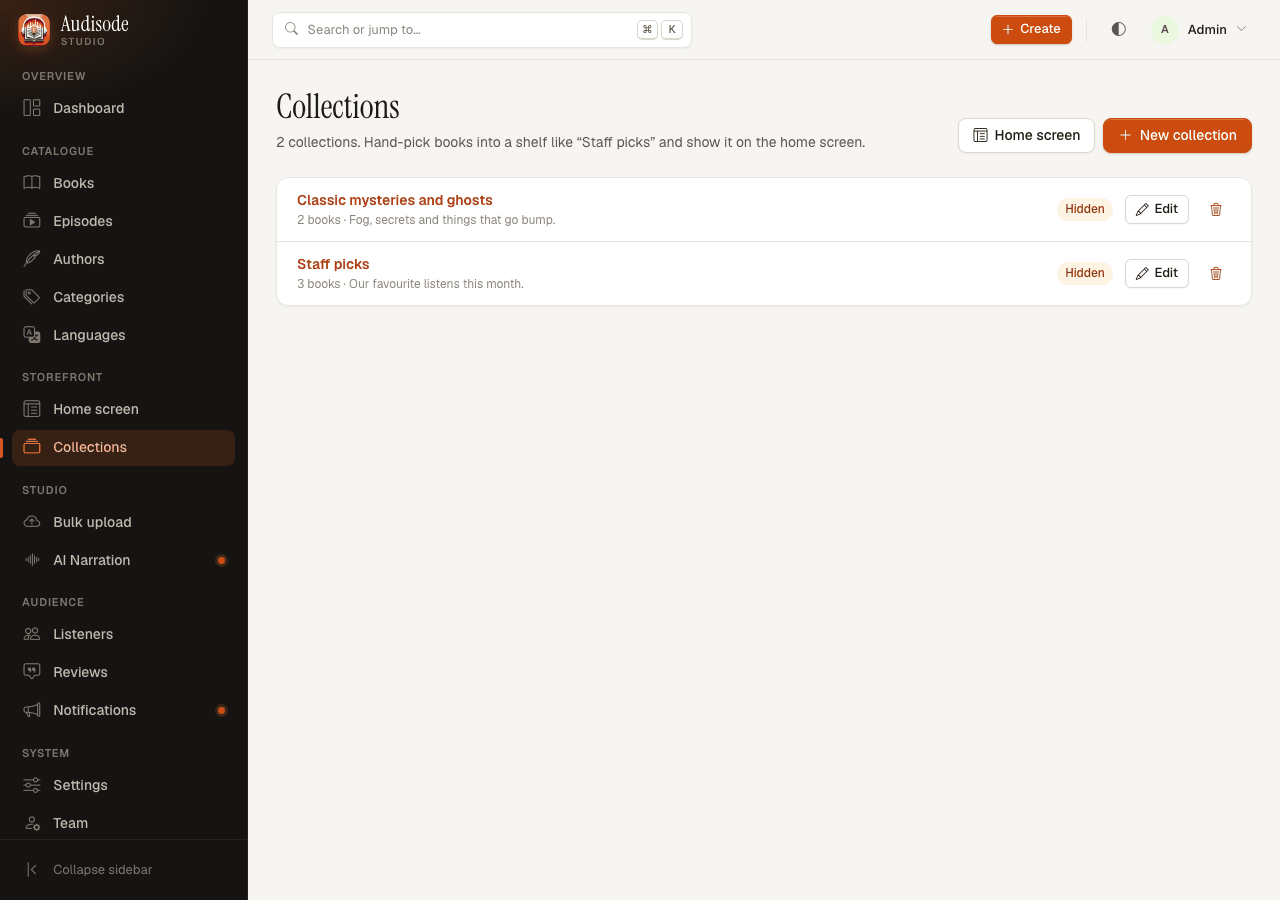
- Create a collection with a heading and a short description, then add books and put them in order.
- A new collection is placed under Featured on the home screen; move it on the Home screen page.
6.7Authors
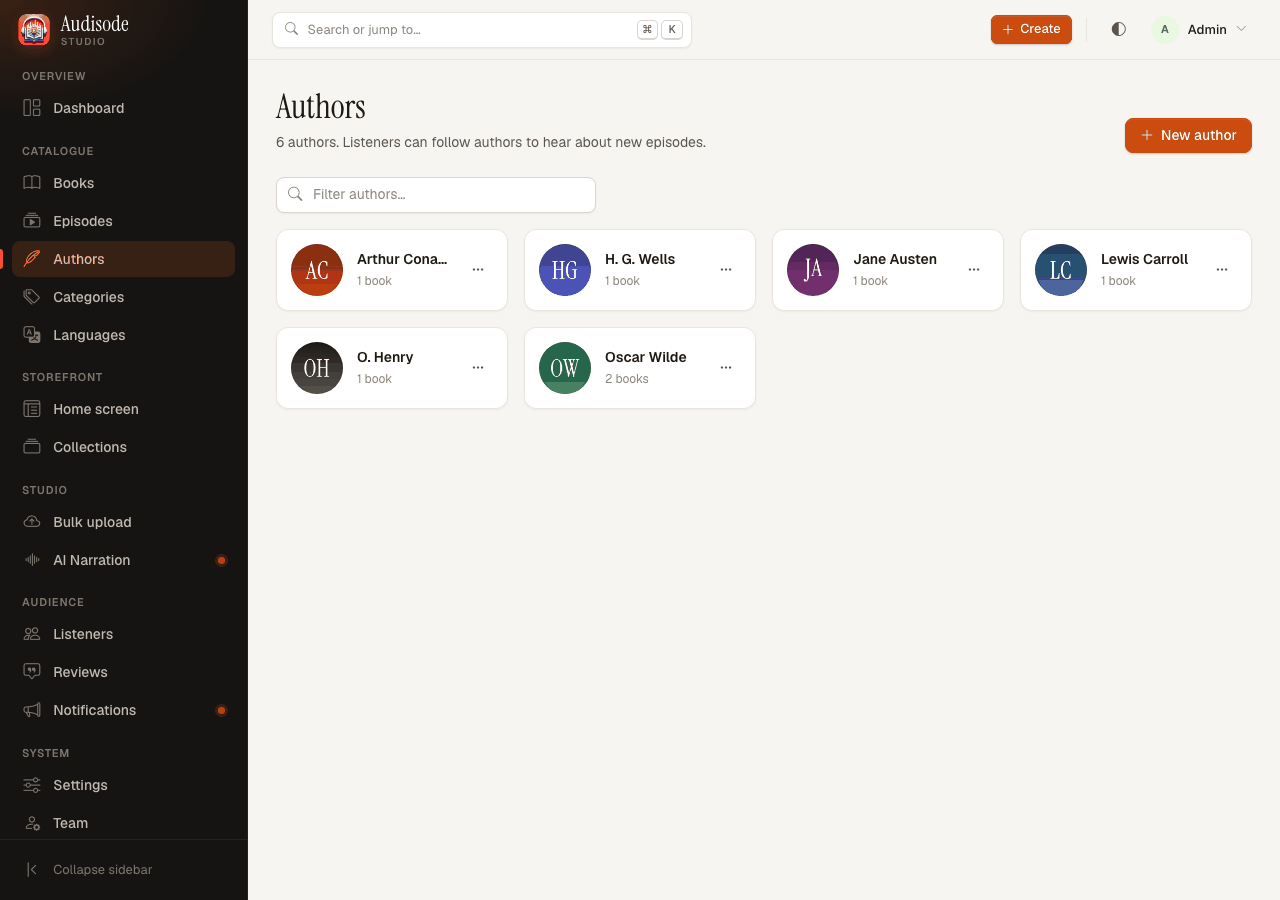
- Add authors with a name, a photo and a short bio.
- Authors who have a bio can be featured in the home screen's Author spotlight, and the bio shows on their page in the app.
- Listeners can follow an author and get an alert when a new episode arrives.
6.8Categories
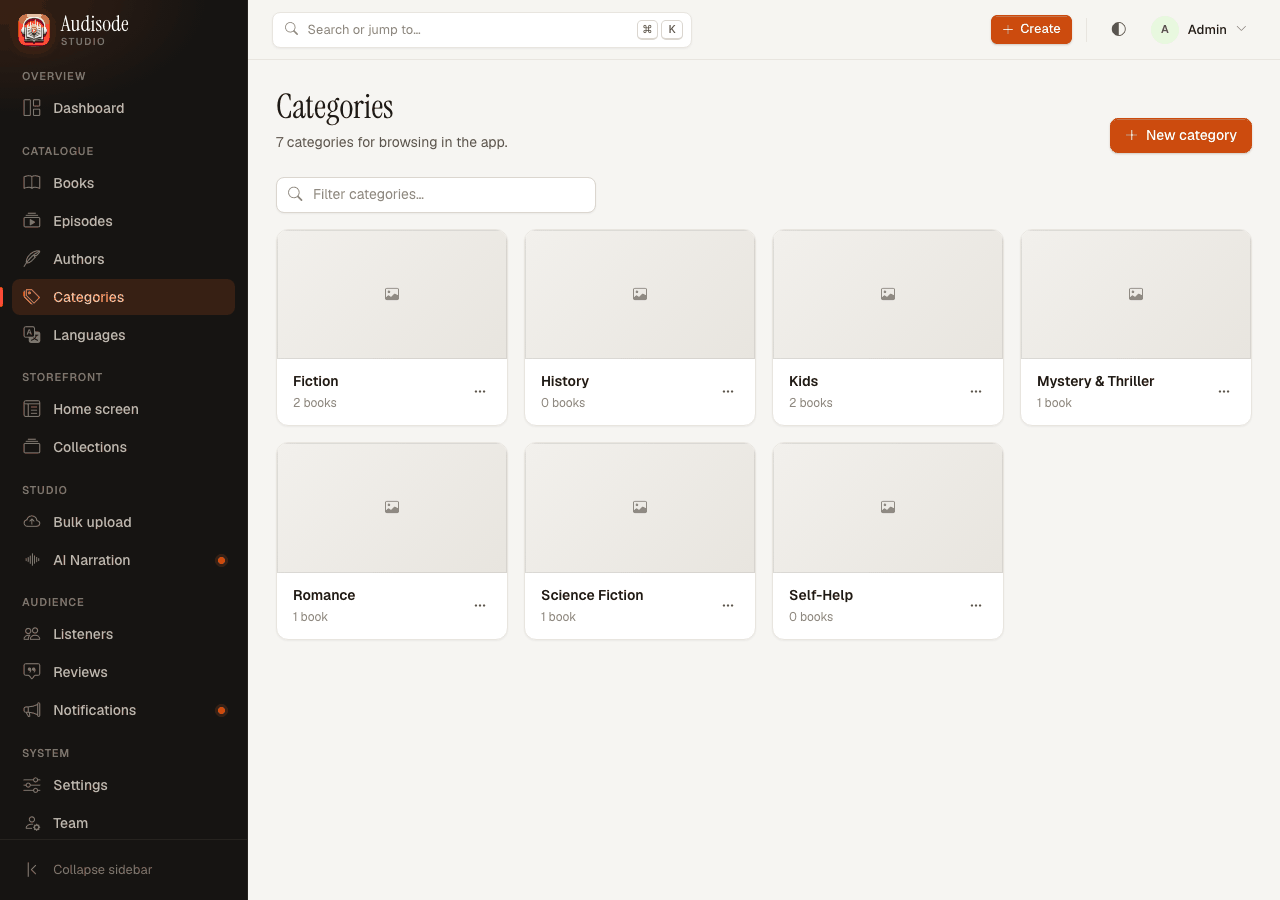
The topics listeners browse by, such as Fiction or Kids. Add, rename and delete them here.
6.9Languages
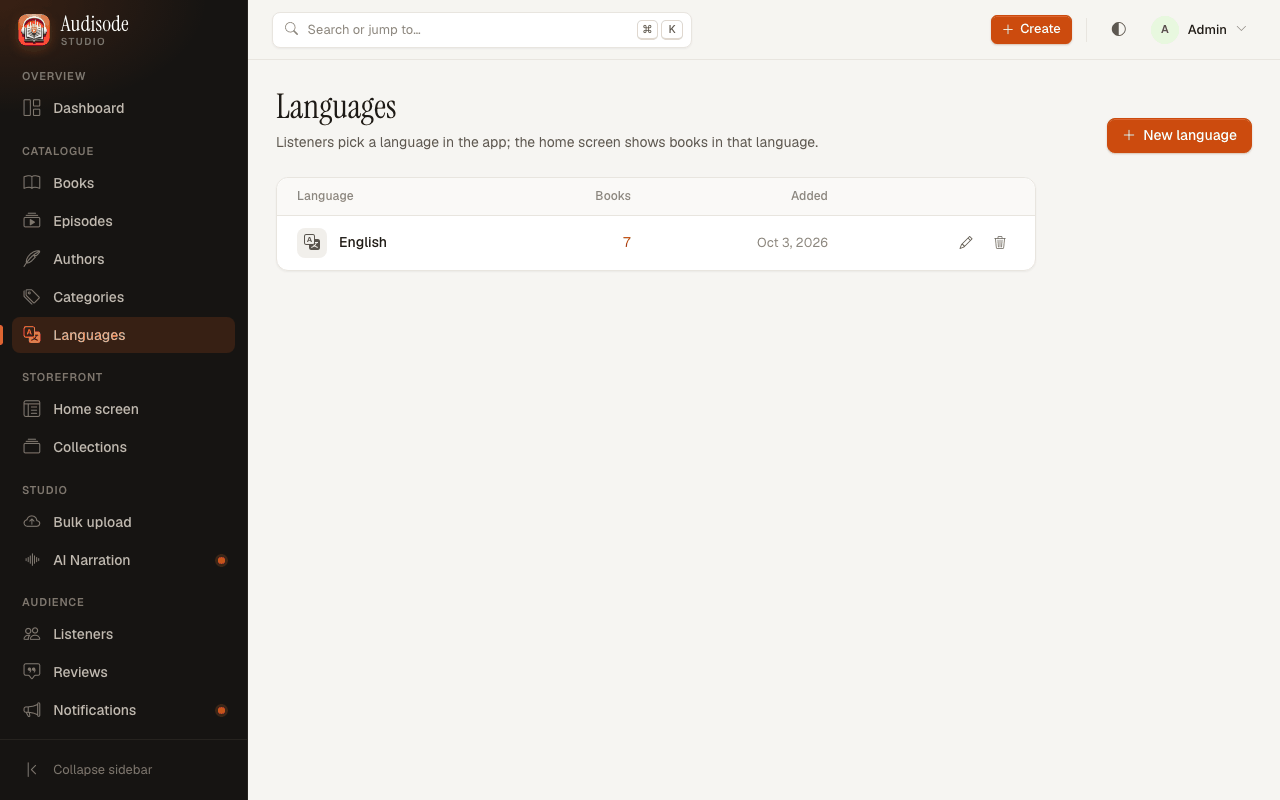
The languages of your audiobooks. Listeners pick one in the app, and the home screen shows books in that language. This is separate from the language of the app's own text; see section 15.9.
6.10AI NarrationOptional
Paste text and a voice reads it aloud. See section 7.5.
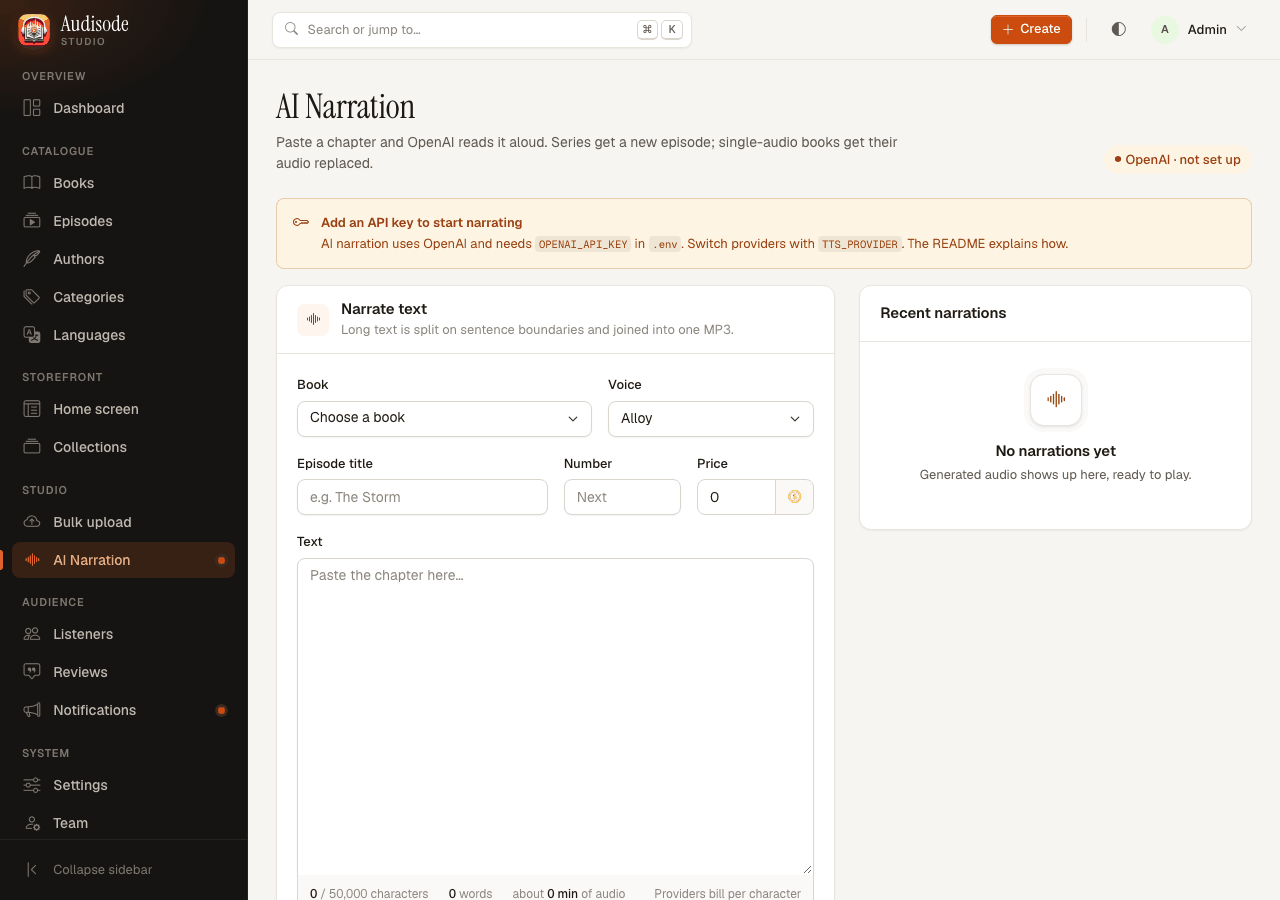
- Choose a book and a voice, paste the text. For a series it becomes a new episode (title, number, price); for a single audio it replaces the audio.
- Long text is split on sentence boundaries and joined into one MP3.
- Failed jobs can be retried or deleted. It needs an API key in .env.
6.11Listeners
Everyone who uses the app.
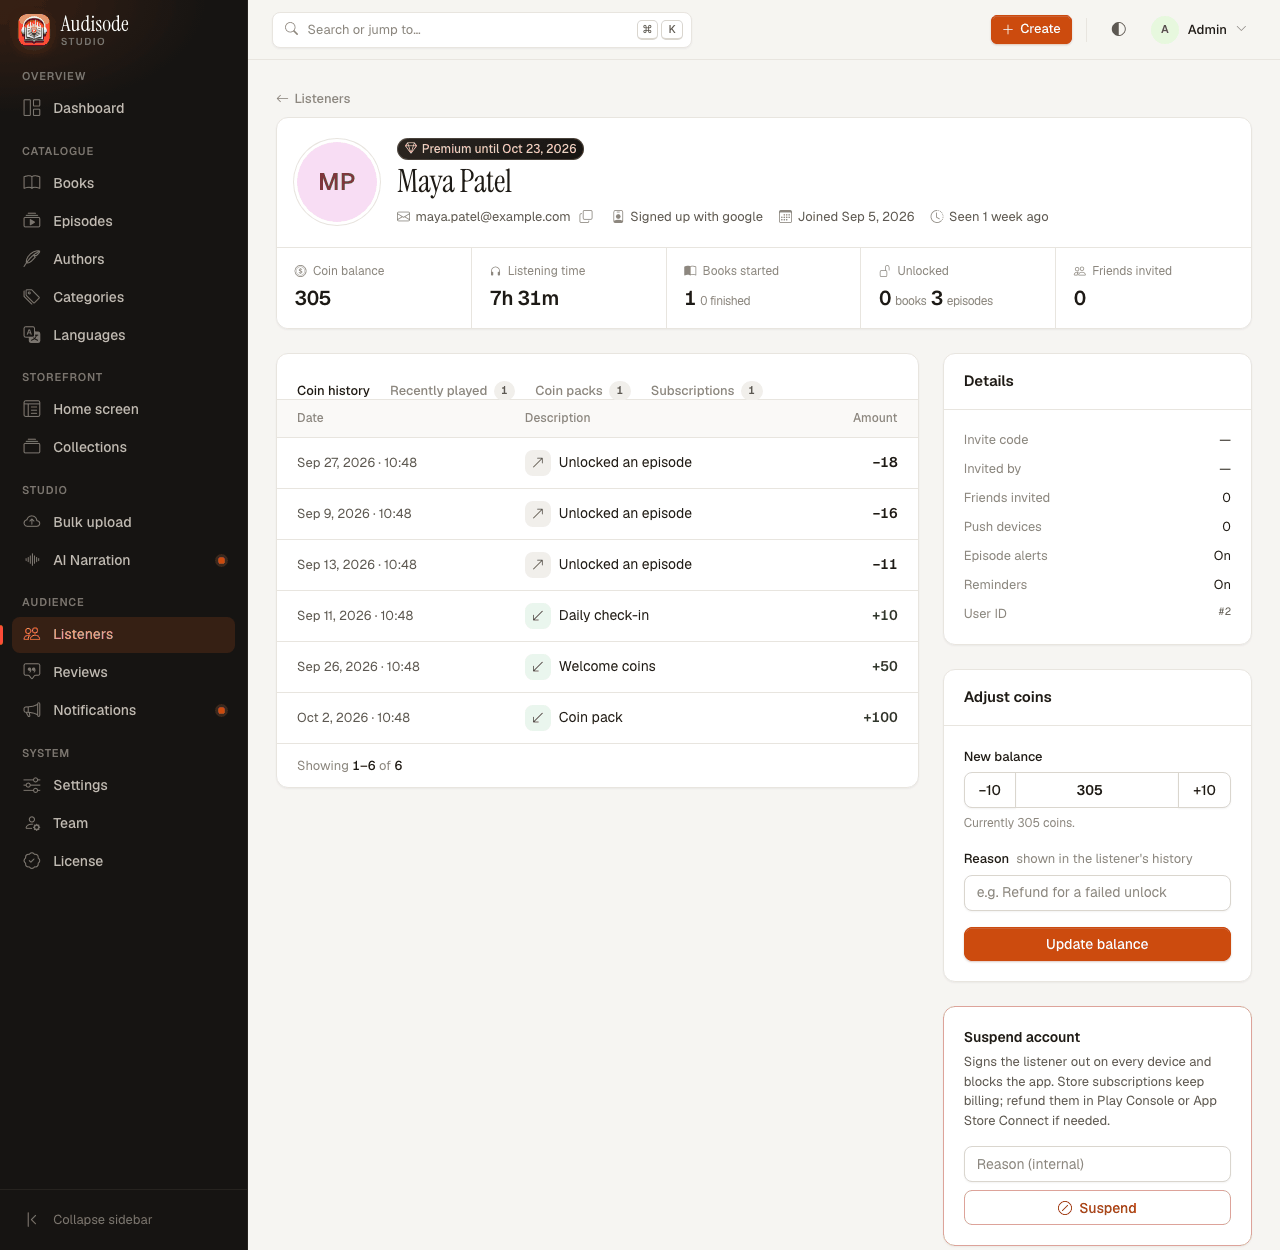
- Search by name, email or invite code. Filter by Premium, suspended or active.
- Each listener's page shows listening time, books started, unlocks, recently played, subscriptions, coin pack purchases and the full coin history.
- Adjust coins: set a new balance and give a reason. The listener sees the reason in their coin history.
- Suspend signs the listener out on every device and blocks the app. Store subscriptions keep billing; refund them in Google Play Console or App Store Connect if needed. You can restore the account later.
6.12Reviews
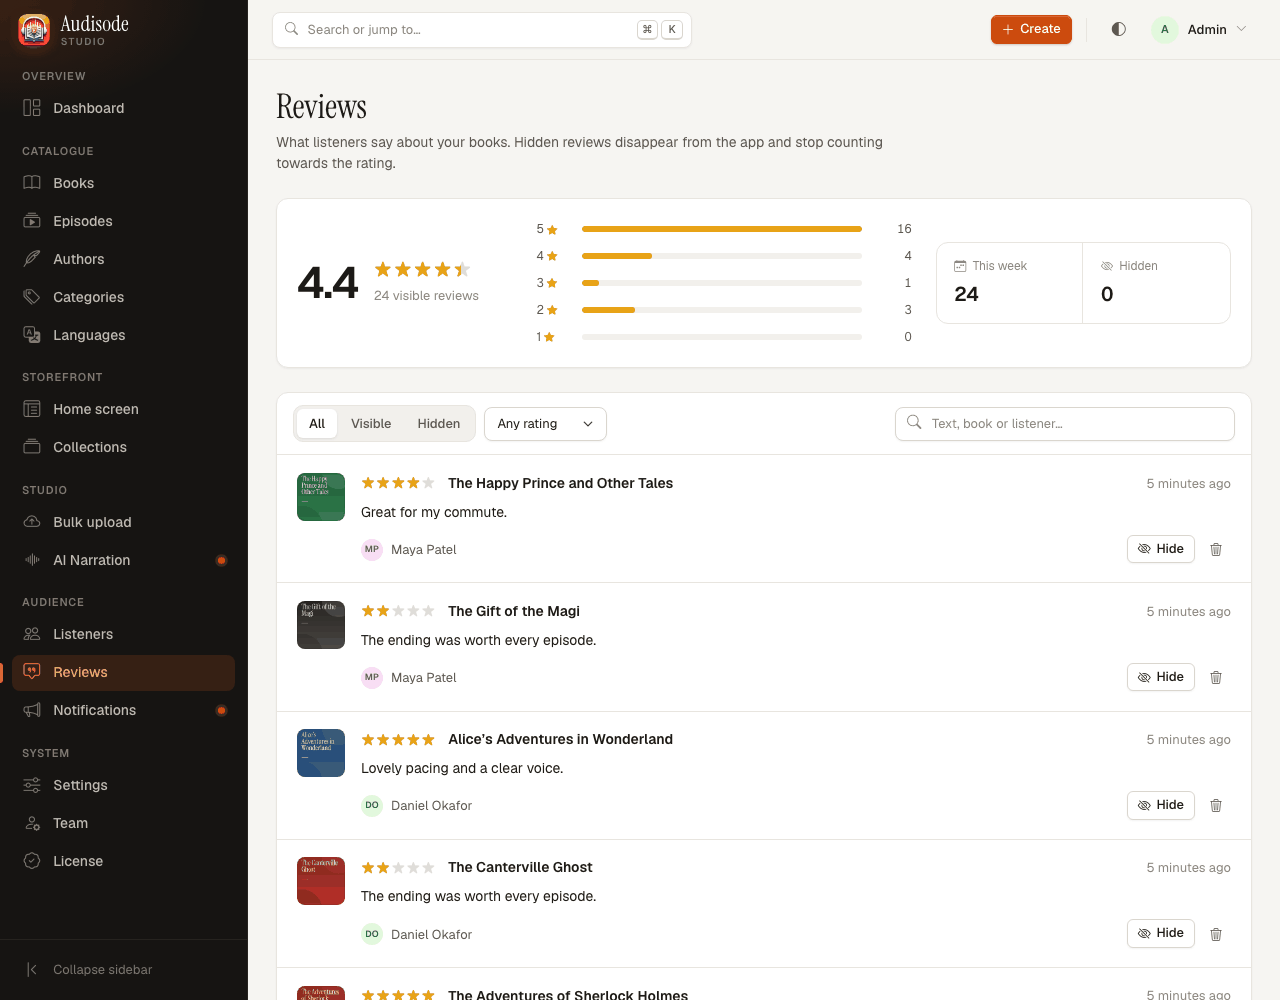
- A rating summary, search and filters, including low ratings.
- Hide removes a review from the app and from the book's rating, and you can bring it back. Delete removes it for good.
6.13NotificationsOptional
Send an announcement to listeners' phones. It needs Firebase push set up first: section 12.
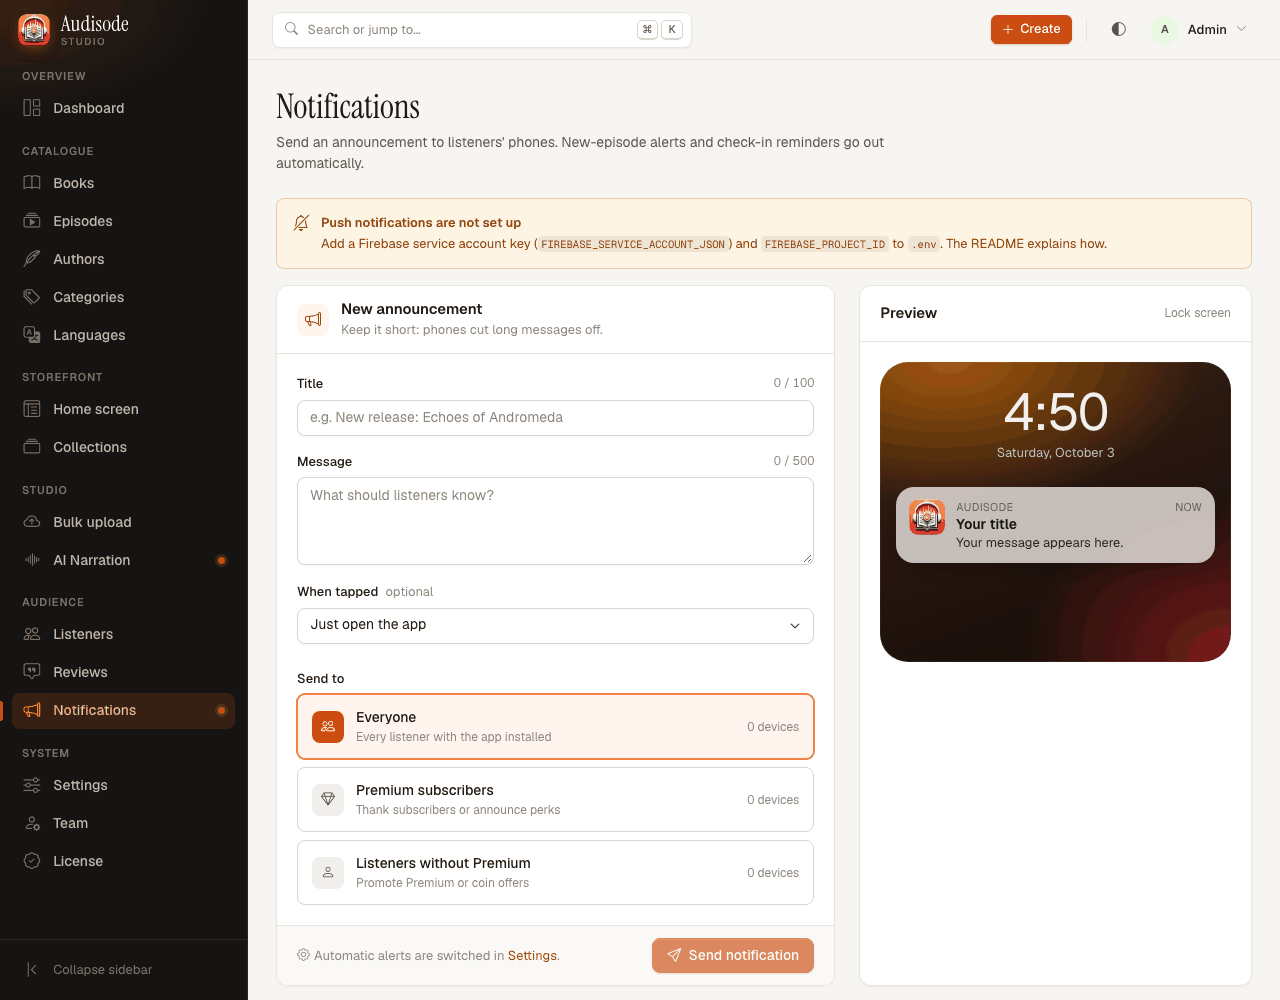
- Write a title and message, choose who gets it (everyone, Premium subscribers, or free listeners), and choose whether tapping opens the app or a particular book.
- The page shows how many devices each audience reaches.
- New-episode alerts and check-in reminders go out automatically; you only switch them on in Settings.
6.14Settings
How the app rewards, sells and talks to listeners. Changes reach the app the next time it loads its settings. Use the list at the left to jump between sections, then press Save settings at the bottom. There are nine sections.
Coins & rewards
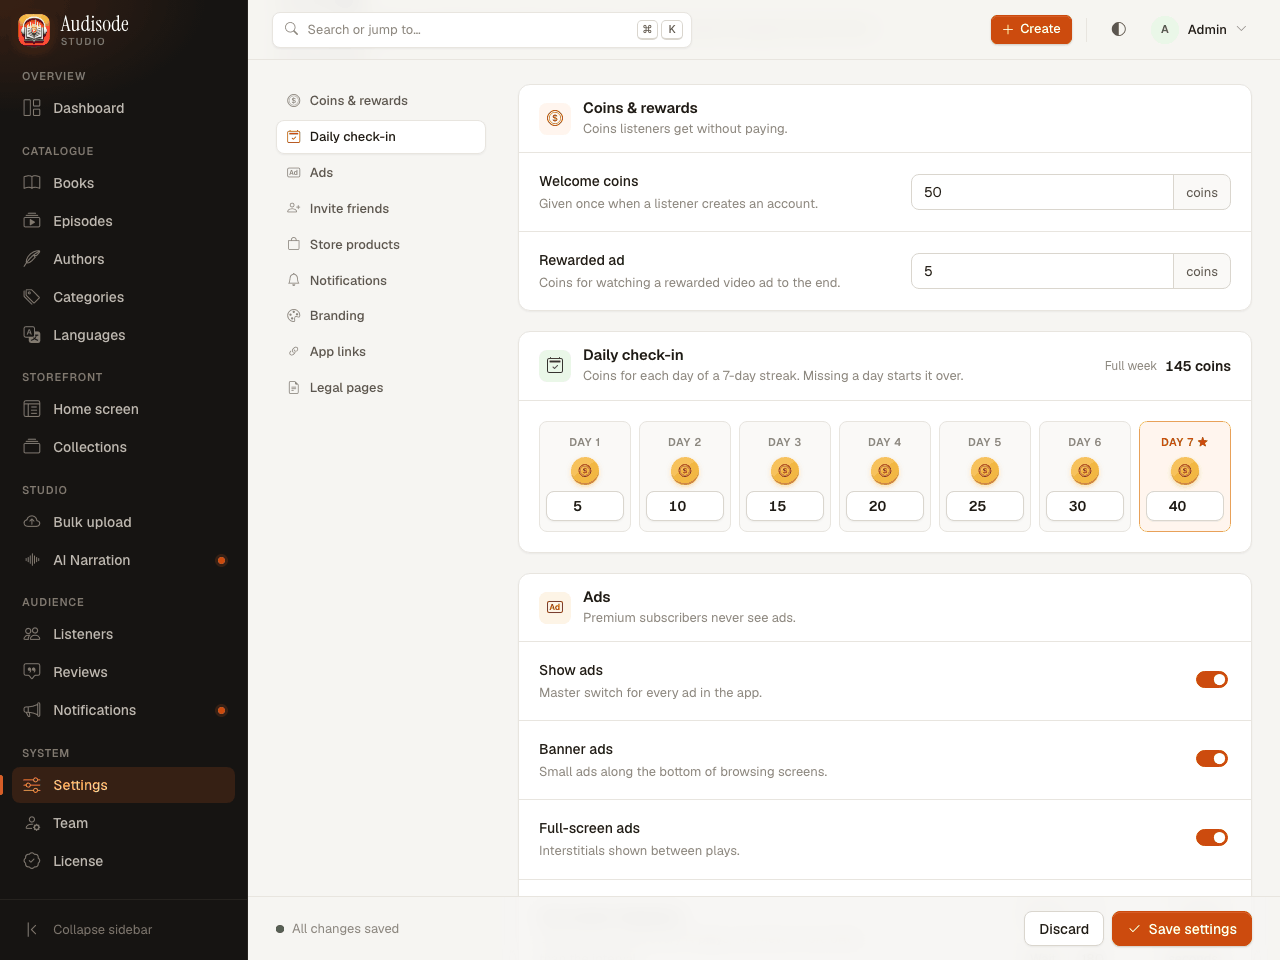
Welcome coins are given once when a listener creates an account. Rewarded ad is the number of coins for watching a rewarded video to the end.
Daily check-in
Coins for each day of a seven-day streak. Missing a day starts the streak over. The page adds up a full week for you.
Ads
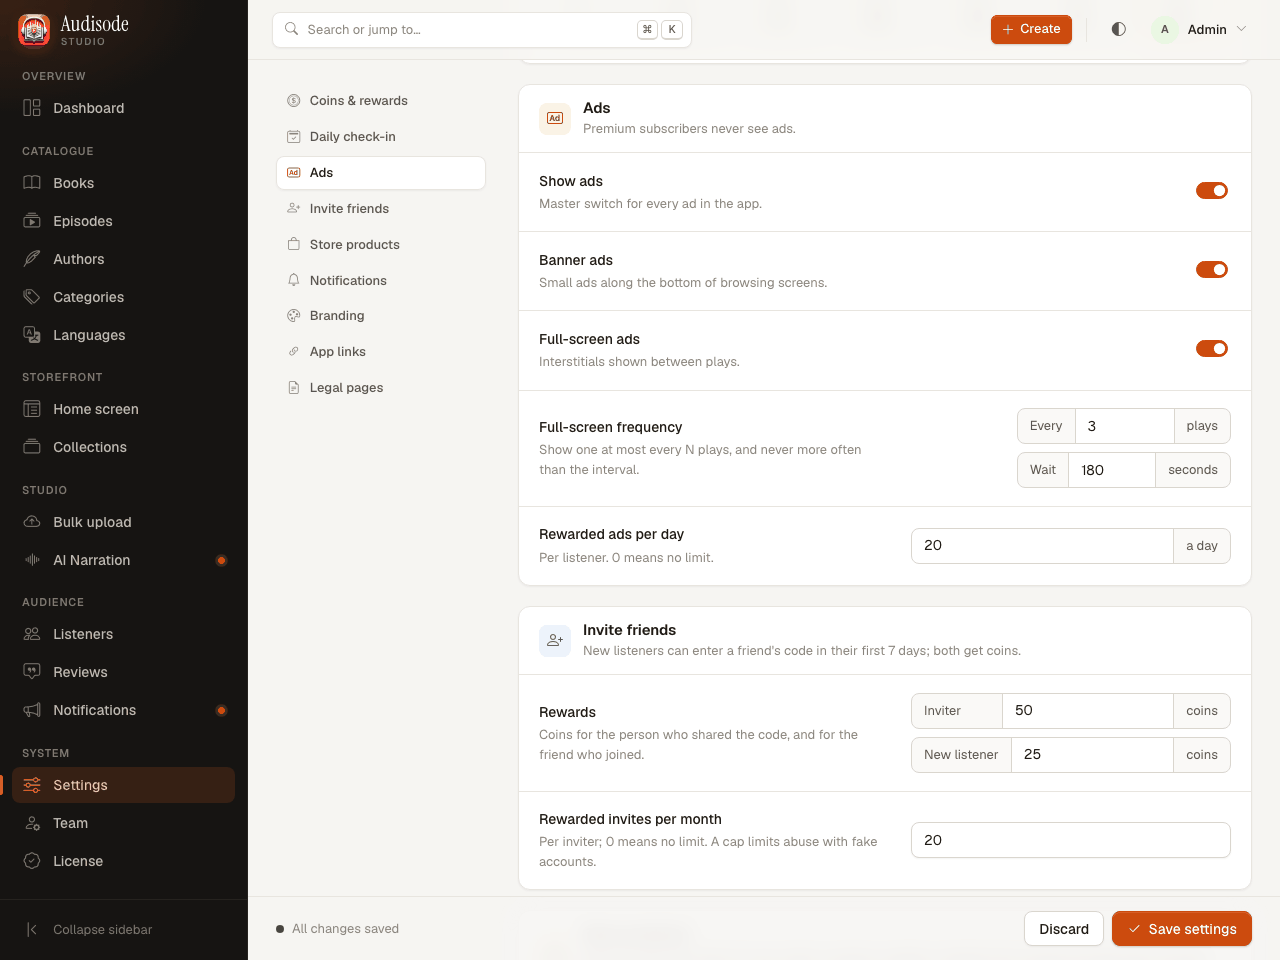
A master switch for every ad, then banner ads, full-screen ads, how often a full-screen ad may appear (at most one every N plays and never more often than the interval), and how many rewarded ads one listener may watch per day (0 means no limit). Premium subscribers never see ads.
Invite friends
Every listener has an invite code. A new listener can enter a friend's code in their first 7 days and both get coins. Set the rewards, and the monthly limit of rewarded invites per inviter (0 means no limit; a cap limits abuse with fake accounts).
Store products
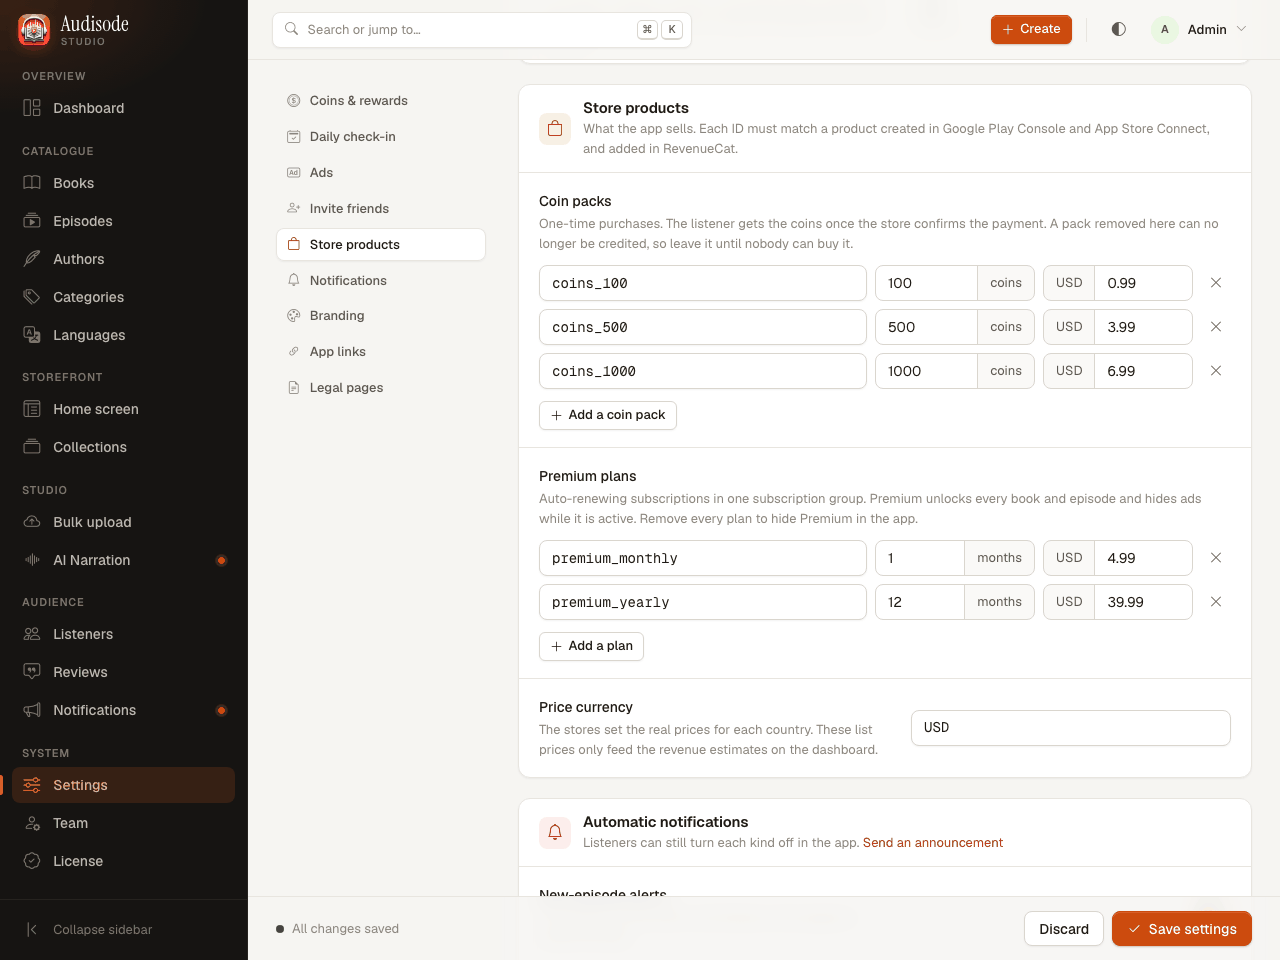
The coin packs and Premium plans the app sells. Remove every Premium plan to hide Premium in the app.
Notifications
Switch on new-episode alerts (to followers of the author and listeners who played or saved the book) and check-in streak reminders, and choose the reminder hour in your server's time zone. Listeners can still turn each kind off in the app.
Branding
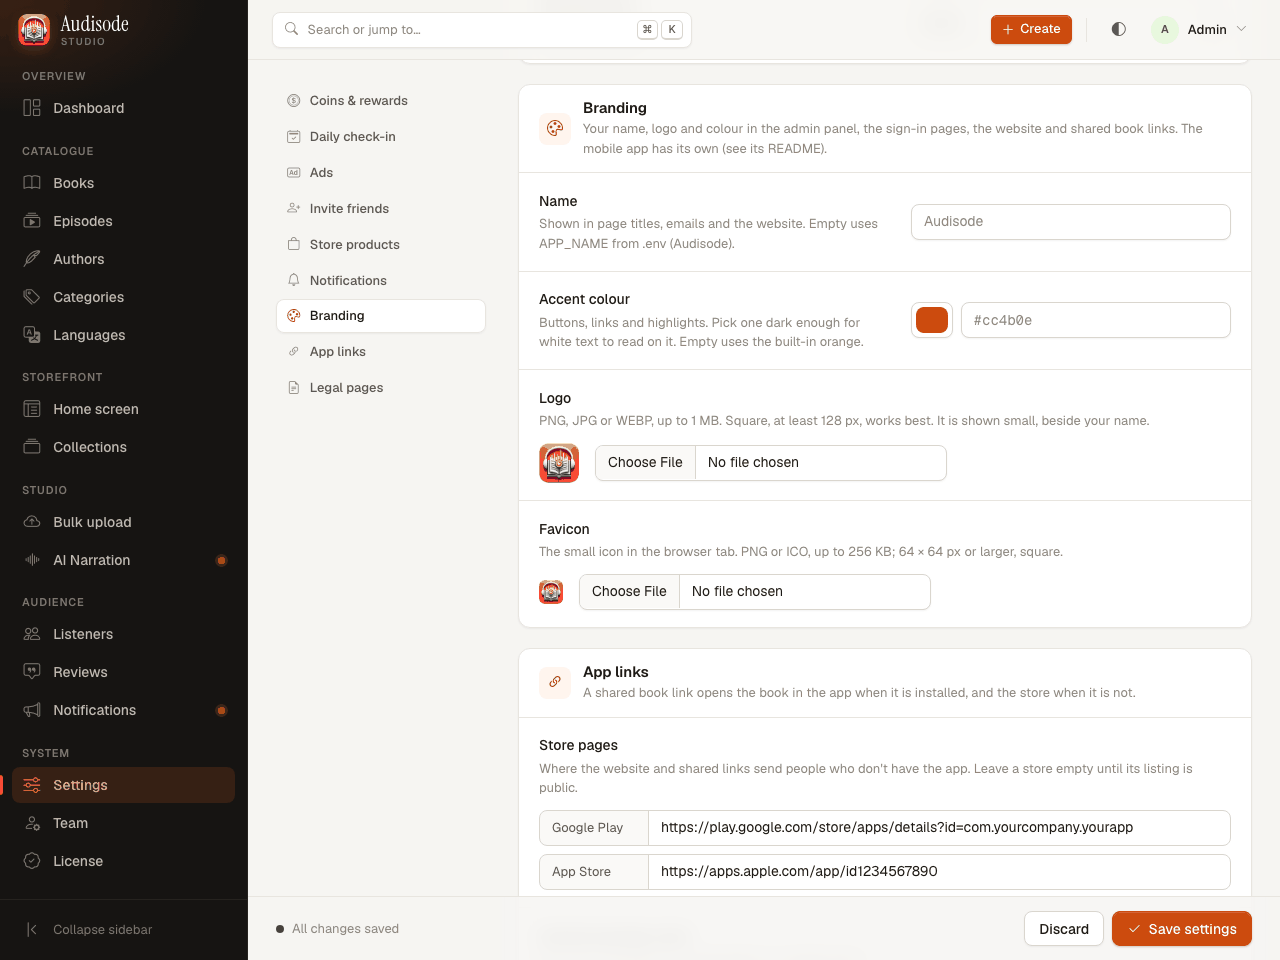
Your name, accent colour, logo and favicon for the admin panel, sign-in pages, public website and shared book pages. The name replaces APP_NAME on web pages and in emails. Choose an accent colour dark enough for white button text (the form tells you if it is not). Logos are PNG, JPG or WEBP up to 1 MB; favicons PNG or ICO up to 256 KB; SVG is refused on purpose. The mobile app has its own name, icon and colours: section 15.
App links
Where shared book links lead. Section 13 explains it.
Legal pages
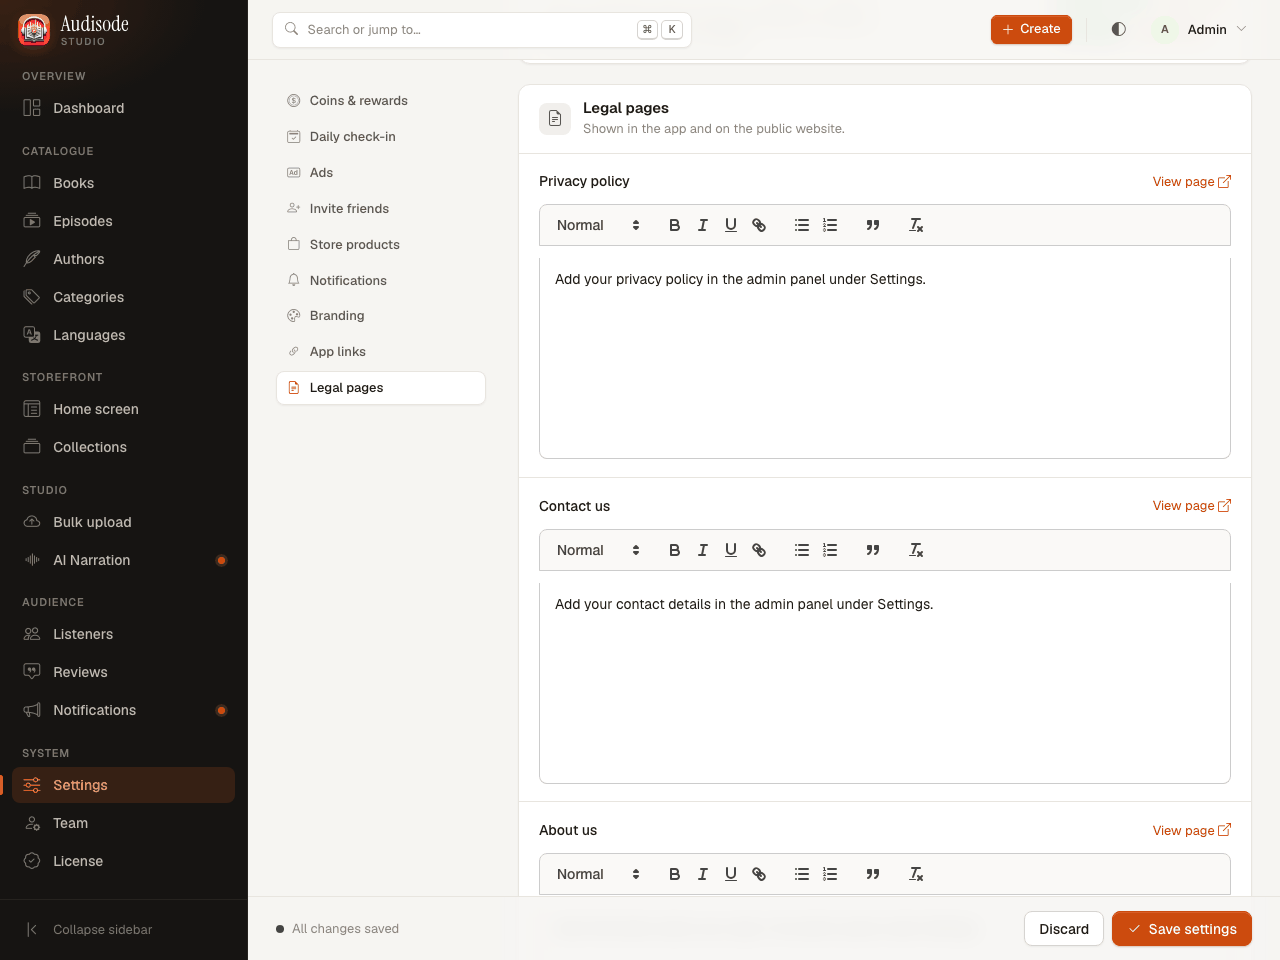
Your privacy policy, contact us and about us text, written in a simple editor. They show in the app (Profile menu) and on the public website at /page/privacy_policy, /page/contact_us and /page/about_us. Both stores require a privacy policy, so fill it in before you submit.
6.15Team
Everyone who can sign in to the panel. Under System in the menu.
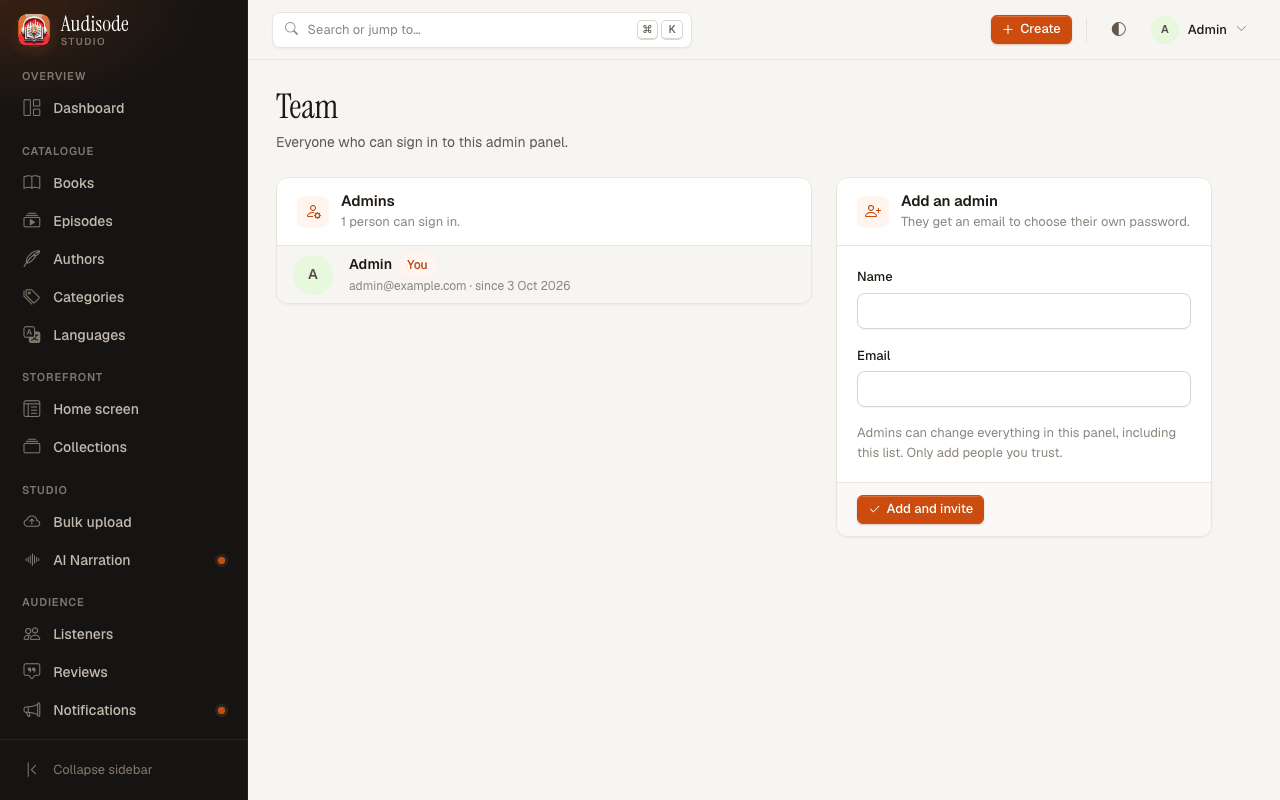
- Add and invite creates the account and emails the new admin a link to choose their own password. If the server has no real mail set up yet, the page shows the link for you to send by hand.
- The link works for 60 minutes. Invite again sends a new one.
- You cannot remove yourself, and the last admin can never be removed.
- Admins can change everything in the panel. Only add people you trust.
6.16License
The licence for this copy. Under System in the menu.
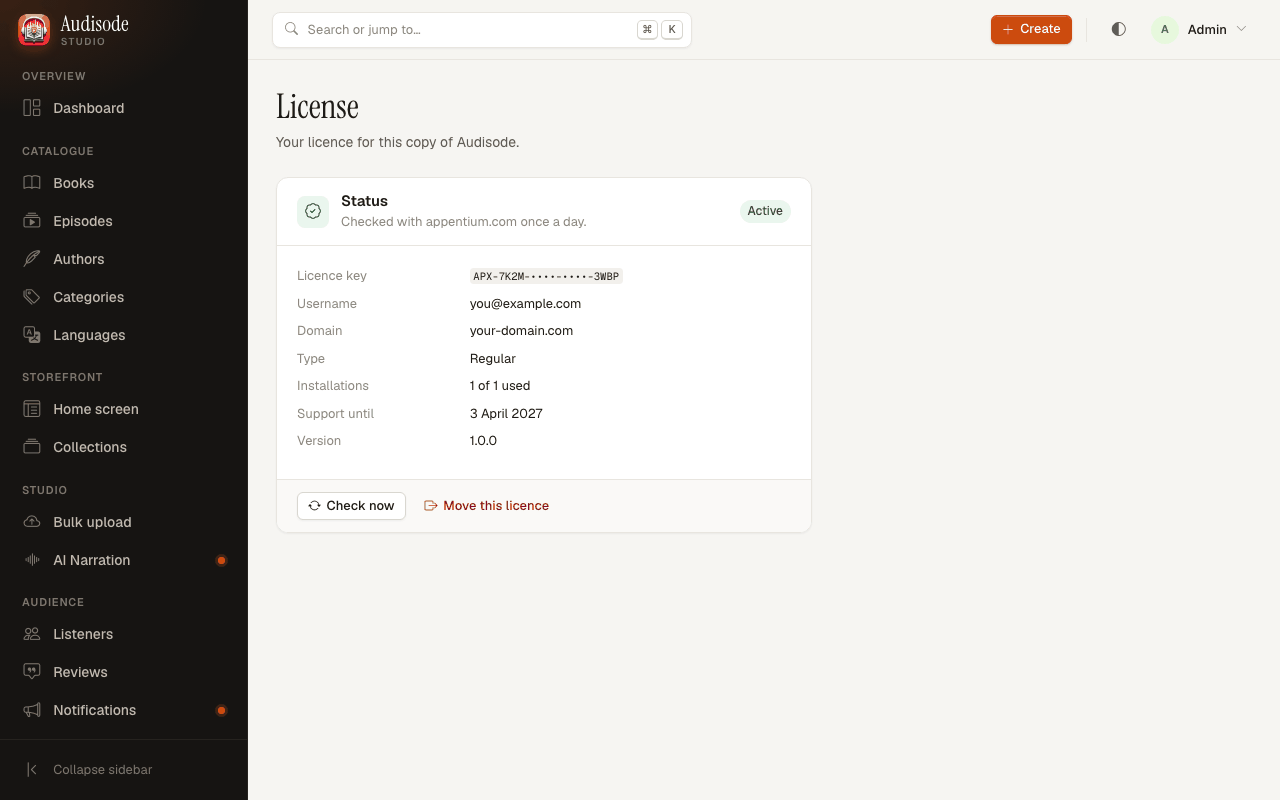
- Shows the status, a masked licence key, the domain, installations used, the date support ends and whether a newer version exists.
- Check now asks the licence server straight away. The scheduler also checks once a day.
- Move this licence gives the domain back so you can use the licence on another site. A subdomain counts as a different domain.
- If the licence server cannot be reached, nothing changes: the product keeps running on the last answer. Only a refusal from the server shows a notice, with its reason.
6.17Account
Your own sign-in details: top-right menu, Account.
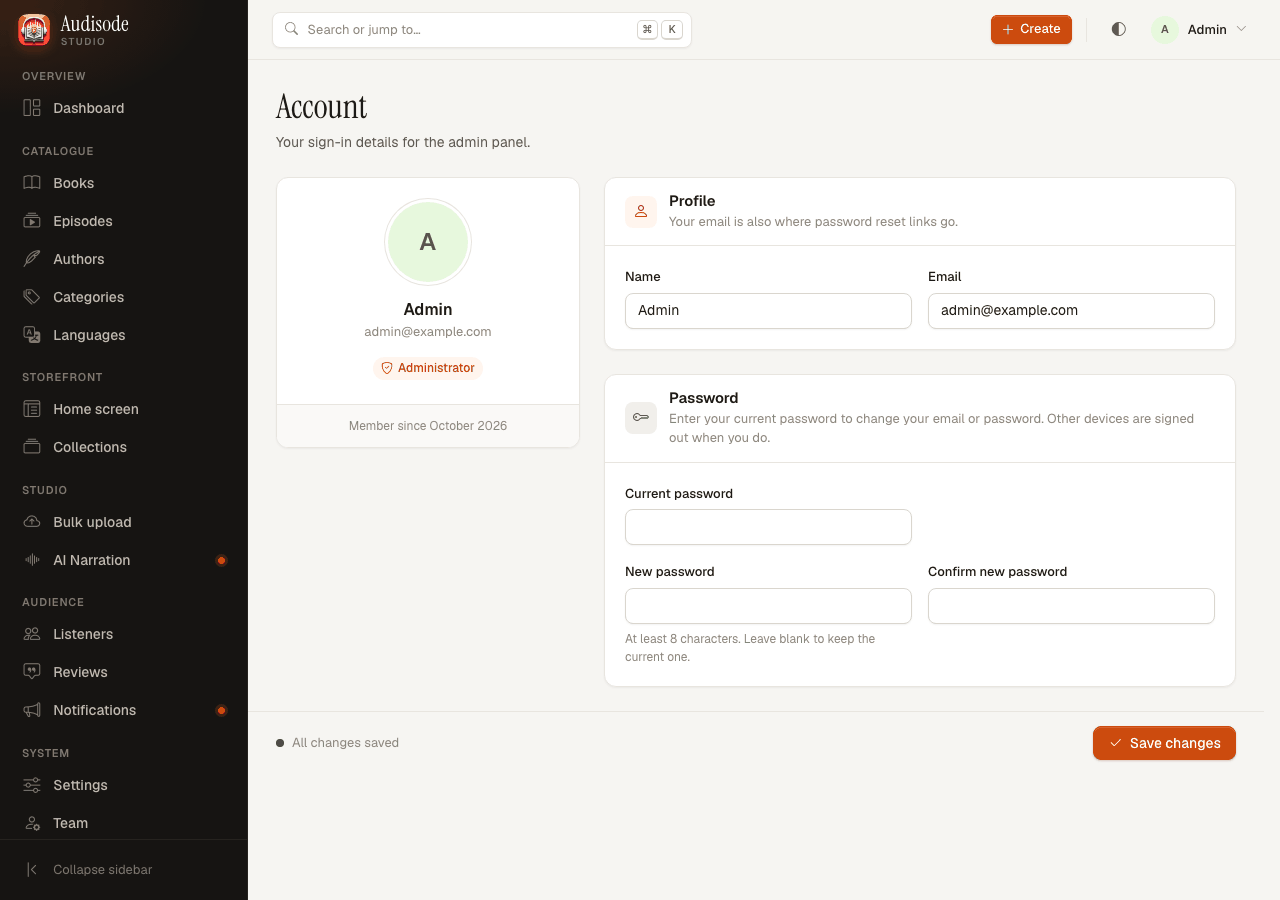
Change your name, email or password. Changing the email or the password asks for your current password and signs out every other browser.
6.18The public website
Your domain's home page (/) is a small public website with your name, store badges and links to the legal pages. The store badges appear only for the stores whose links you filled in under Settings > App links. The admin sign-in is a small link in the footer.
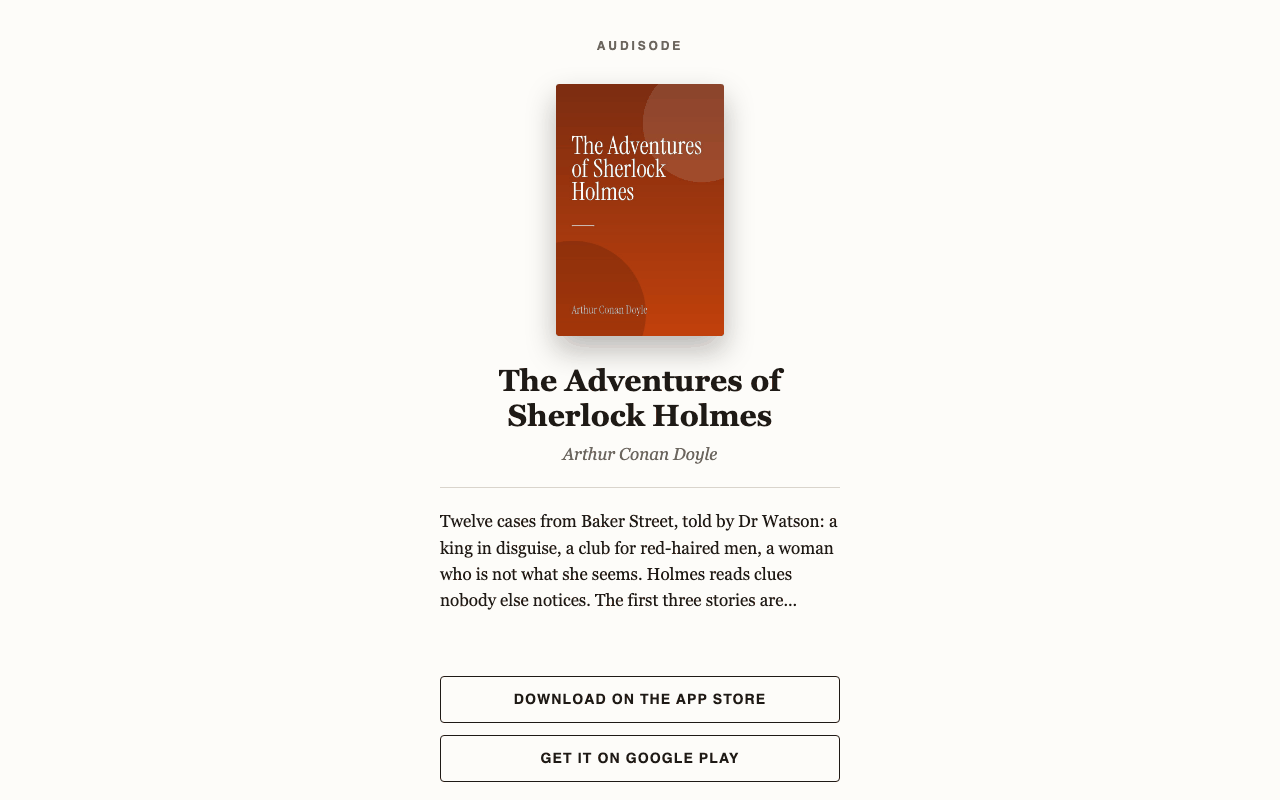
app-screenshot in audisode_backend/public/1/images/.A shared book link (https://your-domain.com/book/12) opens a page with the book's cover and summary and sends phones on to the app or the store. See section 13.
7Adding contentAdmin panel
Work through the left-hand menu from top to bottom. This is the order that saves you backtracking: a book needs an author, a category and a language to exist first.
7.1Languages, categories and authors
Languages. The installer added English if you used
--demoor--sample-books. Add the languages your audiobooks are in. Listeners pick one in the app and see books in that language.Categories. Add the topics listeners browse by (Fiction, Kids, Mystery & Thriller…).
Authors. Add each author with a name and, if you like, a photo and a short bio. A bio makes the author eligible for the home screen's Author spotlight.
7.2A single-audio book
One file, one price. Good for a complete audiobook.
Open Books and click New book.
Choose the format Single audio. Enter the title and summary, and pick the author, category and language.
Upload a cover image.
Set the price in coins.
0makes it free. Premium subscribers always listen for free.Upload the audio file, or paste a link to it. See uploaded and linked audio below.
Save. Check the dashboard: a single audio without audio shows up under Needs attention.
7.3A series with episodes
Many short episodes under one book. Each episode has its own price, so you can make the first few free.
Click New book and choose the format Series. A series has no price of its own.
Add episodes one at a time on the Episodes page: open the series, then New episode. Give each a title, a number, a price and its audio.
Or add them all in one go with bulk upload.
7.4Bulk upload
The quickest way to add a whole season. In the menu, open Bulk upload (or the Bulk upload button on the Books page).
Choose the series the episodes belong to, and the number the first file should get.
Choose how titles are made. From file names uses the name of each file; the other choice names them "Episode 1", "Episode 2" and so on.
Set the price per episode and how many of the first episodes are free. A free sample hooks listeners.
Drop the audio files in. Name them with the number first:
01 Intro.mp3,02 The Journey.mp3. Files are put in order by the number their name starts with, soEpisode 3 - Title.mp3,03_Title.mp3and3 Title.mp3all sort as 3. With From file names, the number and separators are removed from the title:03 - The Long Night.mp3becomes "The Long Night".Check the preview table and click Upload episodes. Followers of the author and listeners who played or saved the book get one notification for the whole batch, not one per episode.
When uploads are rejected for size
PHP limits how much one upload may hold. The Bulk upload page shows your server's limits and warns you before you send. If they are too small, raise them: in cPanel open MultiPHP INI Editor, or edit php.ini (or .user.ini) on your own server.
upload_max_filesize = 256M
post_max_size = 300M
max_file_uploads = 50
max_execution_time = 300
post_max_size must be larger than upload_max_filesize. If you use nginx, also raise client_max_body_size. When even that is not enough, upload big seasons in parts, a few files at a time.
7.5AI narrationOptional
Put the key in .env and run
php artisan config:cache.dotenvTTS_PROVIDER=openai OPENAI_API_KEY=sk-... # or TTS_PROVIDER=elevenlabs ELEVENLABS_API_KEY=... ELEVENLABS_VOICES="Rachel:21m00Tcm4TlvDq8ikWAM,Adam:pNInz6obpgDQGcFmaJgB"Open AI Narration. The orange dot beside it in the menu disappears once a key is set.
Choose a book and a voice. For a series, add the episode title, number and price. Paste the text (up to
TTS_MAX_CHARACTERS, 50,000 by default) and send it.Wait. The job list refreshes itself. When it finishes, a series gets a new episode (and listeners are notified) and a single-audio book gets its audio replaced.
This needs the scheduler (cron) or a queue worker running: see the queue. A failed job shows on the dashboard; retry it from the AI Narration page.
7.6Arrange the home screen and collections
Star the books you want under Featured on the Books page.
Make collections ("Staff picks") on the Collections page: a heading, a description, and the books in order.
On Home screen, drag the sections into the order you want, switch off the ones you do not need, and give most of them your own heading. Collections show up in the list; move them where they belong.
Sections such as Trending this week stay empty until listeners play books. Changes reach the app the next time it opens.
7.7Audio formats, uploaded and linked audio
Audio can be uploaded as MP3, WAV, M4A, M4B or AAC. (M4B is the usual audiobook format.) Or you can paste a link to audio hosted somewhere else.
| Uploaded audio | Linked audio | |
|---|---|---|
| Where it lives | In storage/app/private/media, outside the web root (or in your S3 or R2 bucket) | Wherever the link points |
| How the app plays it | The app asks the backend, which checks the listener may play the title and hands back a signed link that expires after MEDIA_URL_TTL_MINUTES | The link is handed to the app as it is |
| Protected? | Yes: a paid title is never given to a listener who has not unlocked it | No: anyone who sees the link can use it |
| Use it for | Paid content | Free content, or audio you host and protect yourself |
8Coins, Premium and the economyAdmin panel
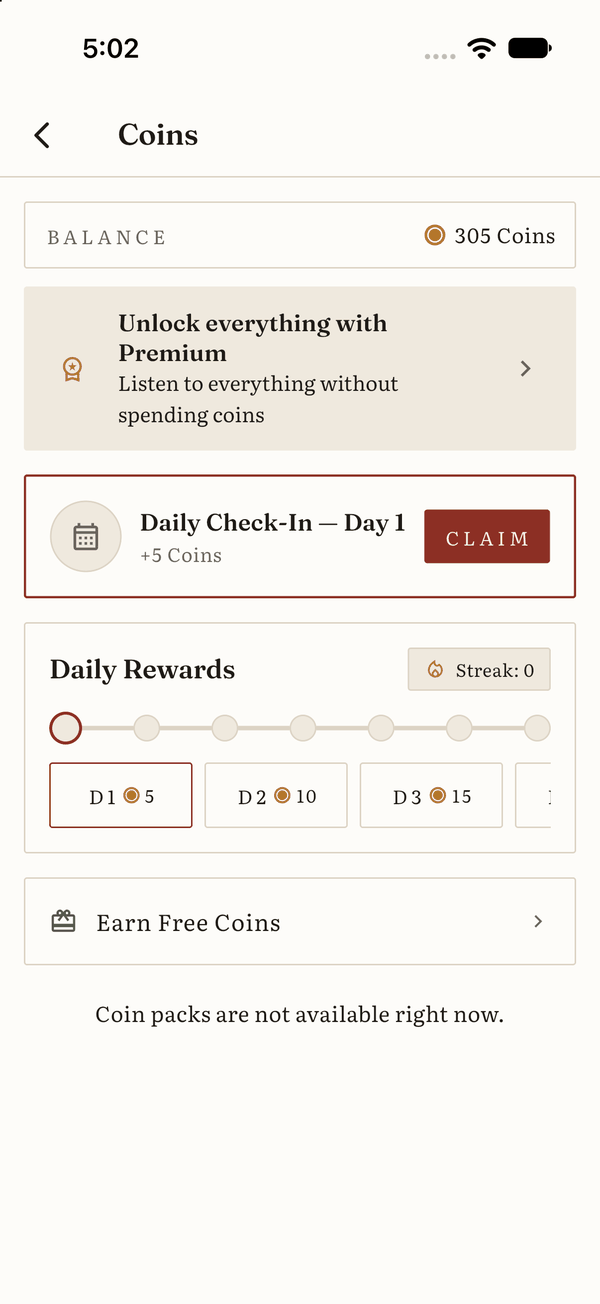
Coins are the app's currency. Listeners earn them or buy them, and spend them to unlock books and episodes. Everything is decided on the server and every price is read from the database, so the app cannot cheat.
8.1How listeners earn coins
| Way to earn | How it works | Where you set it |
|---|---|---|
| Welcome gift | Given once when a listener creates an account. | Settings > Coins & rewards |
| Daily check-in | A seven-day streak with a different amount each day. Missing a day starts it over. A reminder is sent before the streak resets. | Settings > Daily check-in, and Settings > Notifications for the reminder |
| Rewarded ad | Coins for watching a rewarded video to the end, up to a daily limit per listener. Coins are granted only when AdMob confirms it. | Settings > Coins & rewards, and Settings > Ads |
| Invite a friend | A new listener enters a friend's code in their first 7 days. Both get coins, up to a monthly limit per inviter. | Settings > Invite friends |
| Buying a coin pack | An in-app purchase through RevenueCat. Coins are credited once the store confirms the payment. | Settings > Store products |
| Your own adjustment | You can add or remove coins on a listener's page, with a reason the listener can see. | Listeners |
8.2How listeners spend coins
- A single-audio book is unlocked at the price set on the book.
- An episode of a series is unlocked at the price set on that episode. There is no "buy the whole series" price: each episode is unlocked on its own.
- Free titles (price
0) and the free first episodes need no coins. - An unlock is final: coins are deducted and the title is the listener's to keep.
- Listeners with Premium are never charged: everything is open to them.
8.3Premium
- Premium unlocks every book and episode, and removes all ads, while it is active.
- Plans are auto-renewing subscriptions that you set up under Settings > Store products and in the stores. Remove every plan and Premium disappears from the app.
- Cancelling keeps Premium until the period ends. A billing problem keeps it open for the store's grace period.
- Promotional entitlements you grant in the RevenueCat dashboard (a free month for a reviewer, say) work too.
8.4A worked example
You upload a 10-episode series and set 20 coins per episode with the first 2 free.
- A new listener hears episodes 1 and 2 at once, for nothing.
- Episodes 3 to 10 are 8 episodes at 20 coins: 160 coins to hear them all.
- With the default settings, a new listener starts with 50 welcome coins and a full week of check-ins pays another 145 (5, 10, 15, 20, 25, 30 and 40). That is 195 coins, enough to finish the series without paying.
- Or they buy the
coins_100pack twice (200 coins), or subscribe to Premium and listen to everything.
So tune the three numbers against each other: how generous the free coins are, how much each episode costs, and how big the packs are. The dashboard's coin economy chart shows what listeners earn and spend.
9Firebase: sign-in and push~25 min
Firebase checks who is signing in (Google and Apple) and delivers push notifications. Email and password sign-in is handled by your own backend, so you do not need to turn on Firebase's Email/Password provider.
Create a project. Open the Firebase console, click Add project and follow the prompts. Google Analytics is optional.
Turn on the sign-in providers. In your project open Authentication, then Sign-in method, and enable Google (choose a support email) and Apple. Switch Apple on and save; the key that Apple requires for account deletion is added in Sign in with Apple and the App Store, below. The Apple button shows in the iOS app only.
Connect the app to the project. Install and sign in to the Firebase CLI, then run the FlutterFire tool inside the audisode folder. Pick your project and tick Android and iOS. It reads the package name and bundle ID from the project, so check that they are the ones you chose in section 15.
bashnpm install -g firebase-tools firebase login dart pub global activate flutterfire_cli cd audisode flutterfire configureIt writes three files:
- android/app/google-services.json
- ios/Runner/GoogleService-Info.plist
- lib/firebase_options.dart
Google sign-in takes its client IDs from these files, so nothing goes into the Dart code. On Android, google-services.json must contain a web client (
"client_type": 3). Firebase adds it once the Google provider is on. If the app says serverClientId must be provided, runflutterfire configureagain to refresh the file.Add your Android fingerprints. Google sign-in fails on Android without them. You need up to three SHA-1 fingerprints. Add each in Project settings > Your apps > Android app > Add fingerprint:
- Debug, for testing. Run
./gradlew signingReportin the android folder. - Release, from your upload keystore (section 16.1):
keytool -list -v -keystore ~/upload.jks -alias upload. - Play App Signing, after your first upload to Google Play. Google re-signs your app with its own key, and releases installed from the store use that key. Copy it from Play Console > Test and release > App integrity > App signing. This is the one people forget: Google sign-in works in testing and fails for real users.
After adding fingerprints, download google-services.json again (or rerun
flutterfire configure) so it includes them.- Debug, for testing. Run
iOS: one value in Info.plist. Open ios/Runner/GoogleService-Info.plist, copy the value of
REVERSED_CLIENT_ID, and paste it into ios/Runner/Info.plist in place ofREPLACE_WITH_REVERSED_CLIENT_ID(underCFBundleURLSchemes). Without it Google sign-in fails on iOS.Sign in with Apple, on Apple's side. In Apple Developer open Certificates, Identifiers & Profiles > Identifiers, open your app's ID, and tick Sign In with Apple. In Xcode (section 16.2) check that Sign in with Apple is listed under Signing & Capabilities. The project's Runner.entitlements already asks for it. Then add the key for account deletion: see Sign in with Apple and the App Store, below. Apple requires it.
Tell the backend. Set your Firebase project ID in the server's .env and refresh the cache. The backend uses it to check every sign-in, so nobody can sign in as someone else just by sending an email address.
dotenvFIREBASE_PROJECT_ID=your-firebase-project-idbashphp artisan config:cacheThe project ID is in Project settings > General.
9.1Sign in with Apple and the App Store
Apple rejects an iOS app that offers Google sign-in without Sign in with Apple next to it (App Review Guideline 4.8). It also requires that people can delete their account inside the app, and that an app with Sign in with Apple ends that link when they do (Guideline 5.1.1(v) and Apple's account-deletion rules). The app already follows all three. The last one needs a key from you, and the key goes into Firebase, not into your backend.
| What Apple asks | What the app does |
|---|---|
| Offer Sign in with Apple as well as Google | The sign-in page shows Apple's own Continue with Apple button, above Google's and the same size. It appears on iOS only, because Apple's sign-in sheet exists only there. People can hide their email: the app and the backend work with the private address Apple creates. |
| Let people delete their account in the app | Profile, the pencil icon, Delete account. |
| End the Sign in with Apple link when the account is deleted | An Apple account first asks the person to confirm with Apple. The backend deletes the account, then Firebase revokes the link, so the app disappears from the person's Sign in with Apple list. This needs the key below. |
Create a key. In Apple Developer open Certificates, Identifiers & Profiles > Keys and click +. Name it, tick Sign in with Apple and click Configure. Choose your app's ID as the Primary App ID, save, and register the key. Download the .p8 file now: Apple lets you download it only once. Write down the Key ID (10 characters).
Create a Services ID. Under Identifiers click +, choose Services IDs and give it an identifier such as
com.yourcompany.yourapp.signin. Open it, tick Sign in with Apple and click Configure. Choose your app's ID as the primary App ID, add the domainyour-project-id.firebaseapp.com, and the return URLhttps://your-project-id.firebaseapp.com/__/auth/handler. Firebase shows both values under the Apple provider (next step).Give them to Firebase. In the Firebase console open Authentication > Sign-in method > Apple. Fill in Services ID, and under OAuth code flow configuration your Apple Team ID (Apple Developer > Membership details), the Key ID, and the contents of the .p8 file as the Private key. Save. Despite what the form implies, these fields are not optional for deleting accounts: without them Firebase cannot revoke the link.
Test it before you submit
- On a real iPhone, or a simulator that is signed in to an Apple Account in Settings, tap Continue with Apple and choose Hide My Email. The new listener appears under Listeners with the sign-up type Apple.
- Delete that account: Profile, the pencil icon, Delete account, then confirm with Apple.
- On the iPhone open Settings > your name > Sign-In & Security > Sign in with Apple. Your app must no longer be listed.
10In-app purchases with RevenueCat~45 min
Coin packs and Premium are sold through RevenueCat, one service for Google Play and the App Store. The backend never trusts what the app says it bought. It asks RevenueCat what the listener owns, and credits coins or turns Premium on from that answer. Each store transaction is credited once.
10.1How a purchase works
The app calls the sync right after a purchase and when it starts. The webhook covers everything that happens while the app is closed: renewals, expirations, refunds. All of it can repeat safely.
10.2Set it up
Create the products in the stores.
- Coin packs are consumable in-app products. In Google Play Console: Monetize > Products > In-app products. In App Store Connect: your app > In-App Purchases.
- Premium plans are auto-renewing subscriptions. In App Store Connect create one subscription group and a subscription in it for each plan. In Google Play Console create one subscription for each plan, with one base plan each.
- Use the same IDs on both stores, made of lowercase letters, digits and underscores. The starter IDs are
coins_100,coins_500,coins_1000,premium_monthlyandpremium_yearly. Pick your own if you like. - On Google Play enter the subscription ID (RevenueCat's
subscription:base-planform is understood too).
Create a RevenueCat project and add two apps: an iOS app with your bundle ID and an Android app with your package name. RevenueCat asks for an App Store Connect API key (the In-App Purchase key) and a Google Play service account with access to your app. Follow its prompts: they change from time to time.
Add the products to RevenueCat. Under Product catalog > Products add the same IDs.
Create the entitlement
premiumand attach the subscriptions to it. Do not attach coin packs. (If you name it something else, setREVENUECAT_ENTITLEMENT.) You do not need offerings: the app fetches the products by ID.Tell the admin panel. Open Settings > Store products and enter the same product IDs, the number of coins each pack gives, each plan's billing period in months, a list price and the currency. Save. The app reads this list from your server, so you can change coin amounts later without a new app release. Until you save it, the starter list in config/monetization.php applies.
Settings > Store products. Add the keys to .env. In RevenueCat open Project settings > API keys. There are two kinds of key; do not mix them up:
dotenvREVENUECAT_SECRET_KEY=sk_... # secret API key. Server only, never in the app REVENUECAT_IOS_API_KEY=appl_... # public SDK key of the iOS app REVENUECAT_ANDROID_API_KEY=goog_... # public SDK key of the Android app REVENUECAT_WEBHOOK_AUTH=a-long-random-secretMake up
REVENUECAT_WEBHOOK_AUTHyourself: any long random string. Thenphp artisan config:cache. The two public keys reach the app through your server, so changing them needs no app rebuild.Add the webhook. In RevenueCat open Project settings > Integrations > Webhooks and add one:
- URL:
https://your-domain.com/api/webhooks/revenuecat - Authorization header value: the same string as
REVENUECAT_WEBHOOK_AUTH - Environment: both production and sandbox
- URL:
Send the test event from RevenueCat. Your server answers 200 only when the secret matches. A 403 means the value differs. A 503 means
REVENUECAT_WEBHOOK_AUTHis empty on the server (or the config cache is stale). You can also check by hand:bashcurl -i -X POST https://your-domain.com/api/webhooks/revenuecat \ -H "Authorization: wrong-value" -H "Content-Type: application/json" -d '{}'That should answer 403 (or 503 if the secret is not set). It must never answer 404: a 404 means this backend version is not installed there.
Without the webhook, purchases still apply when the app syncs, but renewals, expirations and refunds only show up the next time that listener opens the app. The dashboard warns you if the secret is missing.
10.3Testing
- Google Play: add your Google account as a licence tester (Play Console > Settings > License testing) and install the app from an internal testing track.
- App Store: create a Sandbox tester in App Store Connect (Users and Access > Sandbox) and sign in with it on the device when asked to buy.
- Buy one coin pack and one subscription on both platforms. Coins should appear within seconds. Sandbox purchases credit coins and Premium too, but are left out of the dashboard's revenue.
- Test Restore purchases after reinstalling the app.
- App Review buys in the sandbox, which RevenueCat handles for you: no server switch is needed.
10.4Refunds
When RevenueCat reports a coin pack as refunded, its coins are taken back from the listener's balance. The balance never goes below zero, and coins already spent cannot be recovered. The purchase on the listener's page shows how many coins were taken back, and refunded packs are left out of the revenue estimate. Google Play refunds count once they go through RevenueCat (refund or revoke in Play Console or in RevenueCat); a Play refund made some other way may not be reported. A refunded or expired subscription ends Premium through the same webhook.
10.5What "not available" means
Until the purchase setup is complete, the Coins and Premium pages say that packs and Premium are not available. This is what a listener sees:
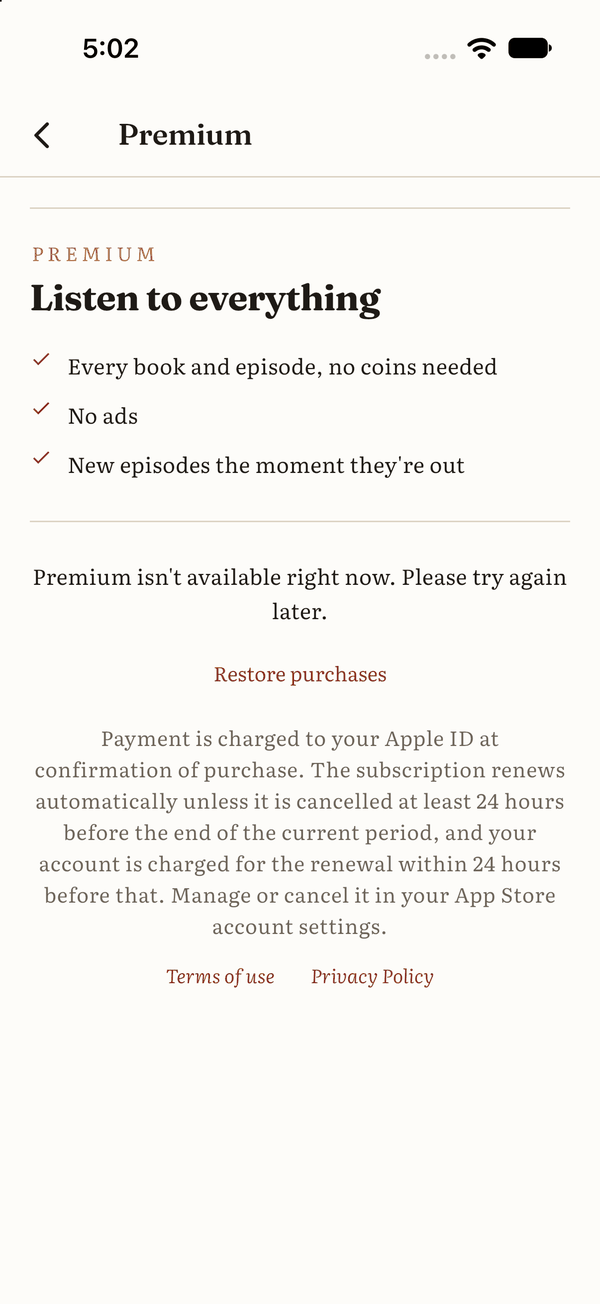
It appears when the public key for that platform is empty, when the products are missing or not ready in the store or RevenueCat, or when the product IDs in the admin panel do not match. In the same way, the sync request answers 503 while the secret key is missing or RevenueCat cannot be reached, and the app tries again later. See troubleshooting for a checklist.
11Ads with AdMobOptional~15 min
You can run the app with no ads at all: switch Show ads off in Settings > Ads. Premium subscribers never see ads.
Create the apps in AdMob. Add an Android app and an iOS app. Each gets an app ID that looks like
ca-app-pub-0000000000000000~0000000000(with a tilde).Put the app IDs in the app.
- Android: audisode/android/app/src/main/AndroidManifest.xml, the
com.google.android.gms.ads.APPLICATION_IDvalue. - iOS: audisode/ios/Runner/Info.plist, the
GADApplicationIdentifiervalue.
- Android: audisode/android/app/src/main/AndroidManifest.xml, the
Create the ad units in AdMob: a banner, a full-screen (interstitial) and a rewarded ad unit for each platform. Their IDs have a slash,
ca-app-pub-0000000000000000/0000000000. Put them in audisode/lib/utils/app_config.dart, or pass them when you build:Setting in app_config.dart Build option androidBannerAdID--dart-define=ANDROID_BANNER_AD_ID=…androidInterstitialAdID--dart-define=ANDROID_INTERSTITIAL_AD_ID=…androidRewardedAdID--dart-define=ANDROID_REWARDED_AD_ID=…iosBannerAdID--dart-define=IOS_BANNER_AD_ID=…iosInterstitialAdID--dart-define=IOS_INTERSTITIAL_AD_ID=…iosRewardedAdID--dart-define=IOS_REWARDED_AD_ID=…Create the consent messages. In AdMob open Privacy & messaging and create a GDPR message. For iOS also create an IDFA explainer message if you want personalised ads: it explains the request and then shows Apple's tracking prompt. The app shows the messages automatically where the law requires consent, and offers Ad privacy in the Profile menu there.
Turn on server-side verification for rewarded ads. In AdMob open the rewarded ad unit, enable server-side verification, and set the callback URL to:
texthttps://your-domain.com/api/admob/ssvCoins are then credited only when AdMob's signed callback reaches your server. This is the default (
ADMOB_SSV_ENABLED=true).Testing with Google's test ads. Test ad units never call your server, so no rewards would be credited. While you test, set
ADMOB_SSV_ENABLED=falsein .env: the app then claims rewards itself, one per 30 seconds, within the daily limit. Set it back totruebefore you release.Tune the frequency in Settings > Ads: the master switch, banner and full-screen ads, how often full-screen ads appear, and how many rewarded ads one listener can watch per day.
12Push notificationsOptional~15 min
The backend sends three kinds of notification through Firebase Cloud Messaging:
- New episode. To listeners who follow the author, have listened to the book or saved it. One alert per bulk upload.
- Daily check-in reminder. To listeners whose streak is about to reset, at the hour you choose.
- Announcements you write on the Notifications page.
Create a service account key. In Google Cloud, choose the project that is your Firebase project. Open IAM & Admin > Service accounts, create a service account with the role Firebase Cloud Messaging API Admin, and create a JSON key for it. Download the file.
Store the key outside the web root, for example in /home/you/keys/, and tell the backend where it is:
dotenvFIREBASE_SERVICE_ACCOUNT_JSON=/home/you/keys/firebase-service-account.jsonFCM_PROJECT_IDdefaults toFIREBASE_PROJECT_ID. Runphp artisan config:cache.iOS only: upload an APNs key to Firebase. In Apple Developer open Keys, create a key with Apple Push Notifications service (APNs) turned on, and download the
.p8file (you can download it only once). In the Firebase console open Project settings > Cloud Messaging, find your iOS app, and upload the key with your Key ID and Team ID. In Xcode, check that Push Notifications is listed under Signing & Capabilities.Switch on the automatic notifications in Settings > Notifications (new-episode alerts and check-in reminders) and choose the reminder hour.
Send a test. Open Notifications in the admin panel, write a title and message, send it to everyone, and watch your phone. The orange dot beside Notifications in the menu and the matching item on the dashboard go away once the key is set.
Listeners choose which kinds they want in the app, and the app asks for permission the first time. The scheduler must be running (cron), because the reminder is sent by it.
13Shared book links~20 min
The share button on a book shares https://your-domain.com/book/12. What happens next depends on the device:
| Where the link is opened | What happens |
|---|---|
| A phone with your app installed | The book opens in the app. |
| A phone without the app | A page with the book's cover and summary opens, with a button to Google Play or the App Store. |
| A chat app previewing the link | It reads the same page for its preview card. |
| A computer | The page shows both store buttons. |
Put your domain in the app, in two files. Replace
your-domain.comwith the domain of your backend (the one inBASE_URL, withouthttps://):- audisode/android/app/src/main/AndroidManifest.xml: the
android:hostin the intent filter withpathPrefix="/book/". - audisode/ios/Runner/Runner.entitlements: the
applinks:entry undercom.apple.developer.associated-domains.
The domain is written into the app, so a backend that moves to a new domain needs a new app release for links to open the app.
- audisode/android/app/src/main/AndroidManifest.xml: the
Fill in Settings > App links in the admin panel:
- Store pages: the Google Play and App Store links. Leave a store empty until its listing is public; its button is hidden and phones are not sent there.
- Android package name: your application ID.
- Android signing fingerprints: SHA-256 fingerprints, one per line. Add the app signing key from Play Console (Test and release > App integrity > App signing) and, for copies installed outside Google Play, the key they were signed with (
keytool -list -v -keystore your.jks). These are SHA-256, not the SHA-1 used for Firebase. - Apple Team ID: 10 characters, from developer.apple.com > Account > Membership details.
- iOS bundle ID: your bundle ID.
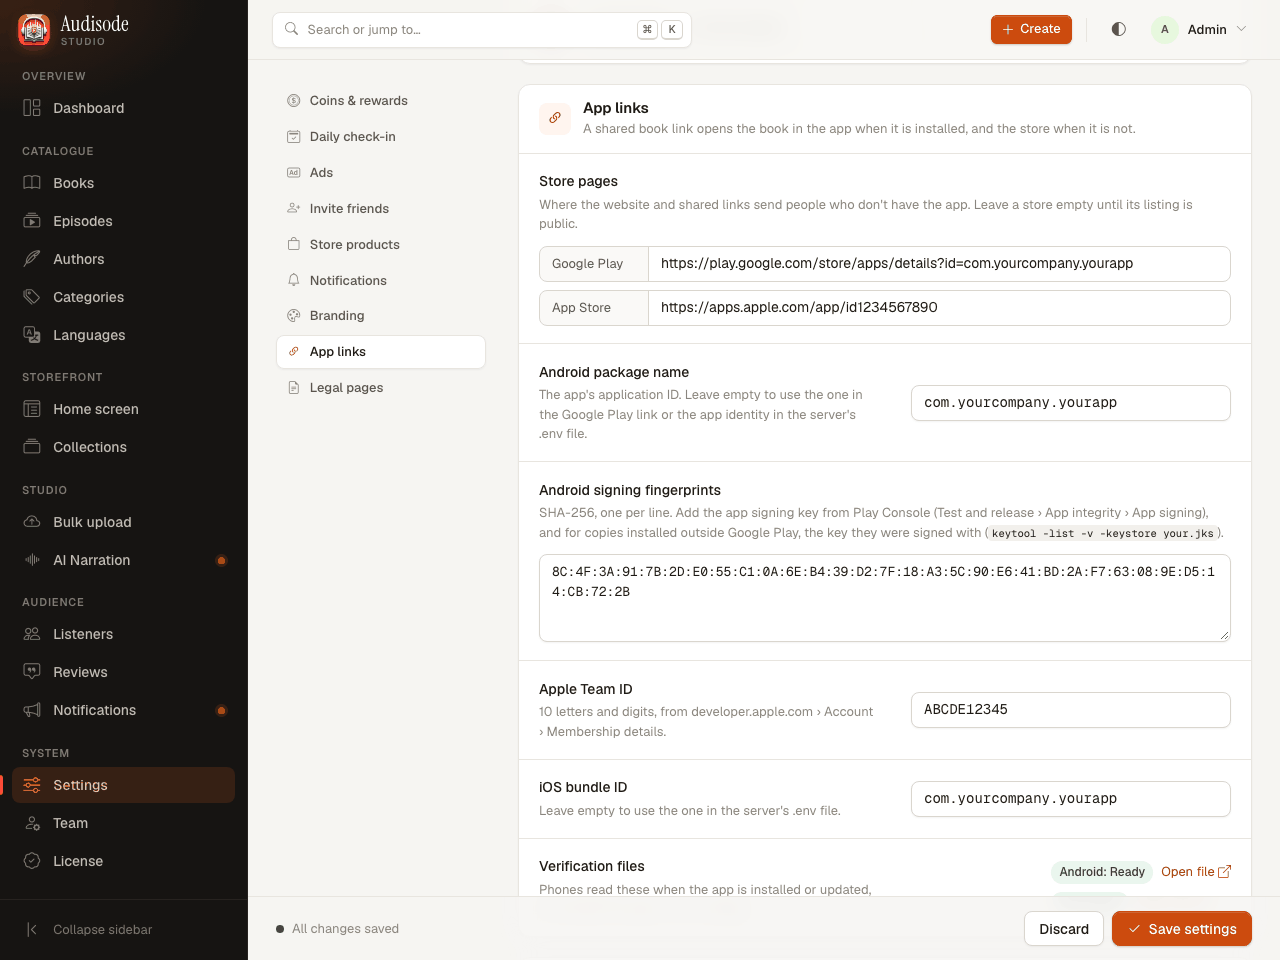
Settings > App links (sample values). Lower on the page, the Verification files box shows whether the Android and iOS files are Ready. Check both verification files. From these settings the backend serves the two files phones read. Each must answer
200with JSON over HTTPS, at the root of the domain inAPP_URL, with no redirect:bashcurl -i https://your-domain.com/.well-known/assetlinks.json curl -i https://your-domain.com/.well-known/apple-app-site-associationA
404means a setting is missing. An HTML page from your host instead of JSON means the web server answered before Laravel: let it pass/.well-known/through to public/index.php.Test on a device. Without sharing anything:
bashadb shell am start -a android.intent.action.VIEW -d "https://your-domain.com/book/12" com.yourcompany.yourapp xcrun simctl openurl booted "https://your-domain.com/book/12"
14Audio storage in the cloudOptional
By default your audio stays on your server. If your hosting has little disk space or bandwidth, keep it in a bucket instead. Listeners still get the same protected, expiring links.
Create a private bucket and an access key with read and write access to it. The bucket must not be public.
Set the keys in .env. For Cloudflare R2:
dotenvMEDIA_DISK=media_cloud MEDIA_S3_KEY=your-access-key MEDIA_S3_SECRET=your-secret-key MEDIA_S3_REGION=auto MEDIA_S3_BUCKET=audisode-audio MEDIA_S3_ENDPOINT=https://ACCOUNT_ID.r2.cloudflarestorage.com MEDIA_S3_PATH_STYLE=falseFor Amazon S3, use your region (for example
us-east-1) and leaveMEDIA_S3_ENDPOINTempty. KeepMEDIA_URL_TTL_MINUTESat10080or less: cloud links cannot last longer than 7 days. Runphp artisan config:cache.Move the audio you already have. New uploads go straight to the bucket. Copy the existing files across, first as a rehearsal and then for real:
bashphp artisan media:push-to-cloud --dry-run php artisan media:push-to-cloud --delete-local--delete-localremoves each local file once it is safely in the bucket. Files not yet copied keep streaming from your server, so the switch needs no downtime.
15Make the app yoursApp
Everything that identifies the app is in a few files. Open the audisode folder in your editor. All paths below are inside it.
15.11. The backend address
In lib/utils/app_config.dart, set baseUrl to your backend, with https:// and a trailing slash:
defaultValue: 'https://your-domain.com/',You can also pass it when you run or build, without editing the file: --dart-define=BASE_URL=https://your-domain.com/. Release builds only allow https; plain http works in debug builds only.
15.22. The package name and bundle ID
Choose a unique ID in reverse-domain style, such as com.yourcompany.yourapp. You can never change it after you publish. Install the packages, then run:
cd audisode
flutter pub get
dart run change_app_package_name:main com.yourcompany.yourapp
It changes the Android applicationId and namespace in android/app/build.gradle, the Android manifests, and the iOS bundle identifier. Open build.gradle and check that both show your ID.
15.33. The app name
The name appears in more than one place. Change them all:
| File | What to change |
|---|---|
| android/app/src/main/AndroidManifest.xml | android:label on the <application> tag |
| ios/Runner/Info.plist | CFBundleDisplayName and CFBundleName. Keep each value on one line with no spaces or line breaks around the name. |
| lib/utils/app_config.dart | appName |
| lib/l10n/app_en.arb, app_bn.arb, app_ar.arb, app_es.arb | appTitle in all four files |
After editing the .arb files, regenerate the text:
flutter gen-l10n15.44. Icons and launch screen
One image makes both. Replace assets/icons/logo.png with your logo and run two commands.
dart run flutter_launcher_icons
dart run flutter_native_splash:create
The first writes the Android and iOS icons (the iOS one without transparency, which the App Store refuses). The second writes the launch screens, light and dark. They read the settings at the end of pubspec.yaml. The colours there (#FDFCF9 for light and #1A1512 for dark) are the app's paper colours: change them if you change the palette. These commands rewrite files under android/ and ios/, so run them before you commit. The other pictures in assets/icons (Google, Apple, email, app bar) are shown inside the app.
15.55. Colours
All colours are in lib/utils/app_colors.dart, as two palettes: AppPalette.light and AppPalette.dark. Each colour is named for the job it does, not for how it looks:
| Role | Used for |
|---|---|
paper | The page background |
surface, surfaceSunk | Raised sheets and dialogs; sunken fields and chips |
rule, ruleStrong | Hairlines; the heavy rule under a row of covers |
ink, inkMuted, inkFaint | Body text; secondary text; disabled and tertiary text |
oxblood, oxbloodInk, onAccent | The main accent: as a fill (buttons, progress, play button), as text on the page, and the text drawn on top of it |
ochre, ochreInk | The second accent: ratings, coins, locked items |
success, danger | Finished and downloaded; errors and destructive actions |
spine, spineLight | The shading down a book cover's binding edge |
Change the colour values (Color(0xFF8C2F24) and so on) and keep the names. Check that text stays readable on its background in both palettes.
15.66. Onboarding images
The three welcome screens use assets/onboard/intro1.jpeg, intro2.jpeg and intro3.jpeg, each 1024 × 1024 pixels. Replace them with your own pictures of the same size and keep the file names. Their titles and texts are in the .arb files (onboardingTitle1, onboardingBody1 and so on).
15.77. The notification channel ID
In lib/utils/app_config.dart, change audioNotificationChannelId so it starts with your new package name, for example com.yourcompany.yourapp.channel.audio. It names the Android notification used for the lock-screen player controls.
15.88. Terms and privacy links
The Premium page links to your terms and your privacy policy, which both stores require for subscriptions.
- Privacy policy: comes from your backend,
https://your-domain.com/page/privacy_policy. Write it in Settings > Legal pages. - Terms of use: by default Apple's standard licence agreement. To use your own, pass
--dart-define=TERMS_URL=https://your-domain.com/termswhen you build, or changetermsUrlin app_config.dart.
15.99. Languages
The app's own text follows the phone's language. It ships in English, Bengali, Arabic (right to left) and Spanish. Have a native speaker review the translations in lib/l10n before you release: they were not written by professional translators.
- Add a language: copy lib/l10n/app_en.arb to app_<code>.arb (for example app_fr.arb), translate the values, run
flutter gen-l10n, and add the code toCFBundleLocalizationsin ios/Runner/Info.plist. - Remove a language: delete its .arb file, run
flutter gen-l10n, and remove its code fromCFBundleLocalizations.
The language of the audiobooks is separate: it is chosen in the app under Audiobook language and managed under Languages in the admin panel.
15.1010. Run it
flutter pub get
flutter run --dart-define=BASE_URL=https://your-domain.com/
Start the app on a phone or emulator that can reach your backend. If your backend runs on your own computer, use http://10.0.2.2:8000/ from the Android emulator or http://127.0.0.1:8000/ from the iOS simulator (plain http works in debug builds only).
16Build and publishApp
16.1Android
Create your own upload keystore. Keep it somewhere safe and back it up: if you lose it you cannot update your app the normal way. Never share it or put it in a repository.
bashkeytool -genkey -v -keystore ~/upload.jks -keyalg RSA -keysize 2048 -validity 10000 -alias uploadCreate android/key.properties with these four lines (your own passwords and the full path to the keystore):
propertiesstorePassword=your-store-password keyPassword=your-key-password keyAlias=upload storeFile=/full/path/to/upload.jksSet the version in pubspec.yaml.
version: 1.0.1+4means version name 1.0.1 and build number 4, on both platforms. The number after the plus sign must go up with every upload to a store.Build the bundle (it ends up in build/app/outputs/bundle/release/) and upload it in Play Console:
bashflutter build appbundle --dart-define=BASE_URL=https://your-domain.com/Add any ad-unit IDs or
TERMS_URLas further--dart-defineoptions, or set them in app_config.dart.After the first upload, go back to two places. Google signs your app with its own key. Copy it from Play Console > Test and release > App integrity > App signing, and add:
- its SHA-1 to the Android app in Firebase (section 9), or Google sign-in fails for store installs;
- its SHA-256 to Settings > App links in the admin panel (section 13), or shared links open the browser.
16.2iOS
Open the workspace in Xcode: ios/Runner.xcworkspace (not the
.xcodeproj). If you have changed packages, runcd ios && pod installfirst.Choose your team. Under Runner > Signing & Capabilities pick your Team and leave Automatically manage signing on.
Check the capabilities. The list must show Push Notifications, Sign in with Apple and Associated Domains. Automatic signing adds them from Runner.entitlements. The Associated Domains entry must show
applinks:your-domain.com(section 13).Check the minimum version. The app supports iOS 15 and newer.
Build the archive (the result is in build/ios/ipa/):
bashflutter build ipa --dart-define=BASE_URL=https://your-domain.com/Upload it with Xcode's Organizer (Window > Organizer > Distribute App) or the Transporter app. Then finish the listing in App Store Connect.
Troubleshooting: iOS simulator build under Xcode 27
With Xcode 27, flutter build ios --simulator can stop with a "does not contain architectures" error in debug_unpack_ios (a failing lipo -verify_arch check). We have seen it only with simulator builds. Work around it by letting Flutter write the settings and building with xcodebuild for one architecture:
flutter build ios --simulator --debug --config-only --dart-define=BASE_URL=http://127.0.0.1:8000/
xcodebuild -workspace ios/Runner.xcworkspace -scheme Runner -configuration Debug \
  -sdk iphonesimulator -destination 'generic/platform=iOS Simulator' \
ONLY_ACTIVE_ARCH=YES ARCHS=arm64 build16.3Before you submit to the stores
Tick these off as you go. Your ticks are kept in this browser only.
17Running the serviceServer
17.1Before you go live
17.2Backups
Back up these regularly, and keep copies somewhere other than the server:
- The database. For example, daily from cron:
bash
mysqldump -u audisode_user -p audisode | gzip > audisode-$(date +%F).sql.gz - Uploaded audio: the folder audisode_backend/storage/app/private/media (not needed if your audio is in a bucket, but keep that bucket safe).
- .env and your keys: the Firebase service account file, your Android keystore and key.properties, and the Apple key files. Losing the keystore means you cannot update your Android app the normal way.
- Uploaded branding and covers: audisode_backend/public/uploads.
17.3Updating the backend
When you receive a new version:
Back up the database and the audio folder.
Upload the new files over the old ones. Keep your .env and the storage/ folder (and public/uploads).
Install the packages. With a package that includes vendor/, upload it too. With SSH:
bashcomposer install --no-dev --optimize-autoloaderUpdate the database.
bashphp artisan migrate --forceRefresh the caches. If something looks stale, run
php artisan optimize:clearfirst.bashphp artisan config:cache php artisan queue:restart(
queue:restartmatters only if you run the worker under Supervisor.)Check the cron entry still exists. Running
php artisan app:installagain is safe, skips the admin account when one exists, and ends with the configuration checklist, so any new TODO line shows what the release needs.Check the deployment.
POST /api/webhooks/revenuecatwithout the secret must answer 503 or 403, never 404. A 404 means the old code is still live.
17.4Logs and the scheduler
- Errors are written to storage/logs/laravel.log. Keep
APP_DEBUG=falseon a live server. - To see that the scheduler knows its jobs, run
php artisan schedule:list. To run it once by hand, runphp artisan schedule:run. - If AI narrations or announcements stay waiting for more than a few minutes, the cron entry is not running: see troubleshooting.
- The licence is checked once a day by the scheduler. A server that cannot reach the licence server keeps running.
17.5Hosting a public demo
To show the admin panel to buyers, host it with a read-only demo admin: someone who signs in with it can browse everything, but every change is refused and a "Demo mode" alert says so. It is the same code as the real panel, and the demo login exists only where you create it.
Deploy the code to its own server with its own database, and run
php artisan app:install --sample-booksthere. The demo server needs its own licence for its own domain.Set
DEMO_ADMIN_EMAILin .env. Use an address that is not a real mailbox, so the public "forgot password" page cannot reach anyone. SetDEMO_ADMIN_PASSWORDtoo.Create the demo admin:
bashphp artisan db:seed --class=DemoAdminSeederPublish that login and password on your listing. Keep your own owner account off the demo server. Listener emails are masked in the demo.
If people can use the mobile app against the demo server, reset its data now and then, for example nightly: only the admin panel is read-only, so listeners can create accounts, spend coins and write reviews. A reset is
php artisan migrate:fresh --forcefollowed by the install and seeder steps above. Run it from cron at night.
17.6Security checklist
APP_DEBUG=falseandAPP_ENV=production.- HTTPS everywhere, and the document root set to public/.
https://your-domain.com/.envanswers 404 or 403.- Strong, unique admin passwords. Add people on the Team page rather than sharing one login. Remove people who leave.
- Keep the Firebase service account key, .env and your keystore out of any public folder, repository and email.
- Hide your PHP version: set
expose_php = Offin php.ini (in cPanel, MultiPHP INI Editor). PHP otherwise sends anX-Powered-By: PHP/x.yheader. The panel itself already sendsX-Frame-Options,X-Content-Type-Options,Referrer-PolicyandPermissions-Policyheaders. - If .env was ever exposed or committed, change every key in it, rotate the app key with
php artisan key:generate --force(this signs admins out), and sign every listener out by emptying the token table:bashphp artisan tinker --execute="DB::table('personal_access_tokens')->delete();" - Keep the backend updated, and keep your server's PHP and operating system updated.
18API referenceFor developers
You do not need this to run the product. It is a compact map of the backend's API for developers. The README in audisode_backend/README.md has more detail.
- All endpoints live under
/apiand return JSON. - Signed-in endpoints expect the header
Authorization: Bearer <token>. The token comes from/login,/registeror/social-loginand lasts a year by default. - Errors always have one shape:
{"status": false, "code": "...", "message": "...", "errors": {...}}.errorsappears for validation failures. - Sign-in endpoints are rate limited. Purchases and unlocks answer
503withnot_configuredwhile a needed service is not set up.
| Endpoint | Purpose |
|---|---|
GET /settings | App settings, daily rewards, coin packs, Premium products, ad frequency, invite rewards |
GET /home?language_id= | Home screen: layout (sections to show, in order) and the data for each |
GET /books | Paginated catalogue. Filters: language_id, category_id, author_id, featured, free, series, q, ids. sort: latest, top_rated, most_played, title |
GET /books/{id} | One book with its episodes |
GET /books/{id}/reviews | Paginated reviews |
GET /books/{id}/episodes, GET /episodes/{id} | Episodes |
GET /books/{id}/audio, GET /episodes/{id}/audio | A playable, expiring URL, after checking access |
POST /books/{id}/views | Count a play (once per listener every 6 hours), for "Trending this week" |
GET /authors, GET /authors/{id}, GET /categories, GET /languages | Browsing |
POST /register, /login, /social-login, /forgot-password | Accounts (rate limited) |
GET /me, PATCH /me/update, DELETE /me/delete, POST /logout | Profile, including Premium status and invite code |
POST /unlock-book, /unlock-episode | Spend coins. The price comes from the server. Free with Premium |
POST /purchases/sync, POST /rewards/ad-view, GET and POST /daily-check-in | Earn coins. purchases/sync applies RevenueCat purchases |
GET /referrals, POST /referrals/redeem | Invite code, stats, and entering a friend's code |
PUT /progress, GET and DELETE /progress/{book} | Listening position, synced across devices |
GET /library?shelf=listening|finished|unlocked | My Library shelves |
POST and DELETE /authors/{id}/follow, GET /me/following | Following authors |
PUT /me/listening, GET /me/stats | Time listened per day; the activity page |
GET /recommendations | "Because you listened to…" and new books from followed authors |
POST and DELETE /devices, PUT /me/notifications | Push tokens and notification choices |
GET, POST, DELETE /bookmarks, GET /transactions | Saved places; coin history |
POST /webhooks/revenuecat | RevenueCat notifications (renewals, expirations, refunds) |
GET /admob/ssv | AdMob's signed rewarded-ad callback |
18.1The home screen layout
GET /api/home returns a layout: the sections the app should draw, top to bottom, exactly as set on the admin panel's Home screen page. Each entry has a type and an optional title (your own heading). A collection entry also carries its description and books. The other keys in the response (featured, recent, top_rated, most_played, free, series, trending, new_episodes, reviews, spotlight, authors) hold the data for those sections. A section you hid is left out of layout and its data comes back empty.
Some sections are personal: the app fills them in from the listener's own activity (the premium and check-in strips, continue listening, recommendations, "your week"). The server only decides whether they appear and where. The app ignores a section type it does not know, so a newer backend can add sections without breaking older app releases. To add a built-in section, see "Home screen" in the backend README.
19Troubleshooting
Find the symptom, open it, and work down the list. Most problems are one wrong value in one place. Always check storage/logs/laravel.log on the server first: it usually names the problem.
19.1Server and admin panel
The admin panel shows a blank page or a 500 error
- Read the last lines of storage/logs/laravel.log.
- Check that storage/ and bootstrap/cache/ are writable by the web server user (file permissions).
- Run
php artisan optimize:clear, thenphp artisan config:cache. - Check that PHP is 8.2 or newer and that the extensions in section 2 are on.
- Check that .env exists and the database details are right.
To see the error on screen while you debug, set APP_DEBUG=true, reload, and set it back to false straight after.
500 error right after I uploaded the files
Almost always permissions or a missing vendor/ folder. Make storage/ and bootstrap/cache/ writable (775), check that vendor/ exists (or run composer install --no-dev --optimize-autoloader), and run php artisan optimize:clear. Also check the hidden files .htaccess and .env.example were uploaded.
https://your-domain.com/.env loads in the browser
The document root is not public/. Fix this before anything else: anyone can read your passwords. Set the document root to audisode_backend/public (section 4). If your host will not let you, make sure the .htaccess in the project folder was uploaded, then check again.
"419 Page Expired" when I sign in or save
The browser's session does not match the site's address.
- Use the exact address in
APP_URL:httpsversushttp, andwwwversus nowww, are different sites. - Leave
SESSION_DOMAINasnull. - After you change
APP_URLor the domain, runphp artisan config:cache, clear the browser's cookies for the site, and try again.
Password-reset and invitation emails do not arrive
MAIL_MAILER=logwrites emails to storage/logs/laravel.log instead of sending them. Set realMAIL_*values (section 5) and runphp artisan config:cache.- Check the port and scheme with your mail provider: usually
587, or465withMAIL_SCHEME=smtps. - Use a
MAIL_FROM_ADDRESSon your own domain, and check the spam folder. - Send a test from the server. It prints nothing if it worked, and an error if it did not:
bash
php artisan tinker --execute='Mail::raw("Test", fn($m) => $m->to("you@example.com")->subject("Test"));' - The Team page shows the invite link on screen when mail is not set up, so you can send it by hand.
Audio uploads are rejected (format or size)
- Format: only MP3, WAV, M4A, M4B and AAC files are accepted.
- Size: PHP's limits (
upload_max_filesize,post_max_size,max_file_uploads) decide how much one upload may hold. The Bulk upload page shows them. Raise them as in section 7.4, or upload in parts. With nginx also raiseclient_max_body_size. - If a long upload times out, raise
max_execution_timetoo.
Notifications, narrations or other background jobs never run
The cron entry is missing or wrong.
- Check it exists:
crontab -l, or Cron Jobs in cPanel. It must run every minute. - Check the path and the PHP version in the entry. On shared hosting the plain
phpmay be an old version: use the full path of PHP 8.2. - Run
php artisan schedule:listandphp artisan schedule:runby hand. Errors show on screen. - If you use Supervisor, check
QUEUE_RUN_VIA_SCHEDULER=false, that the worker is running, and that you ranphp artisan queue:restartafter the last update.
The installer says it cannot write the .env file
Make the project folder (and .env, if it exists) writable, permissions 775, while you install. Put them back afterwards.
The panel says the licence needs attention
- Could not be reached: the server must be allowed to make outgoing HTTPS requests to
appentium.com. Ask your host. - Domain changed: the copy was activated for another domain. Release the old domain first (License > Move this licence on the old site), then activate on the new one. A subdomain counts as a different domain.
- Refused: the notice shows the reason the licence server gave. Check the key and username, and the number of installations your licence allows.
19.2App, sign-in and Firebase
The app stays on a loading screen or shows a retry screen
The app cannot reach the backend, or Firebase is not configured.
- Check
BASE_URL:https, your real domain, and a trailing slash. Openhttps://your-domain.com/api/settingsin a browser: it must show JSON. - On an emulator,
localhostis the emulator itself. Usehttp://10.0.2.2:8000/(Android) orhttp://127.0.0.1:8000/(iOS simulator), in a debug build. - Check that google-services.json and GoogleService-Info.plist are in place (section 9).
The Android build fails with "missing google-services.json"
Run flutterfire configure in the audisode folder (section 9). The same applies to a missing lib/firebase_options.dart or GoogleService-Info.plist.
Google sign-in fails on Android
Add your debug and release SHA-1 fingerprints to the Android app in Firebase (section 9), then download google-services.json again. If it says serverClientId must be provided, the file has no web client: run flutterfire configure again.
Google sign-in works in testing but fails in the version from Google Play
Releases from the store are signed with Google's Play App Signing key, not your upload key. Copy that key's SHA-1 from Play Console (Test and release > App integrity > App signing) into Firebase, and download google-services.json again. Rebuild only if the file changed.
Google sign-in fails on iOS
REPLACE_WITH_REVERSED_CLIENT_ID in ios/Runner/Info.plist was not replaced with the REVERSED_CLIENT_ID from GoogleService-Info.plist.
Sign in with Apple fails
Go through these in order:
- The Apple provider is switched on in Firebase (Authentication > Sign-in method).
- Your app's ID has Sign In with Apple ticked in Apple Developer, and Xcode lists the capability under Signing & Capabilities (section 16.2). A missing capability, or an iPhone or simulator that is not signed in to an Apple Account in Settings, usually shows as
AuthorizationErrorerror 1000. - The bundle ID in Xcode is the one registered for the iOS app in your Firebase project. Apple puts the bundle ID in the token, and Firebase checks it against the iOS apps in the project. After you change the bundle ID, run
flutterfire configureagain. FIREBASE_PROJECT_IDin the server's .env is the project the app uses. If it is not, the backend answers that the sign-in token is invalid.
Closing Apple's sheet is not an error: the app simply stays on the sign-in page.
There is no "Continue with Apple" button
That is on purpose on Android. Apple's sign-in sheet exists only on iOS, and Google Play does not ask for it. On an iPhone the button is always on the sign-in page, above Google's.
A deleted account is still listed under Sign in with Apple on the iPhone
Firebase could not revoke the link, and the account was deleted anyway. The usual cause is the Apple provider in Firebase missing its Services ID or OAuth code flow fields (Team ID, Key ID, private key): the error in the app's log is then Code flow is not enabled for Apple. Fill them in (section 9.1). Check also that the Key ID belongs to the .p8 you pasted, and that the key has Sign in with Apple ticked. The person can remove the app by hand under Settings > your name > Sign-In & Security > Sign in with Apple.
Everyone is signed out, or the app says the session expired
Sign-in tokens last a year (SANCTUM_EXPIRATION), and rotating APP_KEY or emptying the token table signs listeners out on purpose. The app asks them to sign in again.
19.3Purchases and Premium
Coin packs or Premium say "not available"
Work down this list:
- The public key for that platform (
REVENUECAT_IOS_API_KEYorREVENUECAT_ANDROID_API_KEY) is set in .env, and you ranphp artisan config:cache. Openhttps://your-domain.com/api/settings: the keys appear in it. - The product IDs in Settings > Store products match the store and RevenueCat exactly, letter for letter.
- The agreements, tax and banking are signed in both stores (Paid Apps Agreement in App Store Connect, merchant profile in Play Console).
- iOS products are Ready to Submit with a price and a localisation. Android products are Active, and the app has been uploaded to a testing track.
- The products exist in RevenueCat under Product catalog > Products, in the right app.
- You test with a licence tester (Google) or a Sandbox tester (Apple), on a real device.
The listener paid, but no coins arrived
- Check
REVENUECAT_SECRET_KEYis the secret key (sk_…), not a public one. - Check the product ID is listed under Settings > Store products as a coin pack with its coins.
- The sync request answers
503while the secret key is missing or RevenueCat cannot be reached, and the app tries again later. Open the app again after fixing it. - Look at the log for errors from RevenueCat.
- Check the listener's page in the admin panel: purchases and coin history show there.
Premium does not turn on after a subscription
The subscription products must be attached to the entitlement named premium in RevenueCat (and REVENUECAT_ENTITLEMENT must match if you named it differently). Coin packs must not be attached to it.
The RevenueCat webhook test fails
- 503:
REVENUECAT_WEBHOOK_AUTHis empty on the server, or the cached configuration is stale. Set it and runphp artisan config:cache. - 403: the Authorization header in RevenueCat differs from
REVENUECAT_WEBHOOK_AUTH. - 404: the backend there is an old version without the webhook, or the URL is wrong.
Rewarded ads give no coins
With ADMOB_SSV_ENABLED=true, coins come only from AdMob's signed callback to /api/admob/ssv. Check that server-side verification is on for the rewarded ad unit with that exact URL. Google's test ad units never call your server: set ADMOB_SSV_ENABLED=false while testing with them, and back to true before release.
19.4Links and notifications
Shared links open the browser instead of the app
- Both
/.well-known/files must answer 200 with JSON (section 13). The Verification files box on Settings > App links must say Ready for both. - Android: the SHA-256 fingerprints must include the Play App Signing key for store installs. The package name must match the app's.
- iOS: the Team ID and bundle ID must match, and the app must have the Associated Domains capability with
applinks:your-domain.com. - The domain in AndroidManifest.xml and Runner.entitlements must be your backend's domain.
- Android checks the file when the app is installed or updated, and Apple caches it for up to a day: uninstall and reinstall the app after any change.
Notifications never arrive
- Set
FIREBASE_SERVICE_ACCOUNT_JSONto the full path of a key with the Firebase Cloud Messaging API Admin role (section 12), thenphp artisan config:cache. - Check the cron job runs (above).
- Check the listener has registered a device: their page in the admin panel shows Push devices. They must have allowed notifications.
- Failed announcements show on the dashboard. Check the Firebase credentials.
Push notifications do not arrive on iPhones
- Upload an APNs authentication key to Firebase (Project settings > Cloud Messaging) with the right Key ID and Team ID.
- Check that Push Notifications is listed under Signing & Capabilities in Xcode.
- Test on a real device with a build signed for it; some simulators cannot receive push.
- On the device, check that notifications are allowed for the app in iOS Settings.
19.5Building
flutter build ios --simulator fails with "does not contain architectures"
This is a known problem with Xcode 27. Use the xcodebuild workaround in section 16.2.
Google Play rejects the upload because it is signed with a debug key
android/key.properties is missing or wrong, so the build fell back to the debug key. Create it (section 16.1) and build again.
Google Play says the version code has already been used
Raise the number after the plus sign in version: in pubspec.yaml and build again. It must go up with every upload.
The app name looks wrong or blank on an iPhone
Check that CFBundleDisplayName and CFBundleName in Info.plist are on one line with no spaces or line breaks around the name.
20FAQ
Can I run the app without ads?
Yes. Switch Show ads off in Settings > Ads. Rewarded ads then no longer exist, so listeners earn coins through the welcome gift, the daily check-in and invites. Premium subscribers never see ads either way.
Can I run it without Premium?
Yes. Remove every Premium plan under Settings > Store products and save. Premium disappears from the app.
Can I run it without anyone buying coins?
Yes. Remove the coin packs under Settings > Store products, or never set up RevenueCat, and listeners can still earn coins free. You can also make titles free by setting their price to 0. The app then has no purchases at all.
Can I change the currency?
The stores charge in each listener's own currency, so you do not set it. The currency in Settings > Store products only labels the dashboard's revenue estimates.
Can I host the audio somewhere else?
Yes. Use an S3-compatible bucket (section 14) and keep the protected links. You can also paste a link to audio hosted elsewhere, but a pasted link is handed out as it is, so use it only for free content.
Can I add a language?
Two kinds. For the app's text, copy an .arb file, translate it and regenerate (section 15.9). For audiobooks in a new language, add it under Languages in the admin panel.
Can several people use the admin panel?
Yes. Add them on the Team page; each gets an email to choose their own password. All admins have the same rights.
Does it work on shared hosting?
Yes, if the host has PHP 8.2 or newer, MySQL or MariaDB, cron and HTTPS. Use a package that includes vendor/ and the web installer (section 4, path B).
Can I rename everything?
Yes. The name, logo and accent colour of the admin panel and website are under Settings > Branding. The app's name, package ID, icons and colours are set in its code (section 15). The licence and the terms of your purchase still apply.
What happens to coins when a purchase is refunded?
The coins of a refunded coin pack are taken back from the listener's balance, but never below zero: coins already spent cannot be recovered. A refunded subscription ends Premium. See refunds.
Can a listener use their coins on a new phone?
Yes. Coins, unlocks, listening progress and bookmarks live on your server and follow the listener's account to any device. Downloads for offline listening stay on the device, and signing out removes them.
Can I move the product to another domain?
Yes. Use License > Move this licence on the old site to hand the domain back, then install and activate on the new one. Remember that the domain is written into the app for shared links, so the app needs a new release.
21Changelog, licence and support
21.1Changelog
Versions follow MAJOR.MINOR.PATCH. The version of the whole product, backend and app together, is in audisode_backend/config/app.php and shows in the admin panel's user menu and in php artisan app:install. Quote it when you ask for support. The app also carries its own number in audisode/pubspec.yaml (version: 1.0.1+4 is version name 1.0.1, build number 4). The stores need that number to go up with every upload, so it does not match the product version. The full text is in CHANGELOG.md.
1.0.0: first marketplace release
Mobile app (Android and iOS)
- Audiobooks as single files or series of episodes, with covers, authors, categories, languages, collections and a home screen laid out from the admin panel
- Playback with background audio, lock-screen controls, speed control, sleep timer, bookmarks and "continue listening" that follows the listener across devices
- Offline downloads that pause, resume and survive a closed app
- Coins: a welcome gift, a 7-day check-in streak with reminders, rewarded ads and invite-a-friend rewards; paid titles unlock with coins
- Premium subscription that unlocks everything and removes ads
- In-app purchases through RevenueCat (coin packs and subscriptions), with restore
- Sign in with Google and Sign in with Apple through Firebase; guests can browse and play free titles
- Reviews and ratings, push notifications, shared book links that open the app
- AdMob ads with Google's consent form and an "Ad privacy" menu entry
- Account deletion inside the app
- Four languages: English, Bengali, Arabic (right to left) and Spanish
- Light and dark themes
- App icon and launch screen from one image
- iOS privacy manifest and Google's SKAdNetwork list
- Up-to-date dependencies, including google_sign_in 7 (see the app README for the two packages held back)
Backend and admin panel (Laravel)
- REST API with token sign-in, rate limits and one error format
- Server-side wallet and unlocks: the app cannot grant itself coins or titles
- Audio kept outside the web root and handed out as short-lived signed links, or from S3-compatible cloud storage
- Purchases verified against RevenueCat, with webhooks for renewals, expirations and refunds
- Admin panel: dashboard with analytics, books, episodes, bulk upload, authors, categories, languages, home screen layout, collections, listeners, reviews, push notifications, AI narration (OpenAI or ElevenLabs), settings and legal pages
- Public website with store badges and legal pages
- Read-only demo admin for public demos
- Web installer at
/installfor hosting without SSH - Licence activation for one domain, a daily check that never takes the site down when the licence server is unreachable, and the License page
- Settings > Branding: name, accent colour, logo and favicon
- Team: add admins by email invite, remove them; the last admin stays
php artisan app:install --sample-books: seven public-domain English audiobooks- Panel libraries and fonts served from public/vendor/: no CDN, no Google Fonts
- Sign-in tokens expire after a year; expired ones are pruned daily
php artisan app:installwith a configuration checklist- Light and dark admin themes, a command palette (Ctrl or ⌘ + K) and security headers
21.2Licence and support
Each copy of the product is licensed for one domain, activated with the key and username from your purchase (License page). The licence terms and the support terms are set by the seller of the product and are filled in below.
| Licence terms | {{LICENCE_SUMMARY}} |
|---|---|
| Support channel | {{SUPPORT_CHANNEL}} |
| Support hours | {{SUPPORT_HOURS}} |
21.3Credits and third-party notices
Audisode uses open-source software and fonts, each under its own licence. The full list is in THIRD_PARTY_NOTICES.md at the top of the package. In short:
- Admin panel and website: Bootstrap (MIT), Bootstrap Icons (MIT), Chart.js (MIT), Tom Select (Apache-2.0) and Quill (BSD-3-Clause), all served from audisode_backend/public/vendor/.
- Fonts: Fraunces and Literata in the app, Geist, Geist Mono and Instrument Serif in the admin panel, all under the SIL Open Font License 1.1.
- Sample content: the seven public-domain books and their LibriVox recordings, streamed from archive.org. Delete them before you launch.
- Packages: the PHP packages are listed in audisode_backend/composer.lock and the Dart and Flutter packages in audisode/pubspec.lock.
- Artwork: replace the placeholder images, icons and onboarding pictures with your own before you publish, and make sure you have the right to use every image, sound and font you ship.